
Safety Warning
DIY auto repair can cause serious injury, fire, or vehicle damage. These guides are for informational purposes only. Always follow OEM torque specs, wear PPE, and consult a certified mechanic if you are unsure. You are solely responsible for your safety.
2009 Ford Mustang V8-5.4L SCFACTORY OEM SERVICE PROCEDURE
Subframe - Front
Subframe - Front, 5.4L
Special Tool(s):

Removal and Installation
1. With the vehicle in NEUTRAL, position it on a hoist.
2. Remove the battery and tray.
3. Remove the air cleaner outlet pipe.
4. Install the Engine Lifting Bracket.
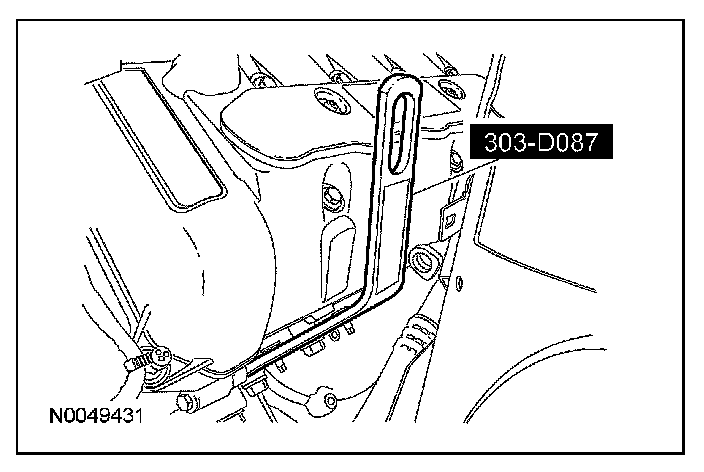
5. Install the Engine Lifting Bracket.
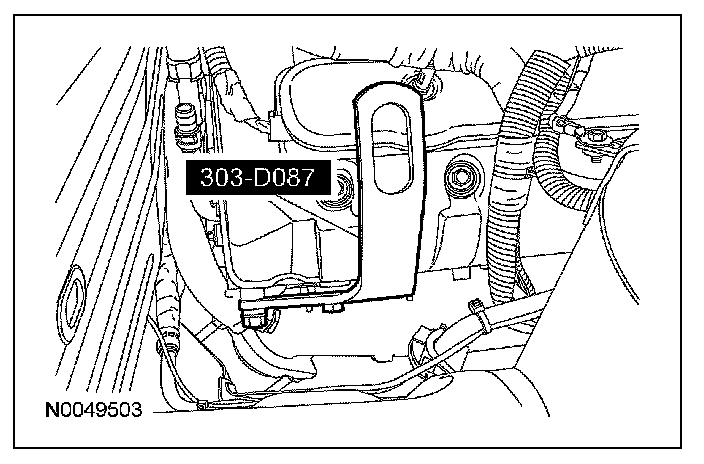
6. Remove the LH and RH engine insulator nuts.
- To install, tighten to 55 Nm (41 lb-ft).
7. NOTE: The heavy duty Engine Support Bar (303-F072) must be used with the draw screws from the light duty Engine Support Bar (303-F070). This will provide enough clearance between the supercharger (SC311) and the Engine Support Bar (303-F072) and enough clearance between the draw screw and the vehicle hood.
Install the Engine Support Bar and raise the engine.
8. Remove and discard the lower steering column coupling bolt.
- To install, tighten to 25 Nm (18 lb-ft).
9. Remove the power steering line support bracket bolt.
- To install, tighten to 11 Nm (97 lb-in).
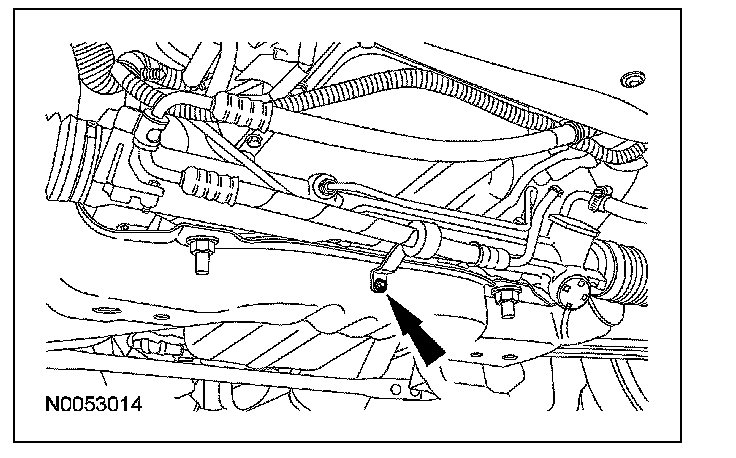
10. NOTICE: Support the steering gear with safety wire or damage to the steering gear may occur.
NOTE:
- The engine must be lifted enough to allow the LH bolt to be removed.
- The steering gear must be secured loosely with safety wire to allow subframe removal.
Remove the 2 steering gear bolts and position the steering gear aside.
- To install, tighten to 115 Nm (85 lb-ft).
11. Remove the 2 lower ball joint nuts and bolts.
- To install, tighten to 103 Nm (76 lb-ft).
12. Separate the 2 lower ball joints from the steering knuckles.
13. Support the subframe.
14. Remove the 4 front subframe bolts.
- To install, tighten to 115 Nm (85 lb-ft).
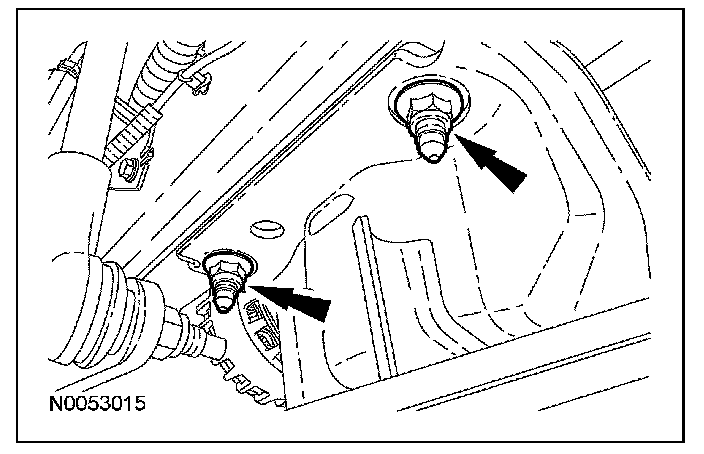
15. Remove the 4 front subframe nuts.
- To install, tighten to 115 Nm (85 lb-ft).

16. NOTE: Two technicians are required to carry out this step.
Lower and remove the front subframe.
17. NOTE: Using a suitable alignment tool with a 15 mm (0.59 in) OD shaft that is long enough to go through the subframe and body. Align the subframe to the body before tightening the subframe bolts and nuts to specification.
To install, reverse the removal procedure.
Factory Service Tools
Use the Manual With the Right Hardware
Pair factory procedures with proven DIY tools so the instructions are easier to execute.
Disclosure: Verified tool recommendations may earn an affiliate commission at no cost to you.
When to See a Mechanic
Stop DIY work and contact a certified mechanic immediately if any of the following apply:
- • You smell fuel, burning insulation, or see smoke.
- • Brakes feel soft, pull hard to one side, or make grinding noises.
- • The engine overheats, stalls repeatedly, or misfires under load.
- • You are missing required tools, torque specs, or safe lifting equipment.
- • You are not confident in the next step or safety outcome.