DTC Troubleshooting: B1241 (C and MODE)DTC B1241 or DTC indicator C and MODE:
A Problem in the Blower Motor Circuit
1.
Clear the DTC with the HDS.
2.
Turn the ignition switch to LOCK (0), and then back to ON (II), or press the engine start/stop button to select the OFF mode, and then the ON mode.
3.
Do the Self-diagnostic Function with the HDS
Initial Inspection and Diagnostic Overview or with the climate control unit
Initial Inspection and Diagnostic Overview.
4.
Check for DTCs.
Is DTC B1241 or C and MODE indicated?
YES -
Go to step 5.
NO -
Intermittent failure. Check for loose wires or poor connections on the blower motor circuit.�
5.
Turn the ignition switch to LOCK (0), or press the engine start/stop button to select the OFF mode.
6.
Check the No. 8 (40 A) fuse in the under-hood fuse/relay box, and the No. 16 (7.5 A) fuse in the driver's under-dash fuse/relay box.
Are the fuses OK?
YES -
Go to step 7.
NO -
Replace the fuse(s), and recheck. If the fuse(s) blow again, check for a short in the No. 8 (40 A) fuse and the No. 16 (7.5 A) fuse circuits.�
7.
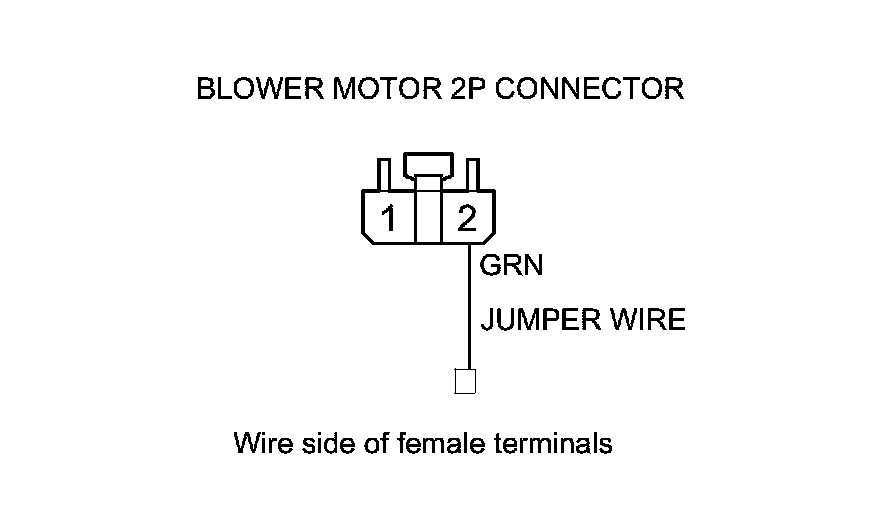
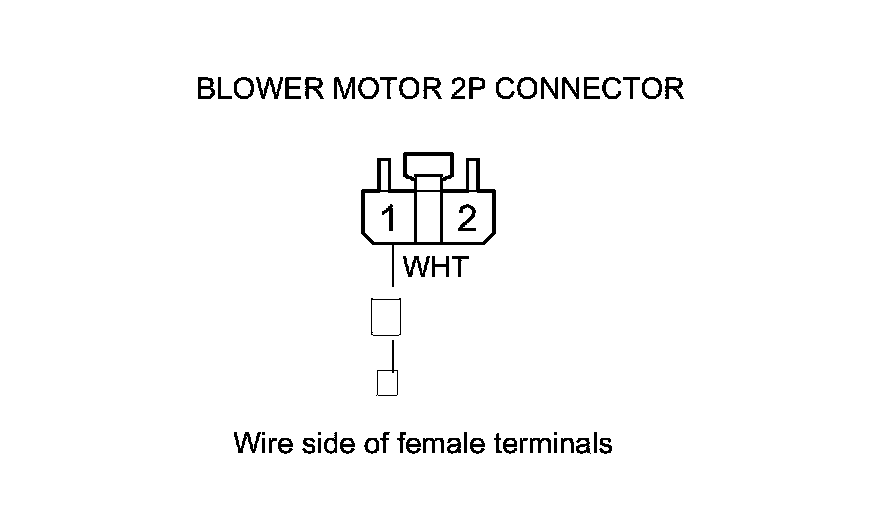
Connect blower motor 2P connector terminal No. 2 to body ground with a jumper wire.
8.
Turn the ignition switch to ON (II), or press the engine start/stop button to select the ON mode.
Does the blower motor run?
YES -
Go to step 9.
NO -
Go to step 25.
9.
Turn the ignition switch to LOCK (0), or press the engine start/stop button to select the OFF mode.
10.
Disconnect the jumper wire.
11.
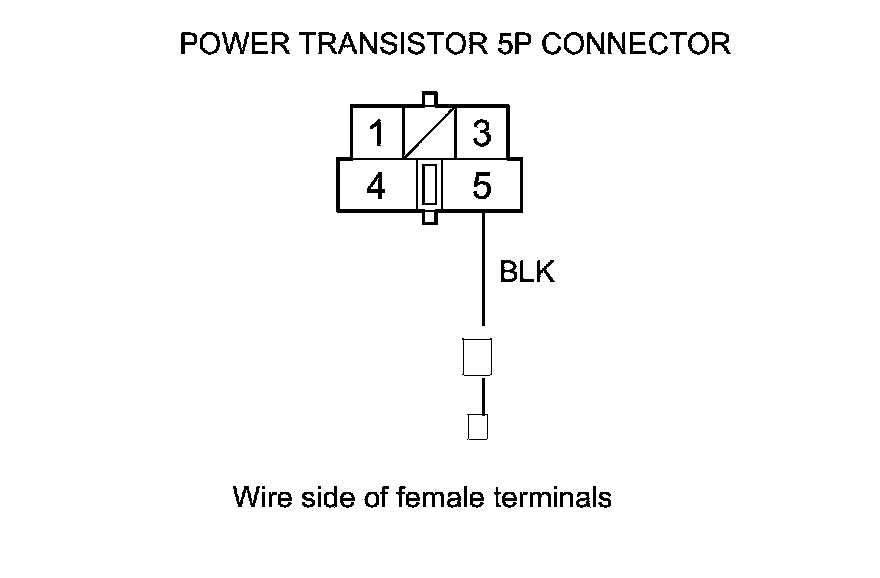
Disconnect the power transistor 5P connector.
12.
Check for continuity between power transistor 5P connector terminal No. 5 and body ground.
Is there continuity?
YES -
Go to step 13.
NO -
Check for an open in the wire between the power transistor and body ground. If the wire is OK, check for poor ground at G302
Harness Locations.�
13.
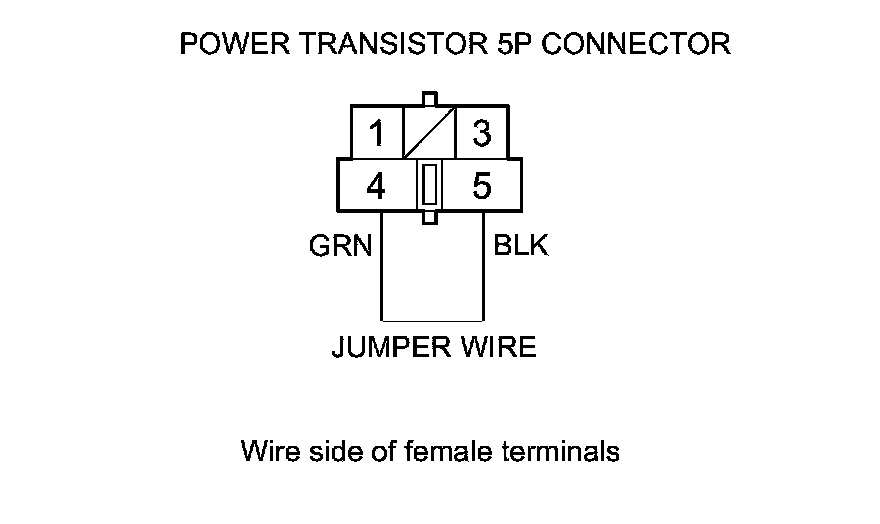
Connect power transistor 5P connector terminals No. 4 and No. 5 with a jumper wire.
14.
Turn the ignition switch to ON (II), or press the engine start/stop button to select the OFF mode.
Does the blower motor run at high speed?
YES -
Go to step 15.
NO -
Repair an open in the GRN wire between the power transistor and the blower motor.�
15.
Turn the ignition switch to LOCK (0), or press the engine start/stop button to select the OFF.
16.
Disconnect the jumper wire.
17.
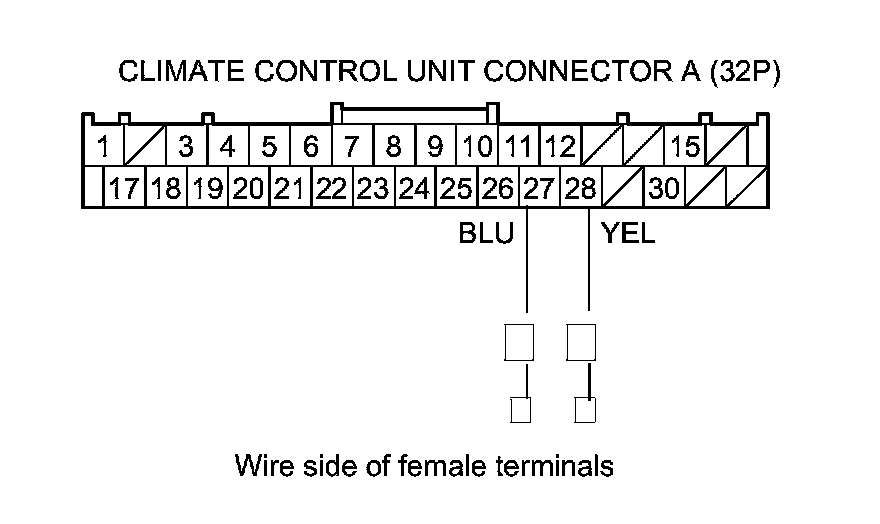
Disconnect climate control unit connector A (32P).
18.
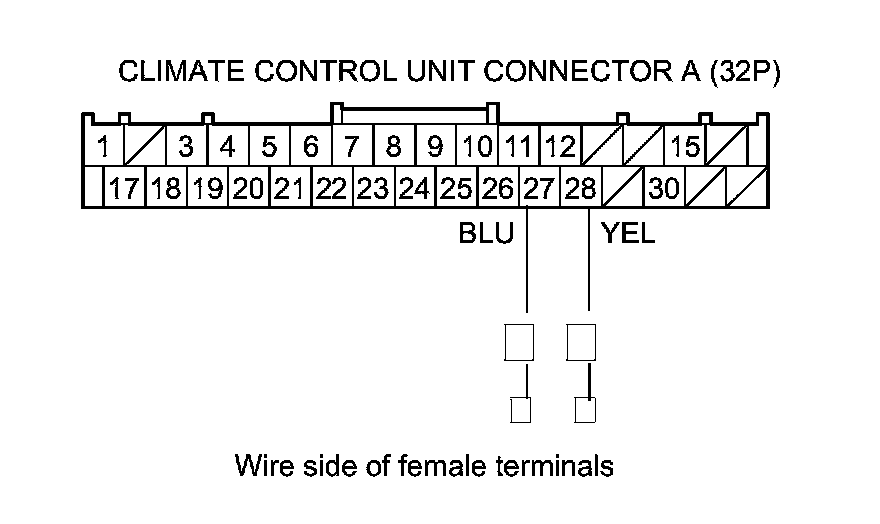
Check for continuity between body ground and climate control unit connector A (32P) terminals No. 27 and No. 28 individually.
Is there continuity?
YES -
Repair a short to body ground in the wire(s) between the climate control unit and the power transistor.�
NO -
Go to step 19.
19.
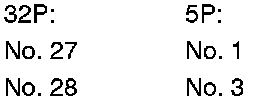
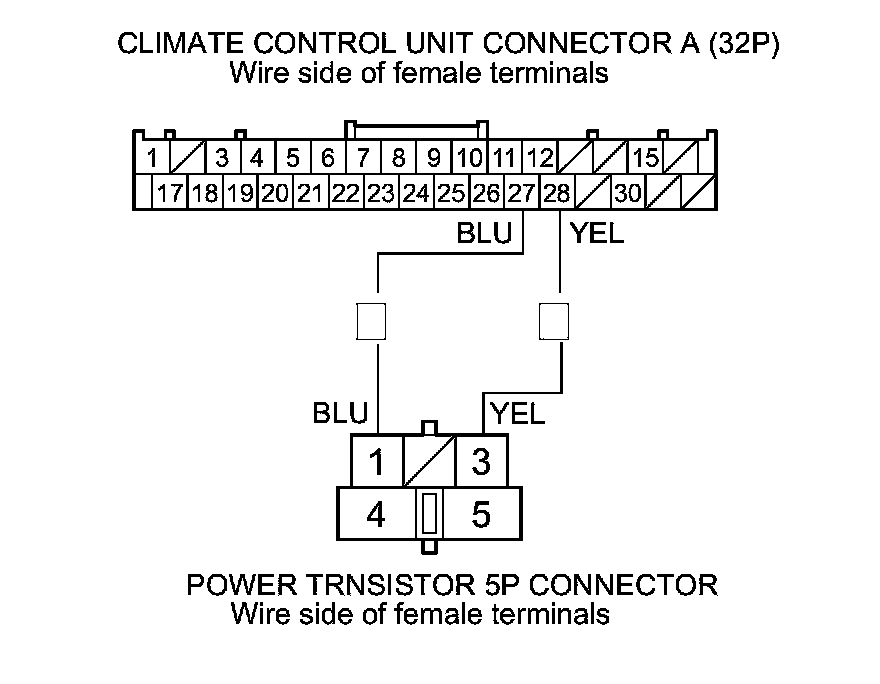
Check for continuity between the following terminals of the climate control unit connector A (32P) and the power transistor 5P connector.
Is there continuity?
YES -
Go to step 20.
NO -
Repair an open in the wire(s) between the climate control unit and the power transistor.�
20.
Turn the ignition switch to ON (II), or press the engine start/stop button to select the ON mode.
21.
Measure the voltage between body ground and climate control unit connector A (32P) terminals No. 27 and No. 28 individually.
Is there voltage?
YES -
Repair a short to power in the wire(s).�
NO -
Go to step 22.
22.
Turn the ignition switch to LOCK (0), or press the engine start/stop button to select the OFF mode.
23.
Reconnect climate control unit connector A (32P).
24.
Test the power transistor
Blower Power Transistor Test.
Is the power transistor OK?
YES -
Check for loose wires or poor connections at the climate control unit connector A (32P) and at the power transistor 5P connector. If the connections are good, substitute a known-good climate control unit, and recheck. If the symptom/indication goes away, replace the original climate control unit
Climate Control Unit Removal/Installation.�
NO -
Replace the power transistor.�
25.
Turn the ignition switch to LOCK (0), or press the engine start/stop button to select the OFF mode.
26.
Disconnect the jumper wire.
27.
Disconnect the blower motor 2P connector.
28.
Measure the voltage between blower motor 2P connector terminal No. 1 and body ground.
Is there battery voltage?
YES -
Replace the blower motor
Blower Unit Component Replacement.�
NO -
Go to step 29.
29.
Turn the ignition switch to LOCK (0), or press the engine start/stop button to select the OFF mode.
30.
Remove the blower motor relay from the under-hood fuse/relay box, and test it
Testing and Inspection.
Is the relay OK?
YES -
Go to step 31.
NO -
Replace the blower motor relay.�
31.
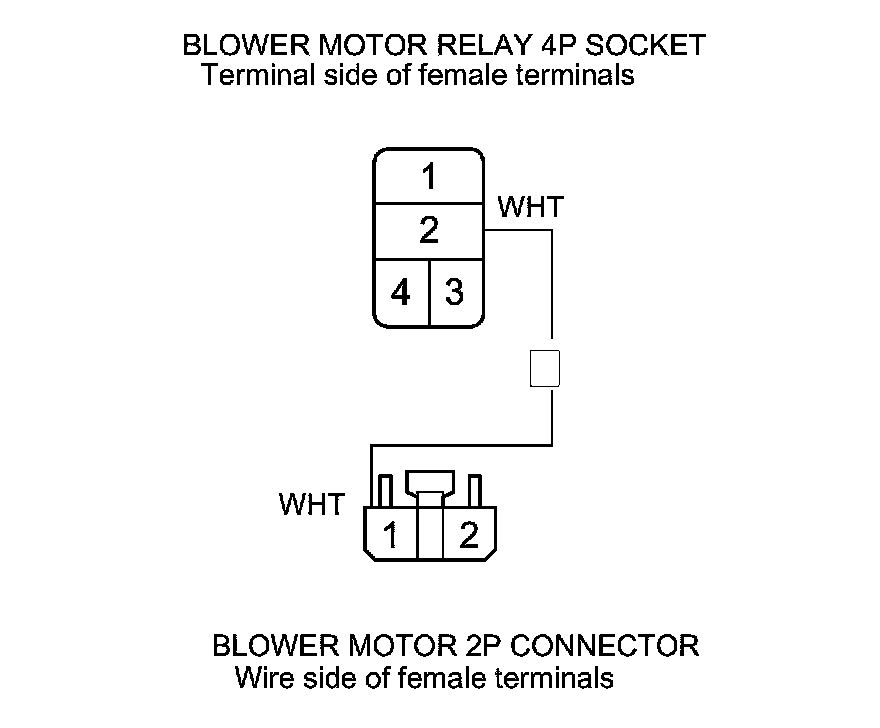
Check for continuity between blower motor relay 4P socket terminal No. 2 and blower motor 2P connector terminal No. 1.
Is there continuity?
YES -
Go to step 32.
NO -
Repair an open in the wire between the blower motor relay and blower motor.�
32.
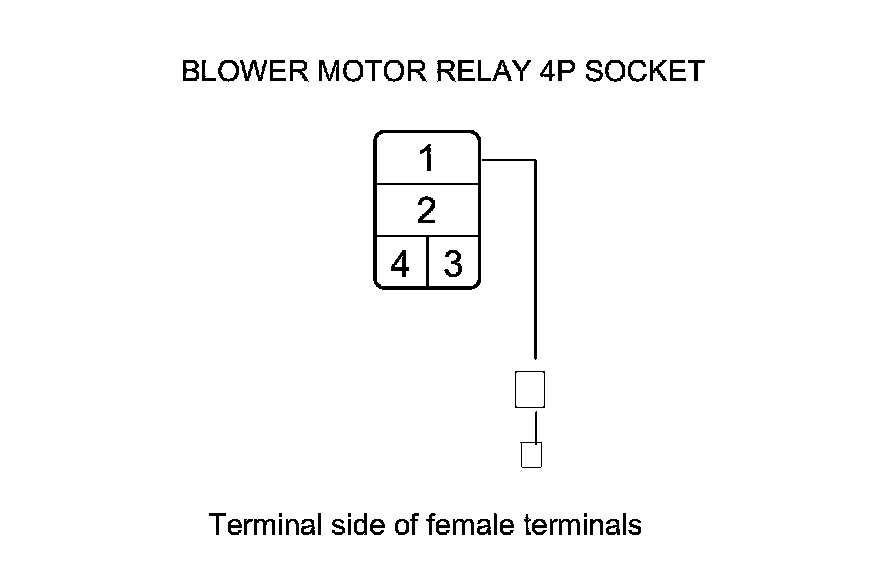
Measure the voltage between blower motor relay 4P socket terminal No. 1 and body ground.
Is there battery voltage?
YES -
Go to step 33.
NO -
Replace the under-hood fuse/relay box
Under-Hood Fuse/Relay Box Removal/Installation.�
33.
Turn the ignition switch to ON (II), or press the engine start/stop button to select the ON mode.
34.
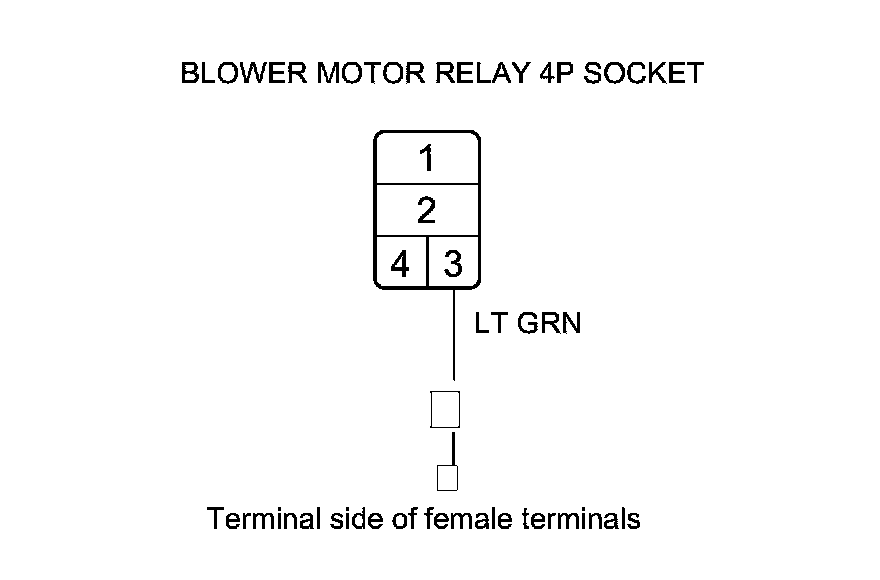
Measure the voltage between blower motor relay 4P socket terminal No. 3 and body ground.
Is there battery voltage?
YES -
Check for an open in the wire between blower motor relay 4P socket terminal No. 3 and body ground. If the wire is OK, check for poor body ground at G302
Harness Locations.�
NO -
Repair an open in the wire between the No. 16 (7.5 A) fuse in the driver's under-dash fuse/relay box and the blower motor relay 4P socket.�