DTC Troubleshooting: B1175DTC B1175:
Fuel Level Sensor (Fuel Gauge Sending Unit) Circuit
NOTE: If you are troubleshooting multiple DTCs, be sure to follow the instructions in B-CAN System Diagnosis Test Mode A
Troubleshooting - B-CAN System Diagnosis Test Mode A.
1.
Clear the DTCs with the HDS.
2.
Turn the ignition switch to LOCK (0) and then back to ON (II), or press the engine start/stop button to select the OFF mode and then the ON mode.
3.
Check for DTCs with the HDS.
Is DTC B1175 indicated?
YES -
-
With SH-AWD: Go to step .7
-
Without SH-AWD: Go to step 4.
NO -
Intermittent failure, the fuel level sensor circuit is OK at this time. Check for loose or poor connections.�
4.
Test the fuel gauge sending unit
Fuel Gauge Sending Unit Test.
Is the fuel gauge sending unit OK?
YES -
Reconnect the sending units, then go to step 5.
NO -
Replace the affected fuel gauge sending unit(s)
Fuel Pump/Fuel Gauge Sending Unit Replacement.�
5.
Turn the ignition switch to ON (II), or press the engine start/stop button to select the ON mode.
6.
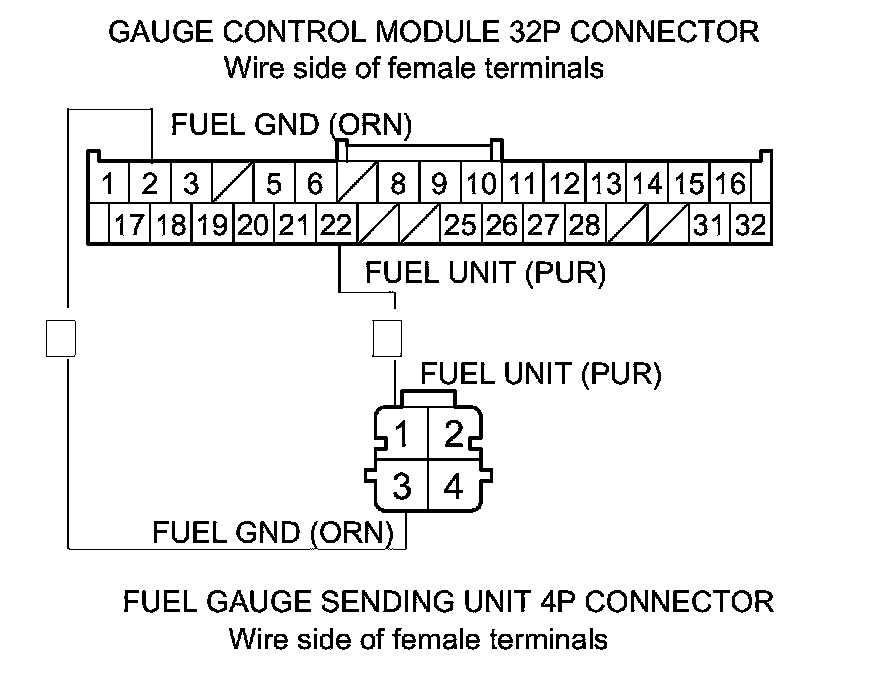
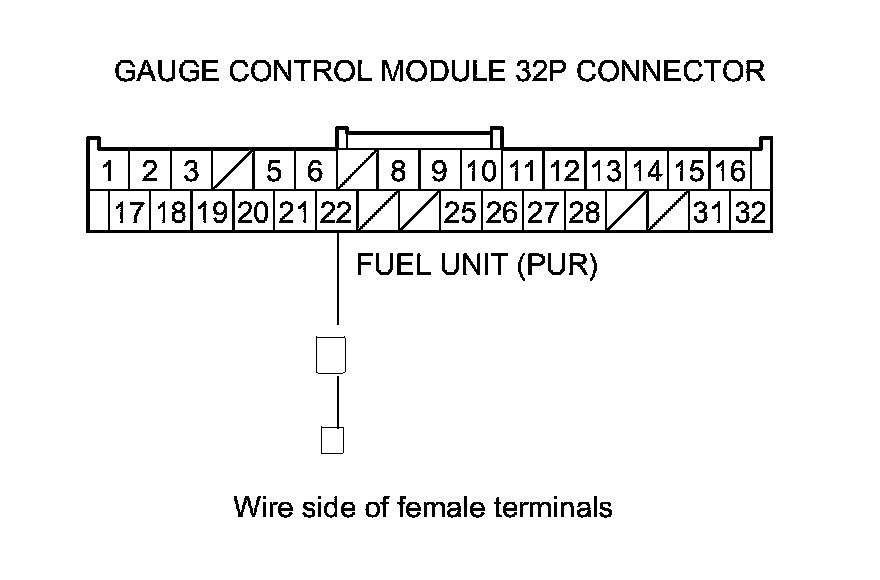
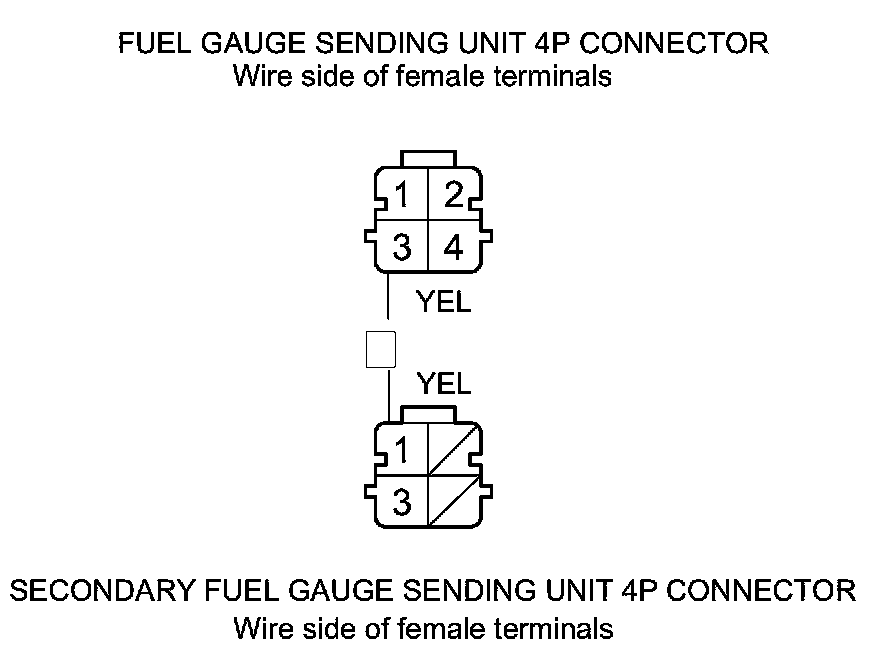
Without disconnecting the connectors, measure the voltage between terminals No. 2 and No. 22 of the gauge control module 32P connector and terminals No. 3 and No. 1 of the fuel gauge sending unit 4P connector respectively.
Is there less than 0.2 V?
YES -
Replace the gauge control module
Service and Repair.�
NO -
Repair the loose connection, high resistance, or an open in the PUR or ORN wire between the gauge control module and fuel gauge sending unit.�
7.
Turn the ignition switch to LOCK (0), or press the engine start/stop button to select the OFF mode.
8.
Test the fuel gauge sending unit and the secondary fuel gauge sending unit
Fuel Gauge Sending Unit Test.
Are the fuel gauge sending units OK?
YES -
Go to step 9.
NO -
Replace the affected fuel gauge sending unit(s)
Fuel Gauge Sending Unit Test.�
9.
Turn the ignition switch to ON (II), or press the engine start/stop button to select the ON mode.
10.
Disconnect the fuel gauge sending unit 4P connector
Fuel Pump/Fuel Gauge Sending Unit Replacement.
11.
Disconnect the gauge control module 32P connector.
12.
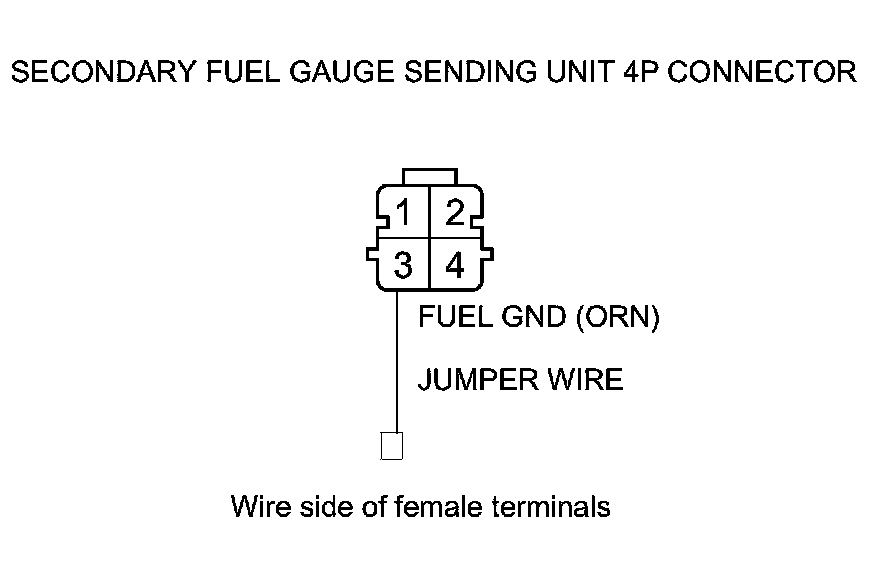
Connect secondary fuel gauge sending unit 4P connector terminal No. 3 to body ground with a jumper wire.
13.
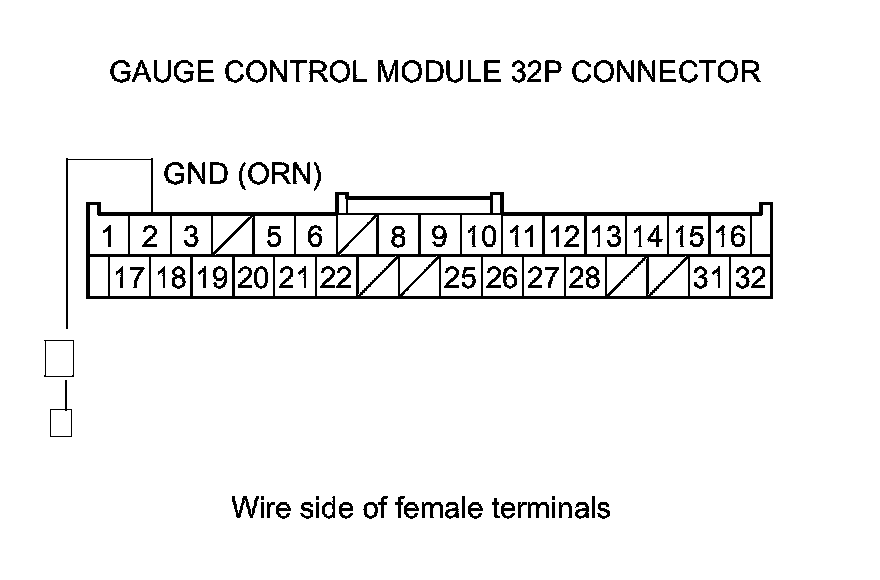
Check for continuity between gauge control module 32P connector terminal No. 2 and body ground.
Is there continuity?
YES -
Go to step 14.
NO -
Repair an open in the wire.�
14.
Disconnect the secondary fuel gauge sending unit 4P connector
Secondary Fuel Gauge Sending Unit Removal/Installation.
15.
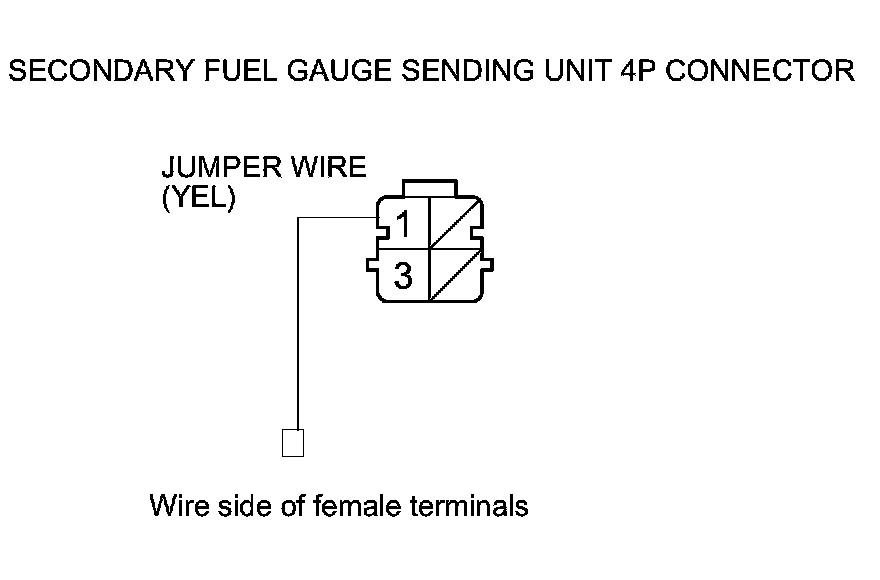
Connect secondary fuel gauge sending unit 4P connector terminal No. 1 to body ground with a jumper wire.
16.
Check for continuity between gauge control module 32P connector terminal No. 22 and body ground.
Is there continuity?
YES -
Go to step 17.
NO -
Repair an open in the wire.�
17.
Check for continuity between fuel gauge sending unit 4P connector terminal No. 3 and secondary fuel gauge sending unit 4P connector terminal No. 1.
Is there continuity?
YES -
Replace the gauge control module
Service and Repair.
NO -
Repair the loose connection, high resistance, or an open in the YEL wire between the fuel gauge sending units.�