
Safety Warning
DIY auto repair can cause serious injury, fire, or vehicle damage. These guides are for informational purposes only. Always follow OEM torque specs, wear PPE, and consult a certified mechanic if you are unsure. You are solely responsible for your safety.
2011 Suzuki SX4 2WD L4-2.0LFACTORY OEM SERVICE PROCEDURE
Part 1
Inspection of ECM and Its Circuits
Precautions for ECM Circuit Inspection Precautions for ECM Circuit Inspection
NOTE:
- The connectors of the ECM are watertight. If tester probes are directly connected to any of the connectors when checking the ECM and its circuits, the watertight performance of the connector will be affected, possibly resulting in corrosion of connector terminals and damage to electrical circuits.
Always use the special tool when checking the ECM and its circuits. Connect tester probes only to the special tool's connectors.
- If you connect a voltmeter or ohmmeter directly to control module terminals by removing control module connectors, you can damage the control module.
Never connect a voltmeter or an ohmmeter directly to any terminal of control module by disconnecting control module connectors.
Voltage Check
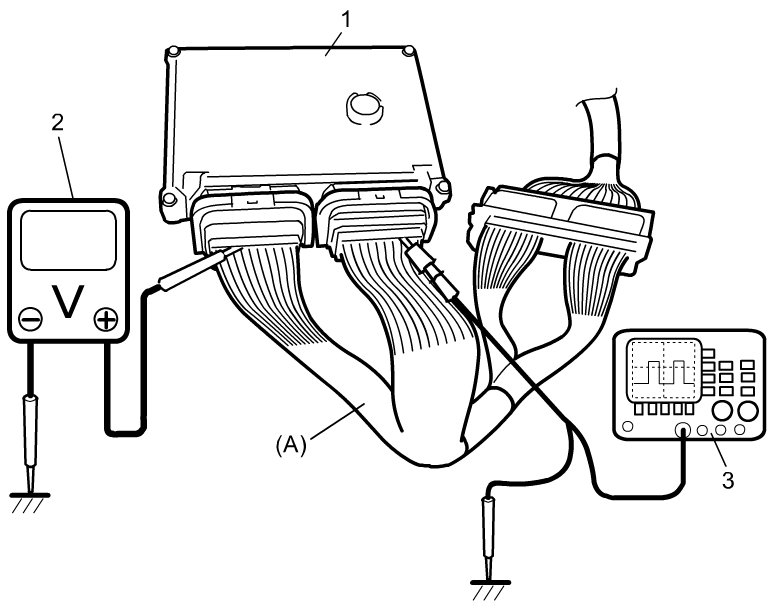
1) Remove ECM (1) from its bracket. Service and Repair
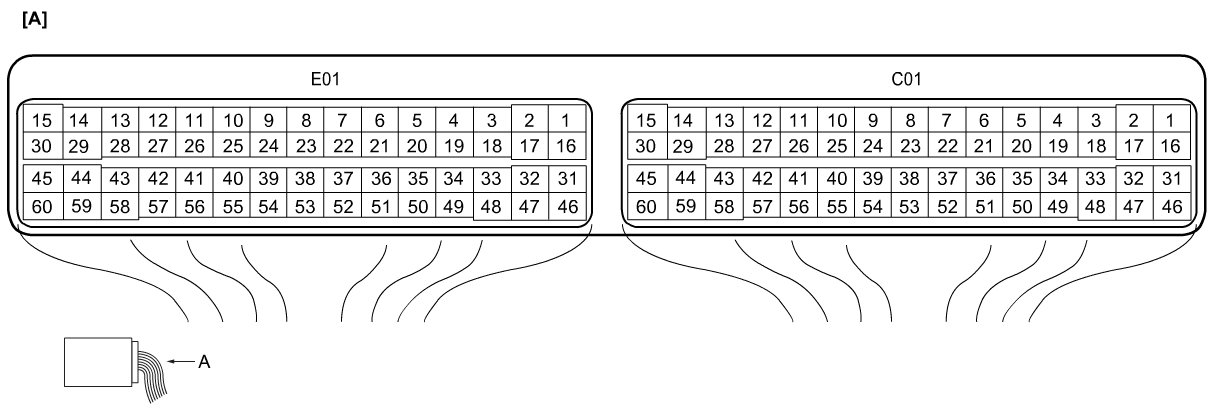
2) Connect special tool between ECM and ECM connectors securely.
Special Tool
(A): 09933-06330
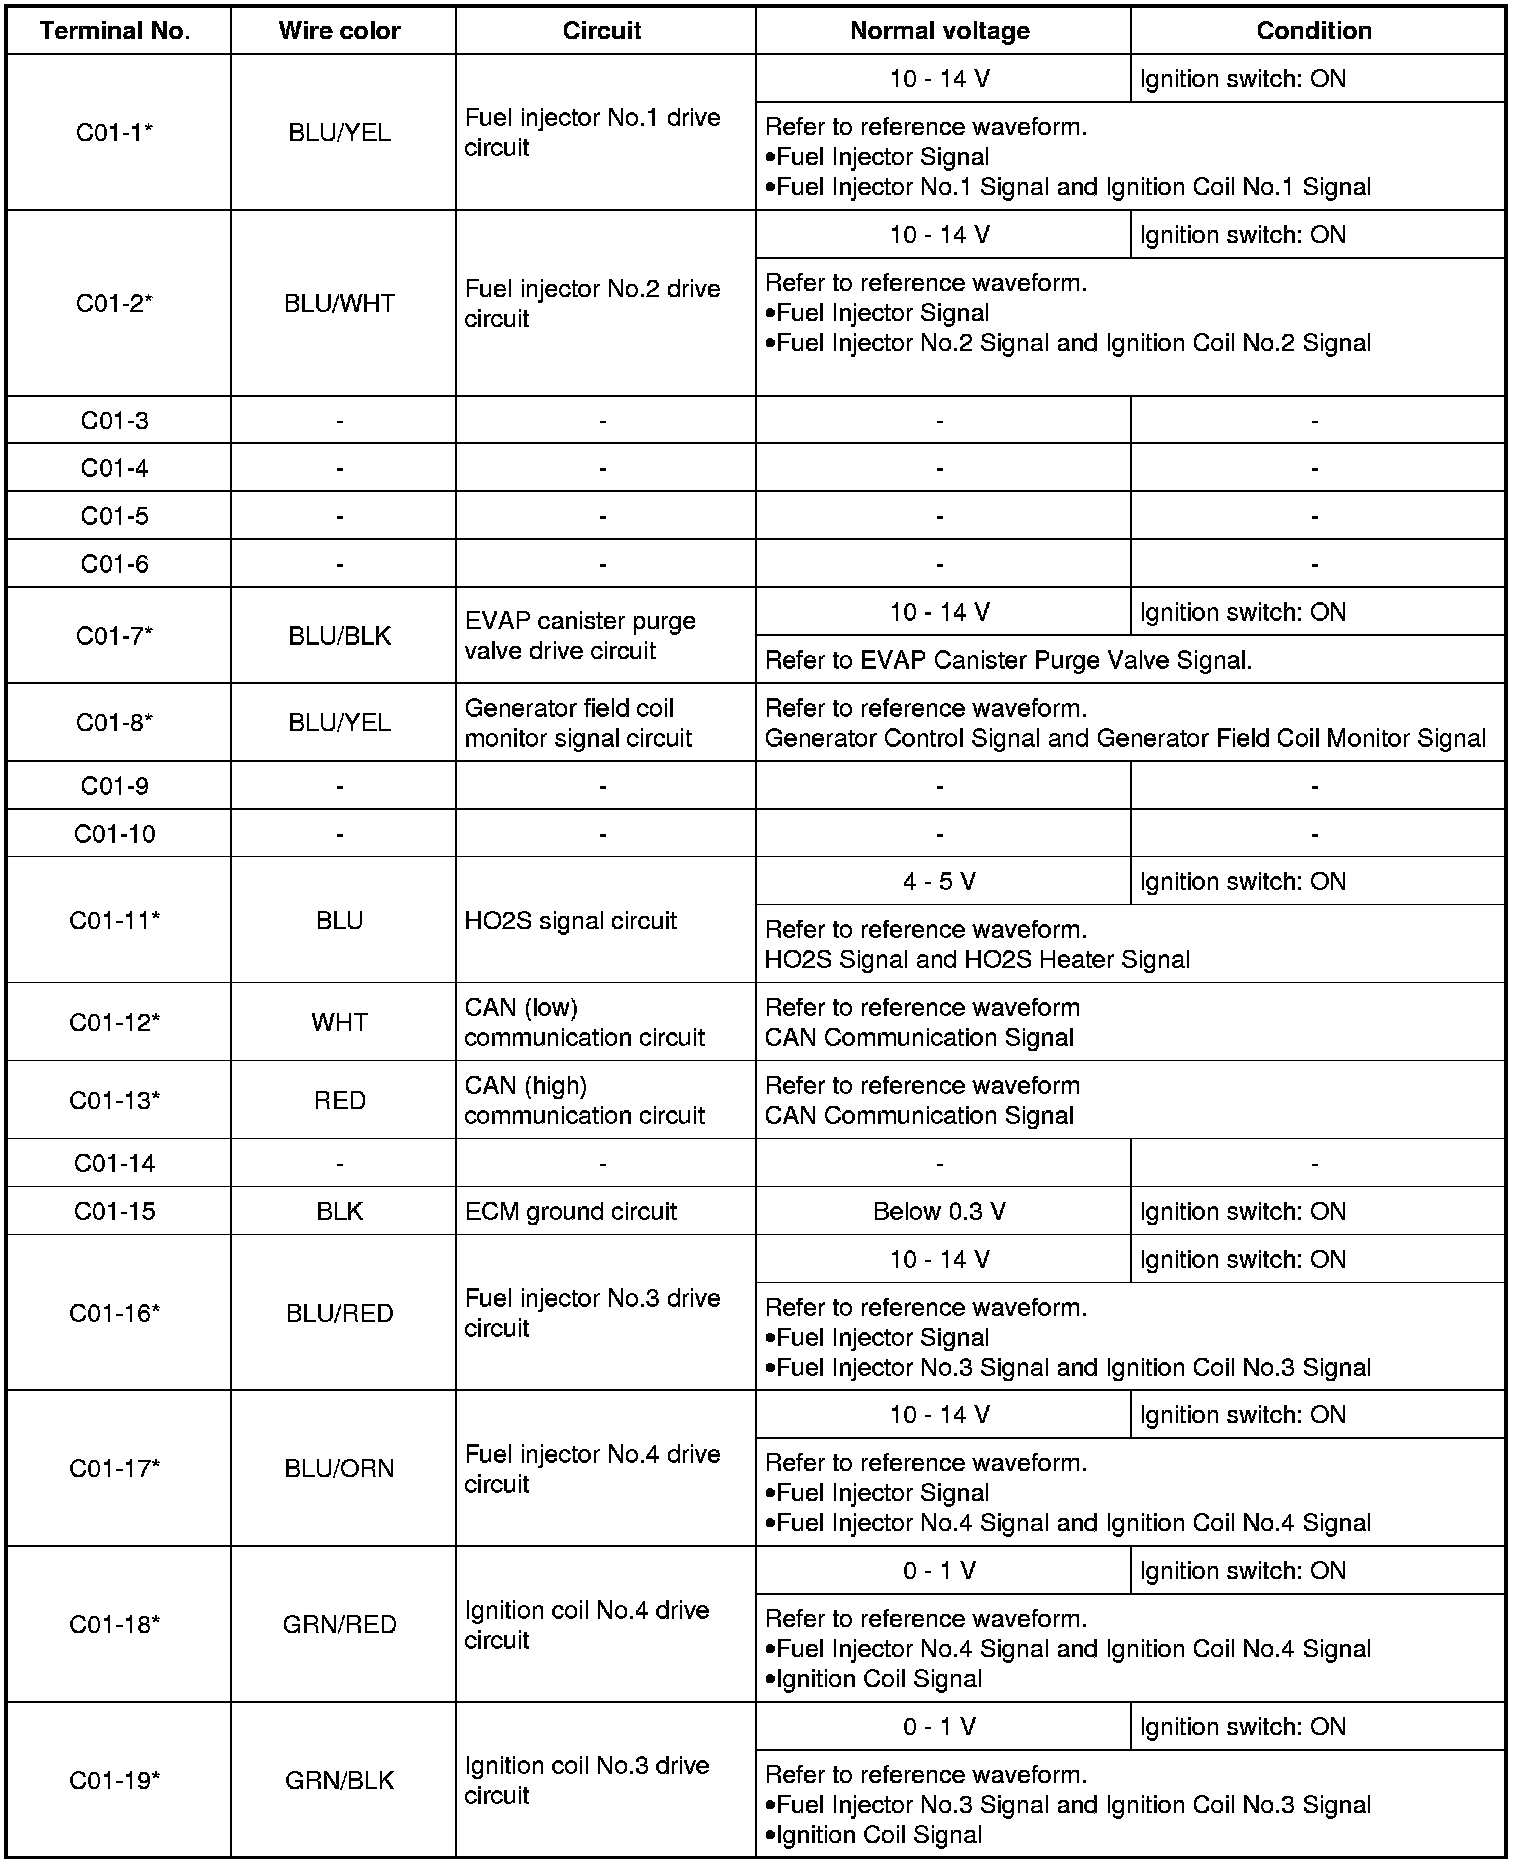
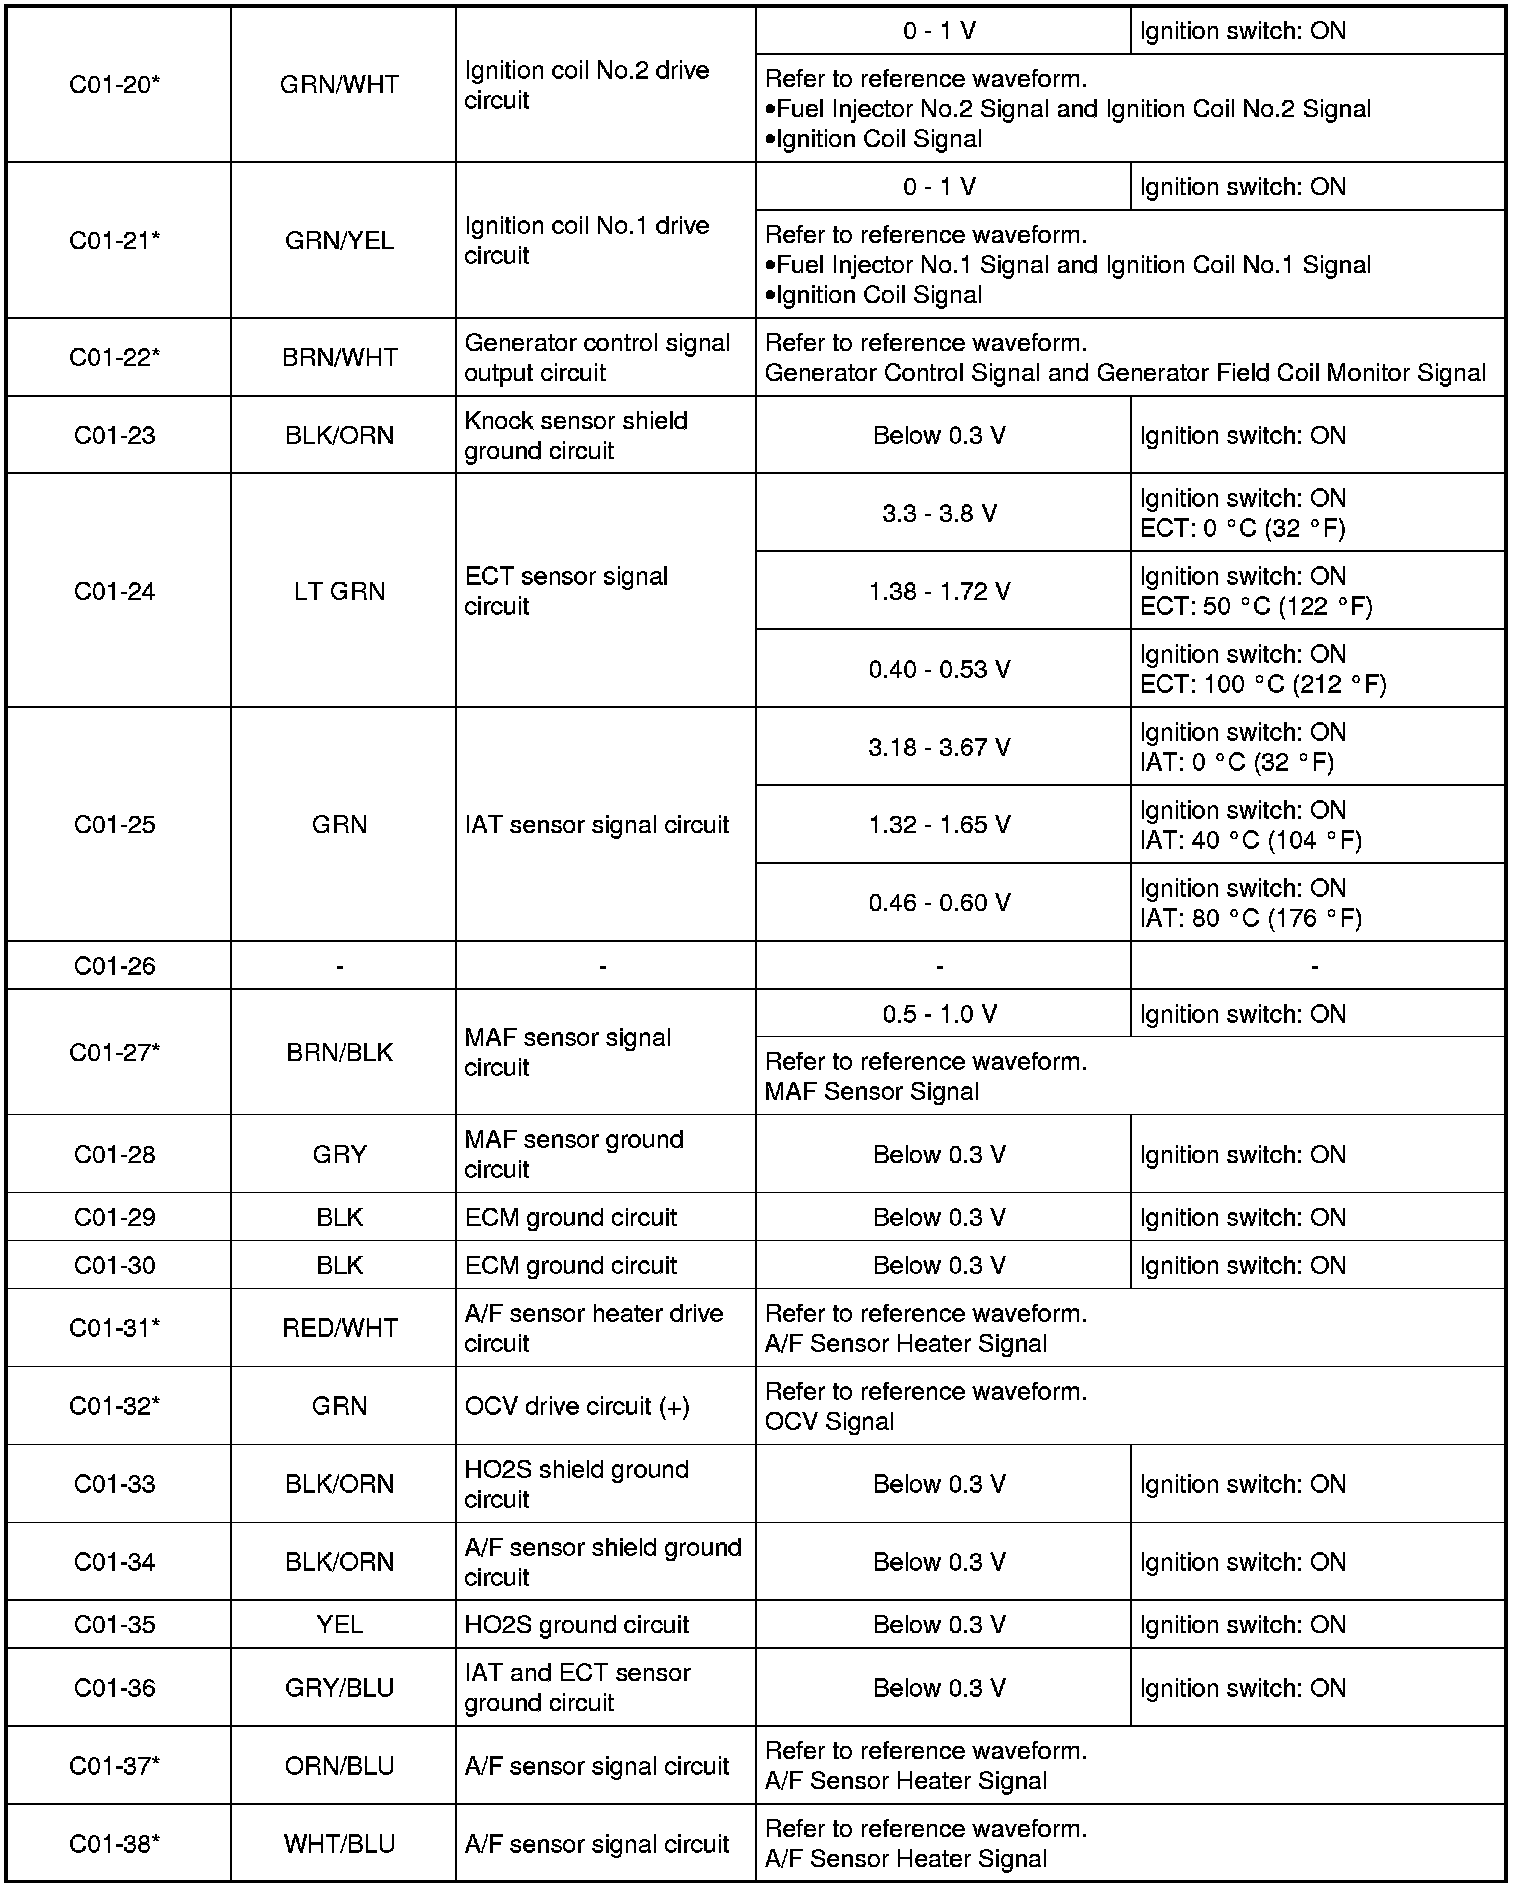
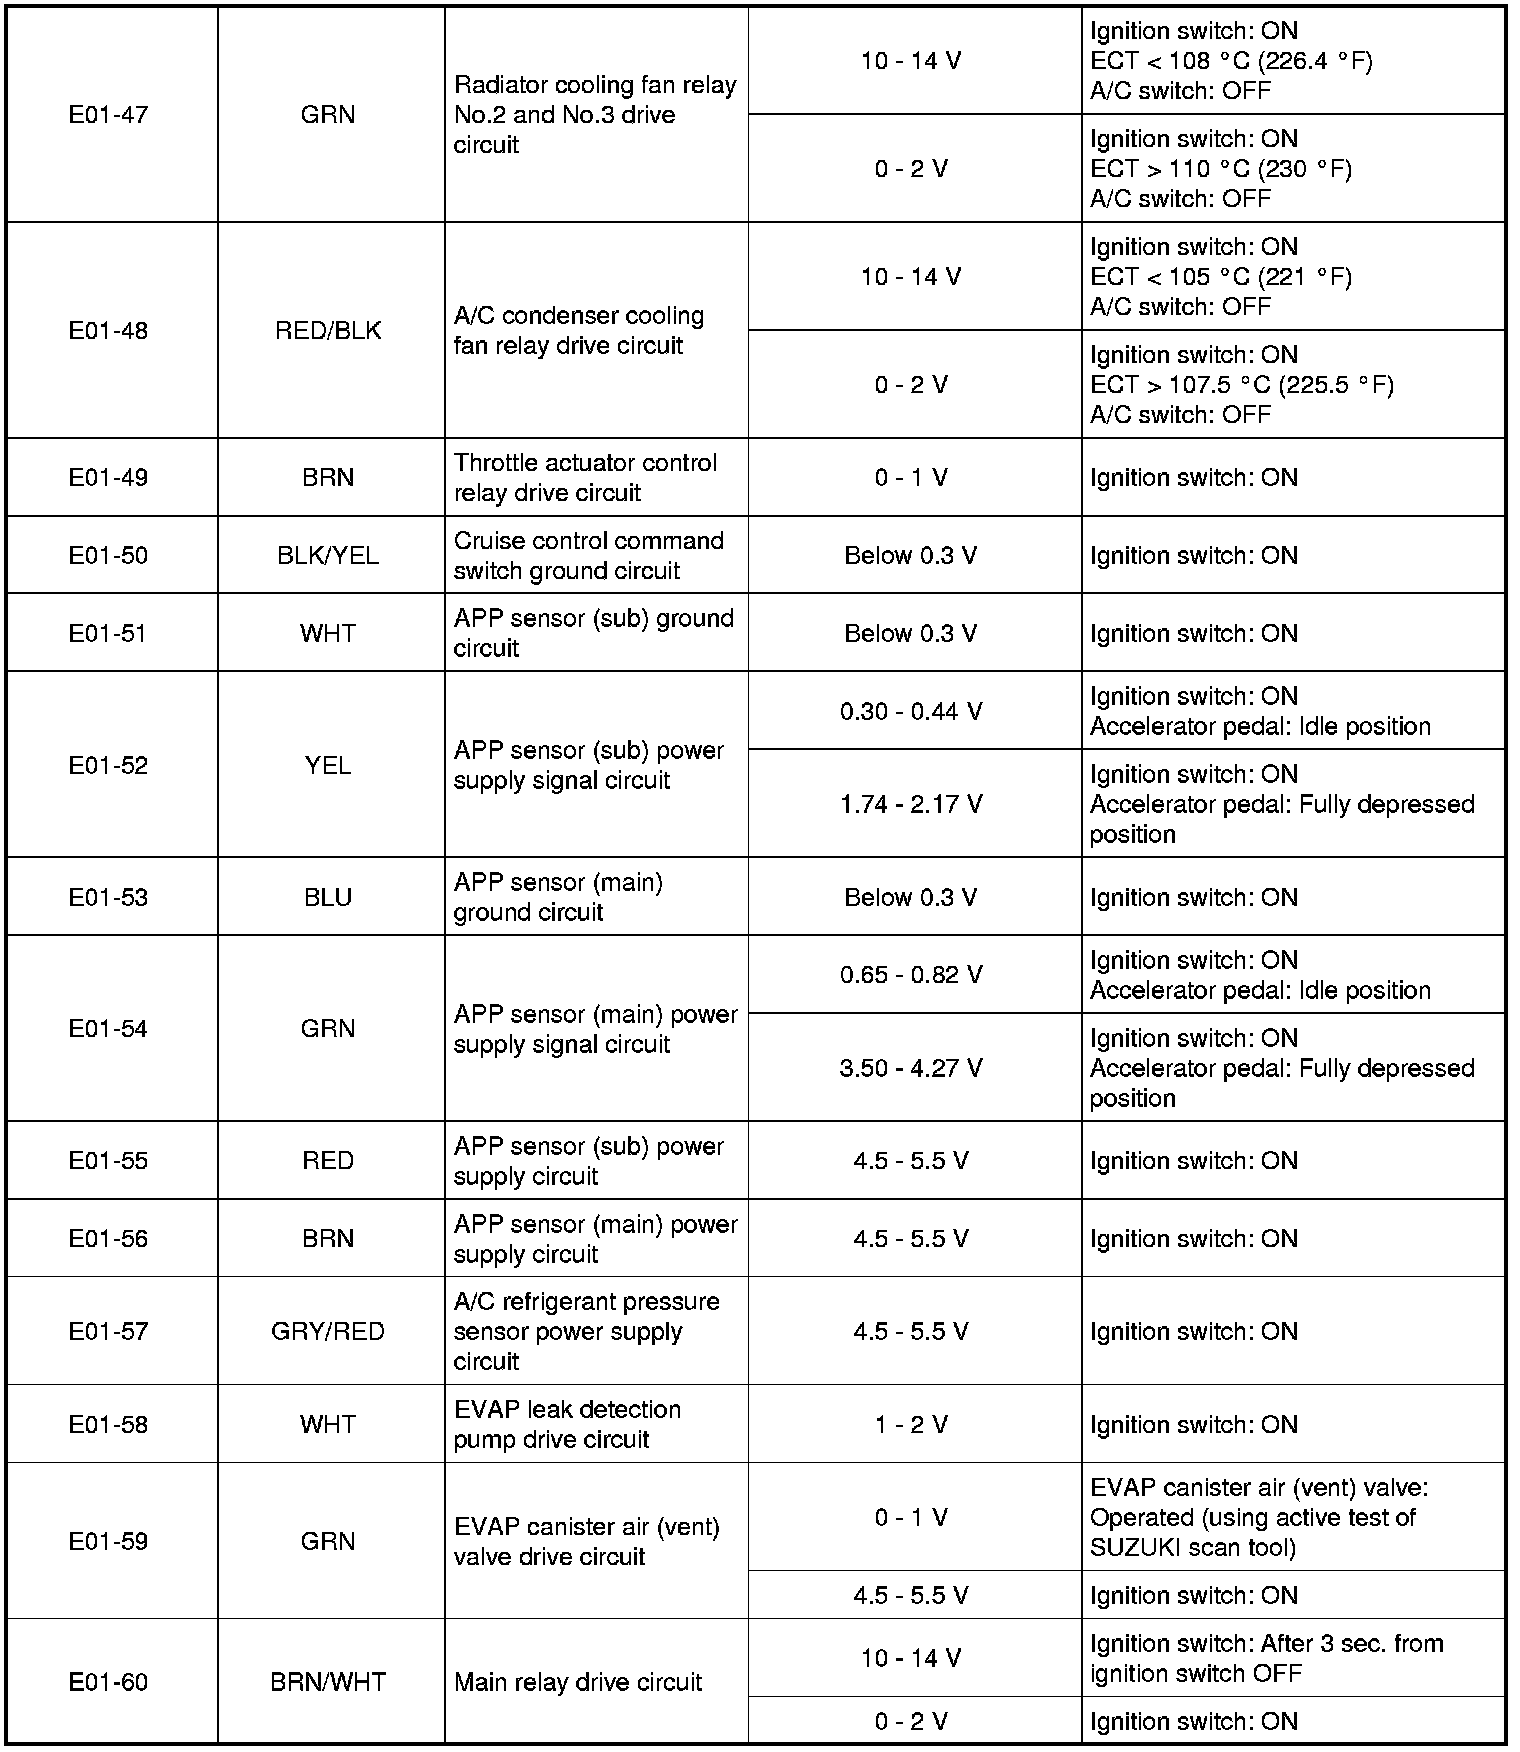
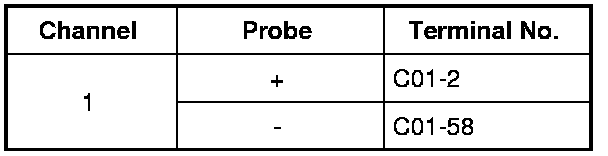
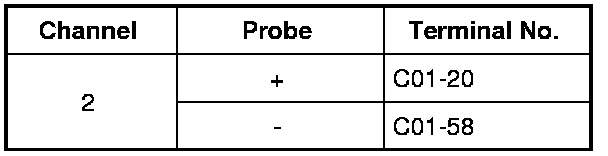
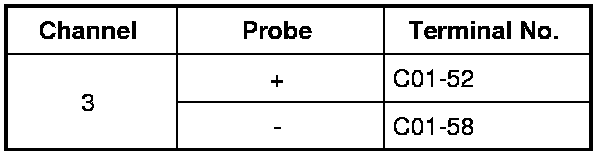
3) Check voltage and/or pulse signal using voltmeter (2) and oscilloscope (3).
NOTE:
- As each terminal voltage is affected by battery voltage, confirm that it is 11 V or more when ignition switch is turned to ON position.
- Voltage with asterisk (*) cannot be measured with voltmeter because it is pulse signal. Use oscilloscope for its check.
- Before performed this inspection, be sure to read Precautions for ECM Circuit Inspection Precautions for ECM Circuit Inspection.
- For identification of each cylinder, refer to Precautions for Identification of Cylinder Precautions for Identification of Cylinder.

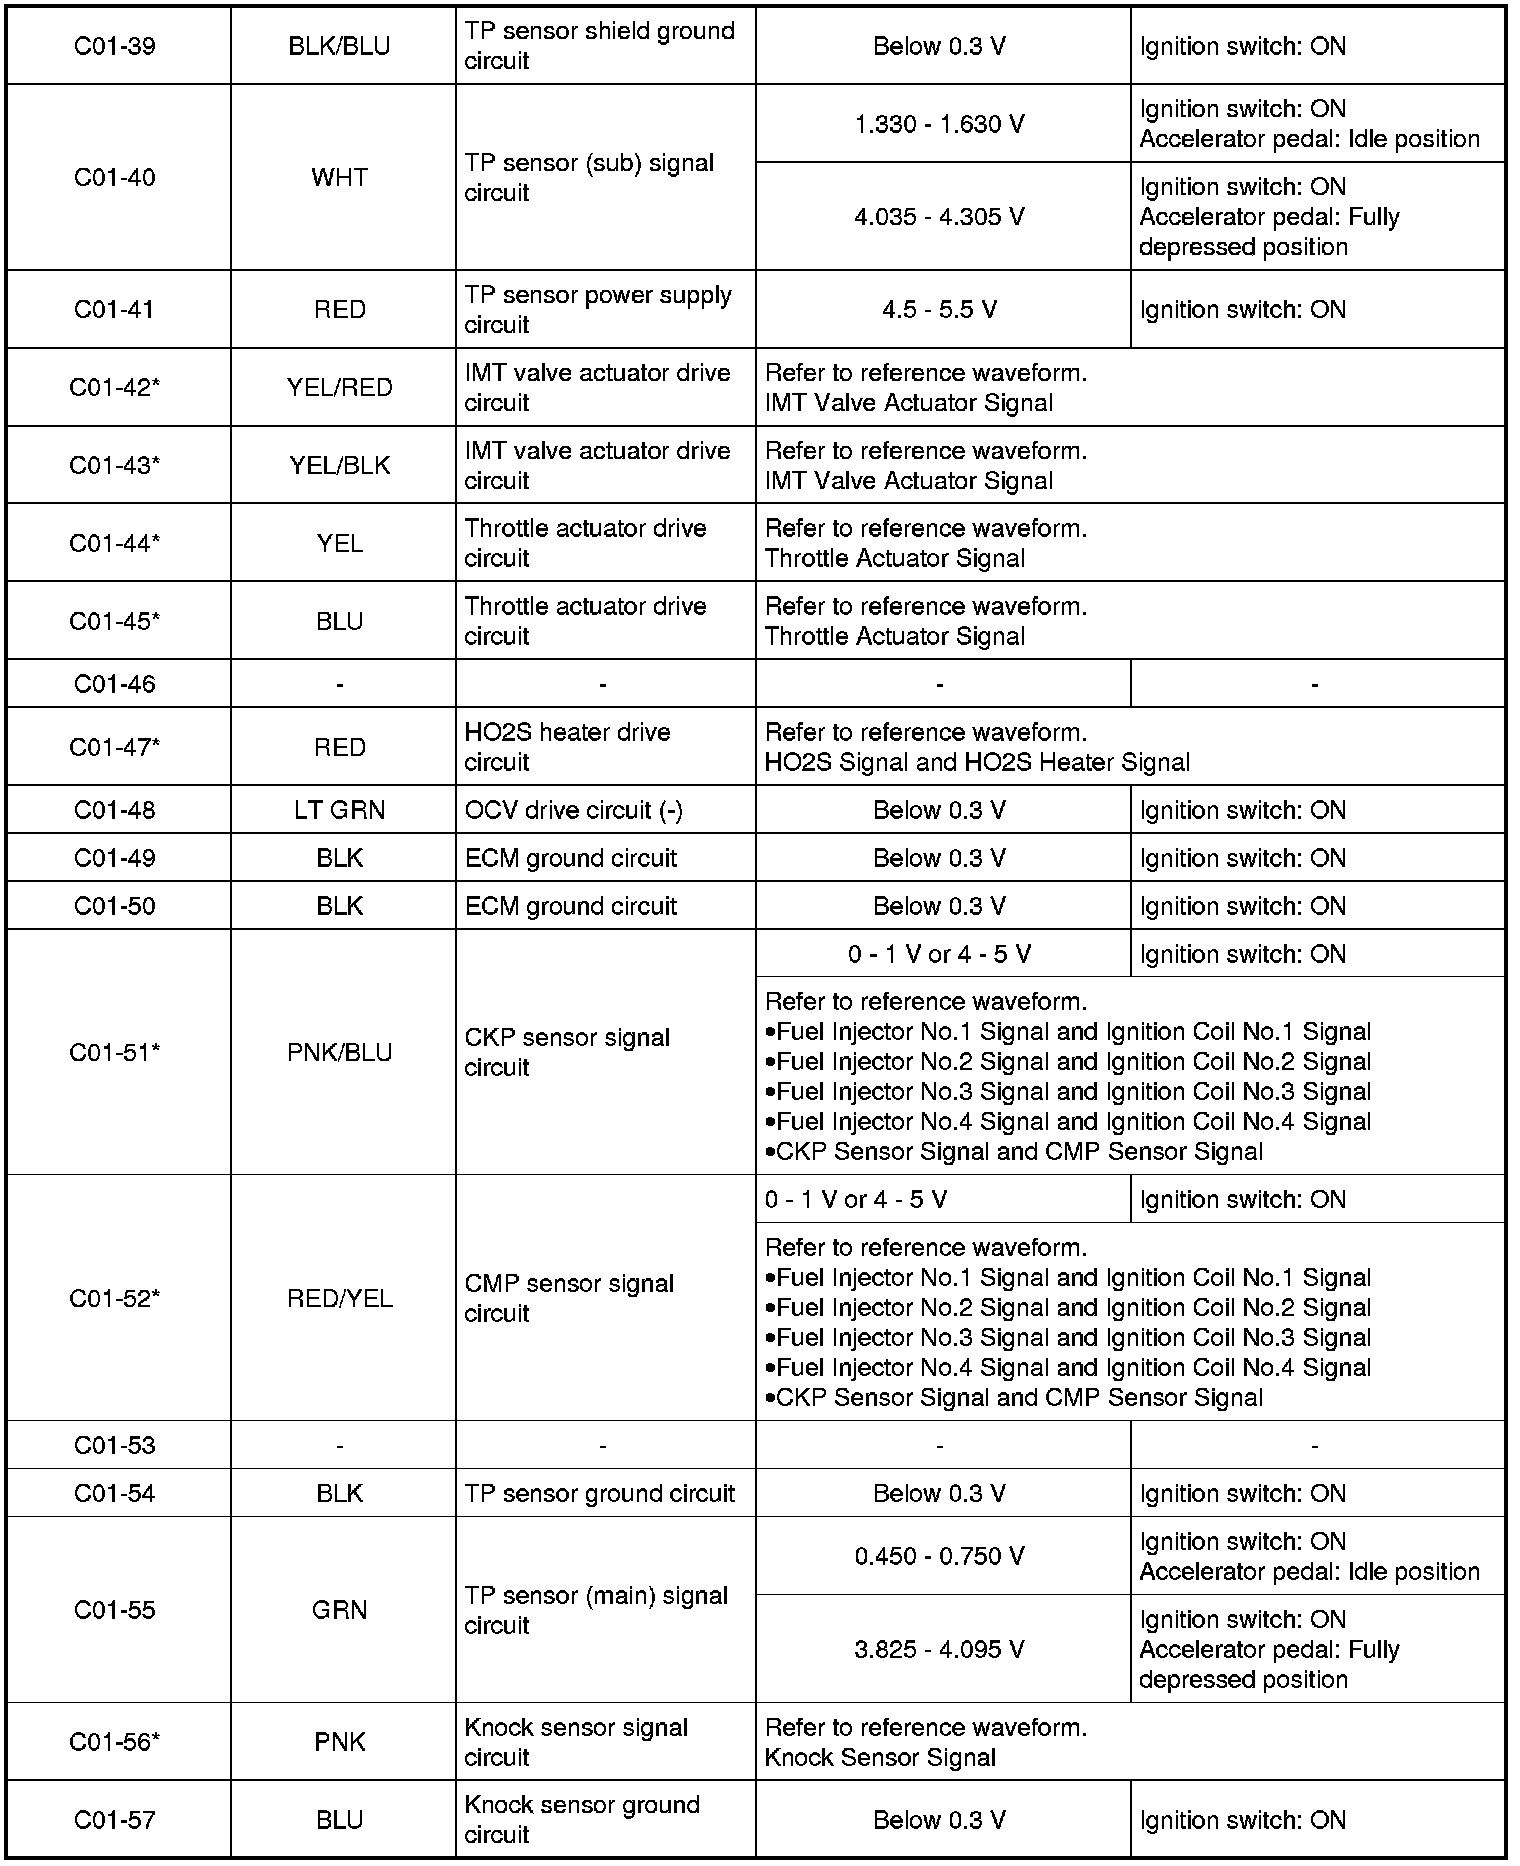

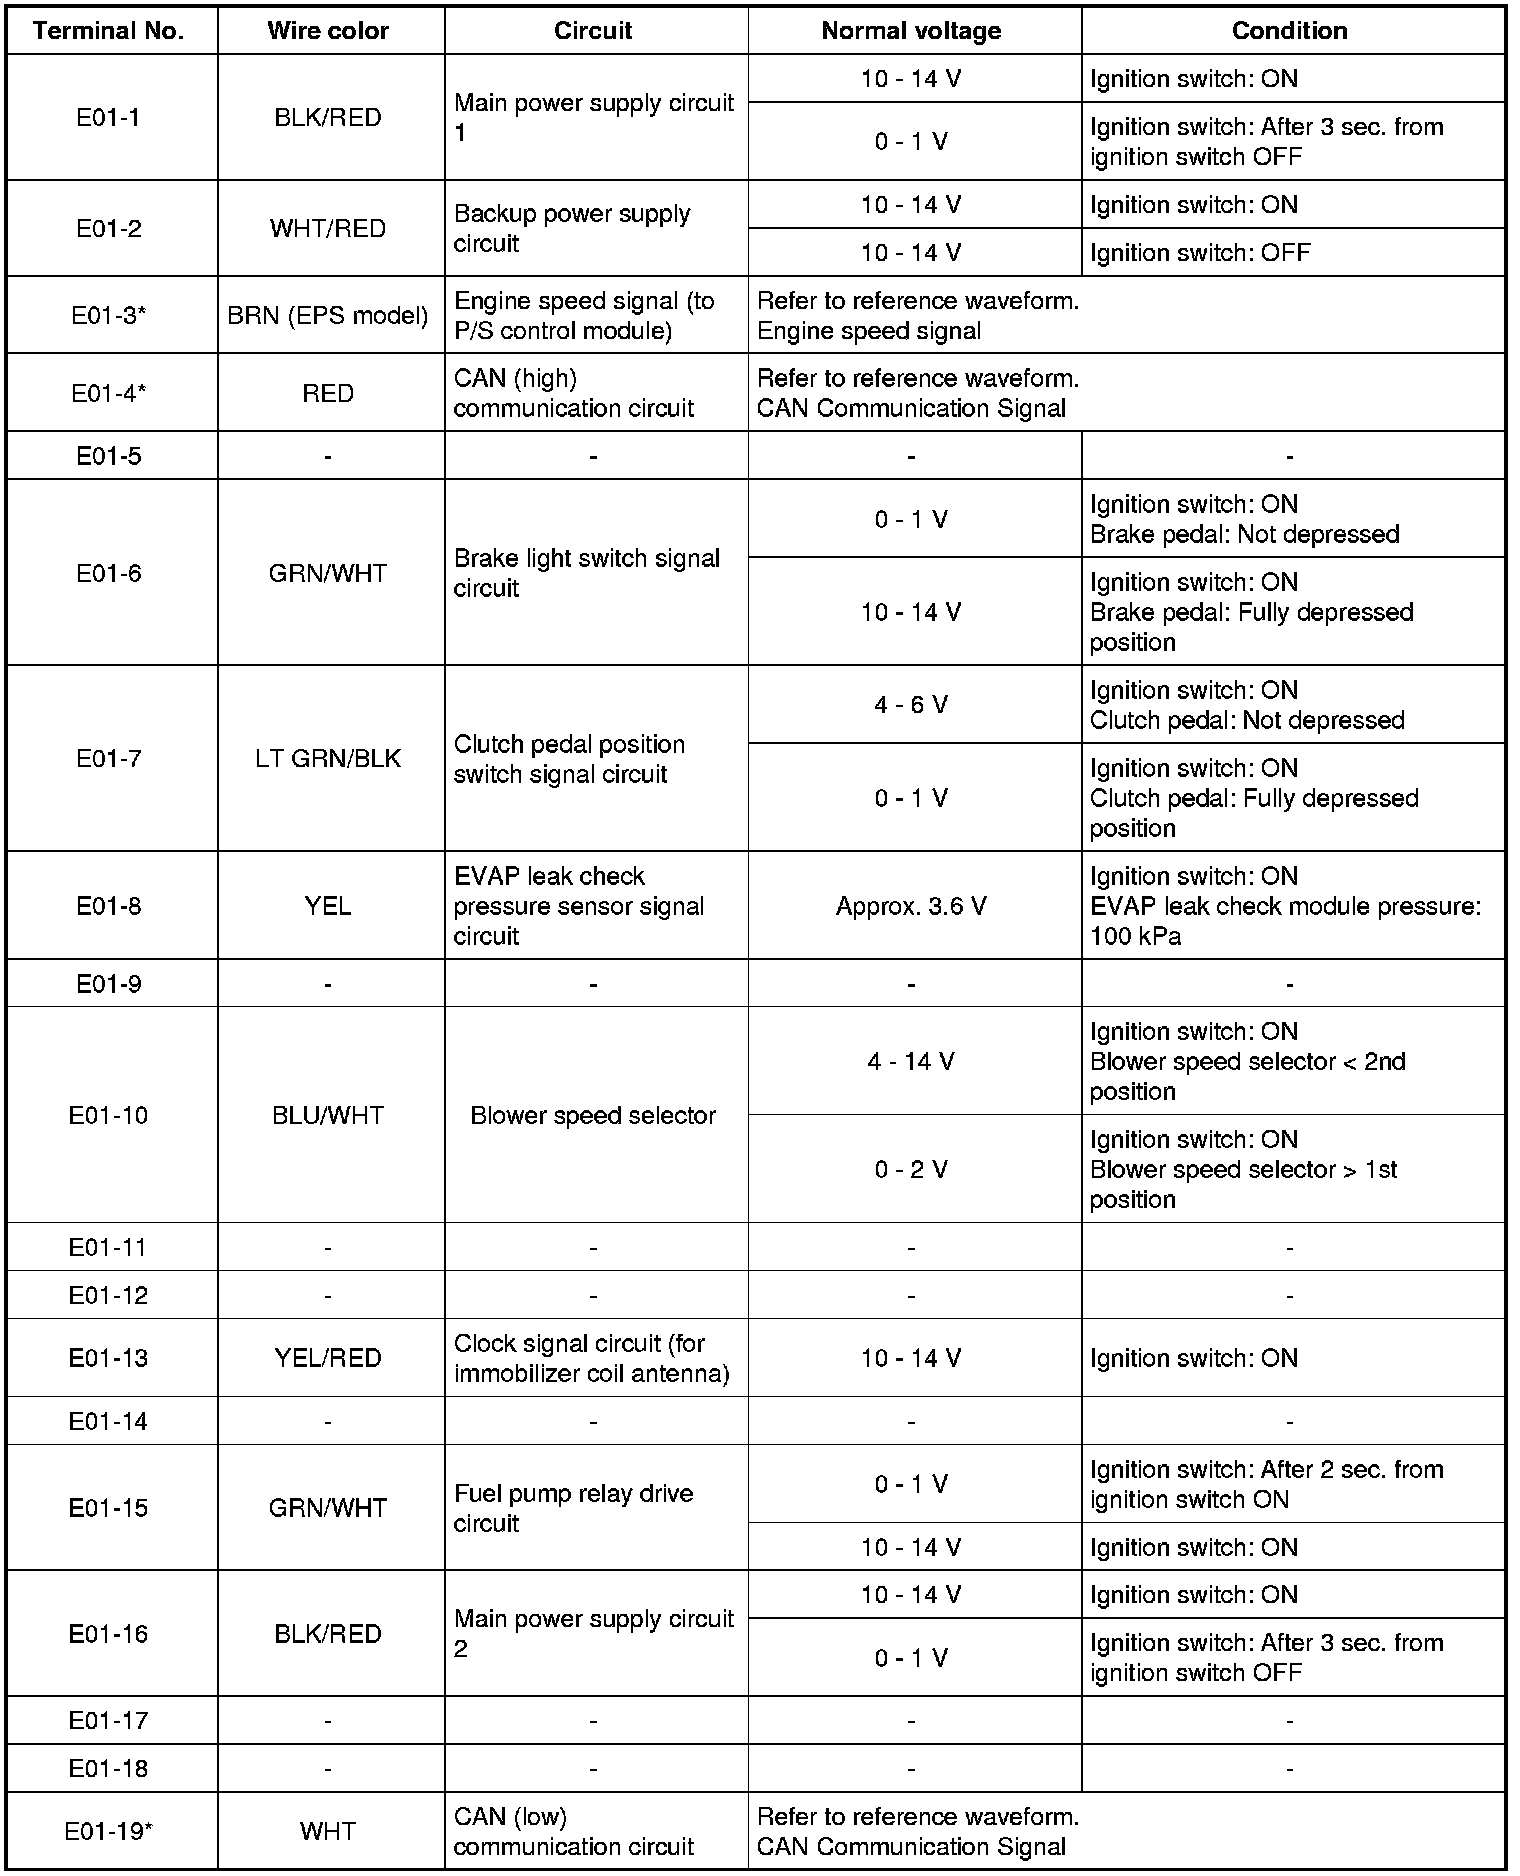
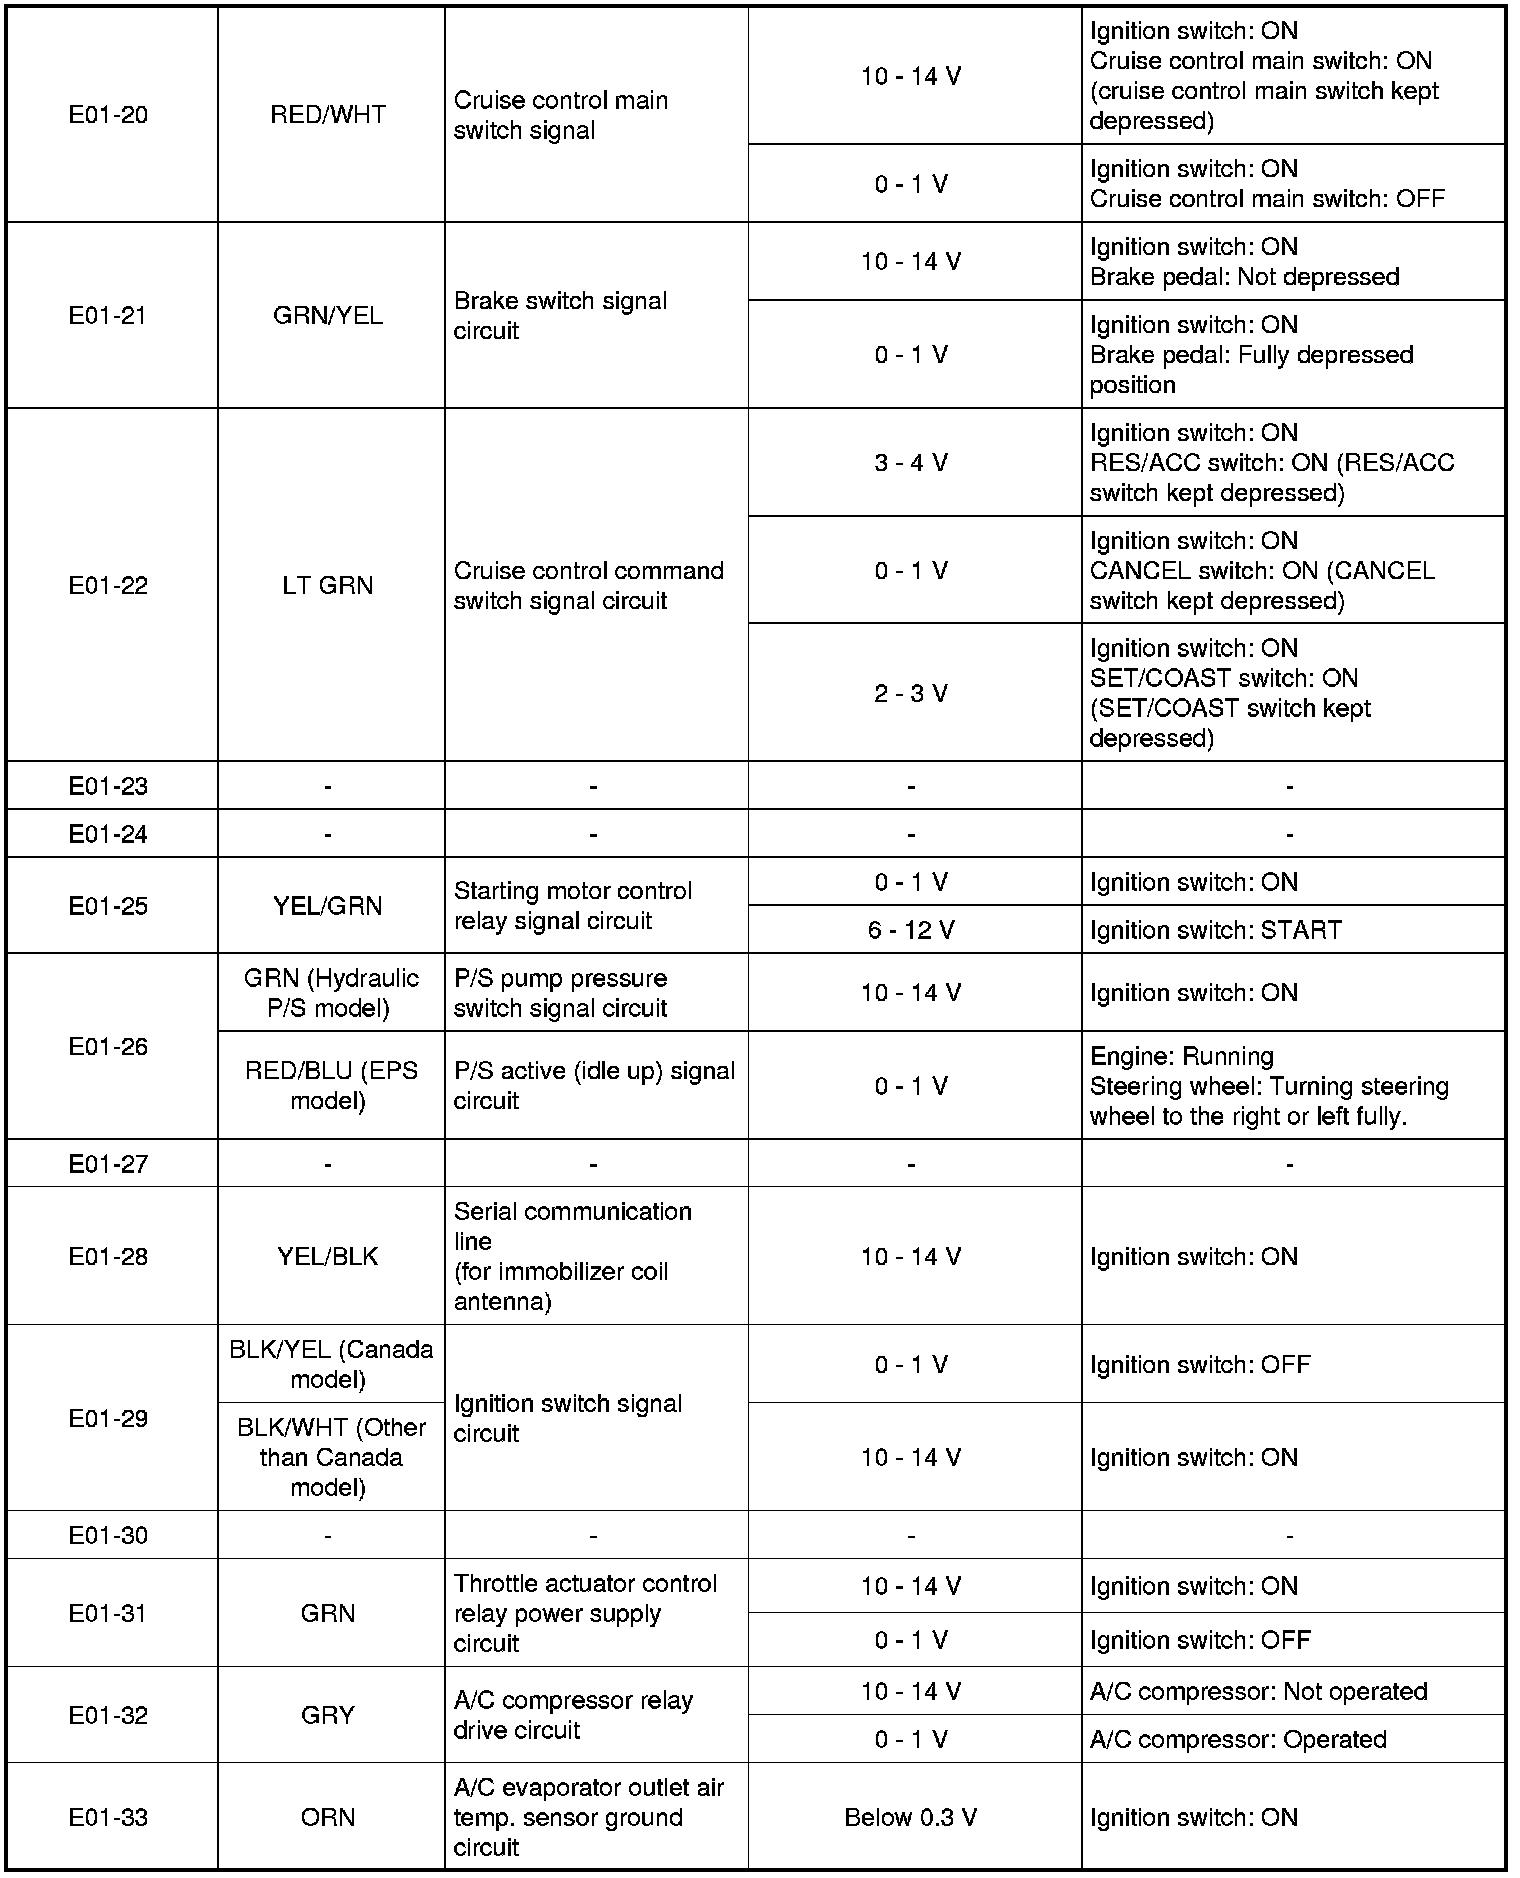
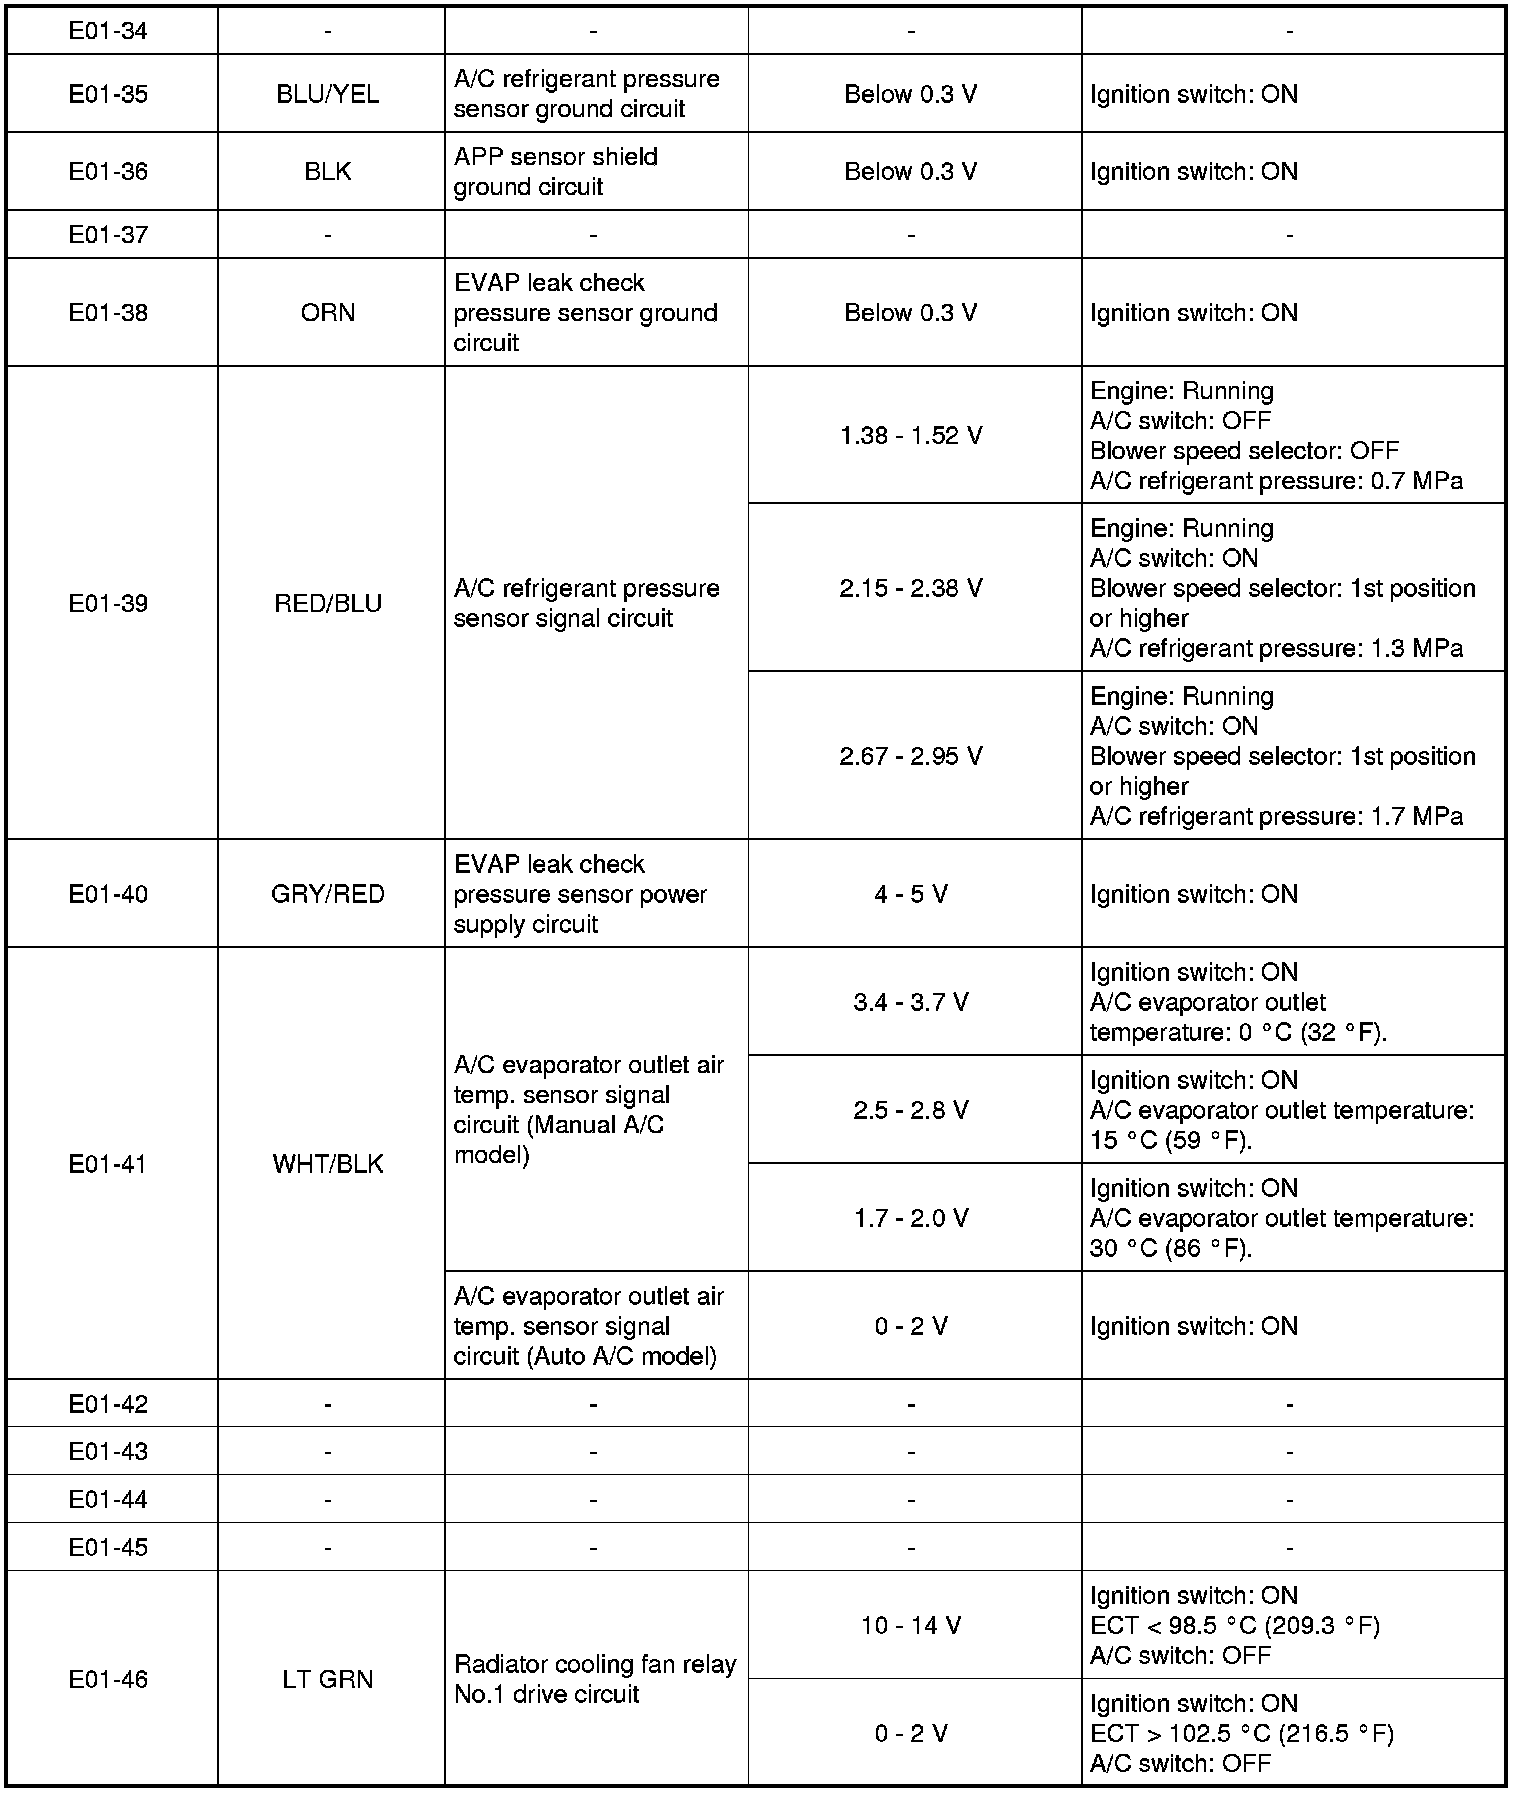
Reference waveform
NOTE:
- Waveform analysis is as follows.
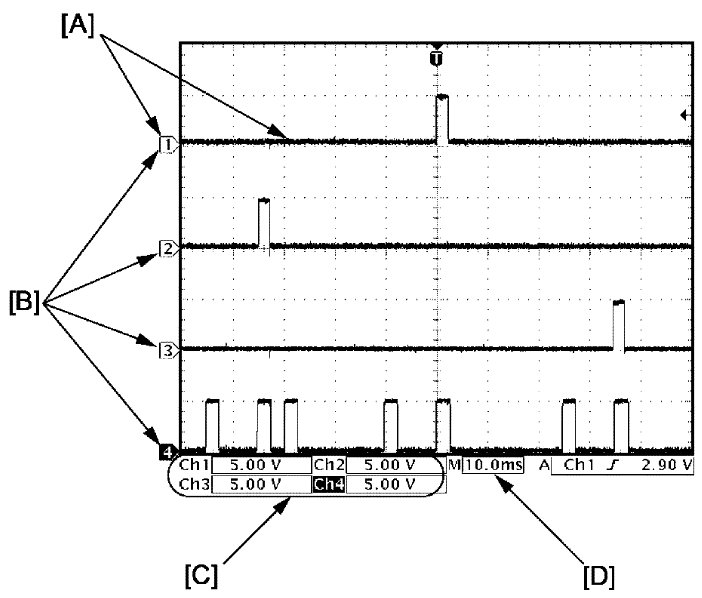

- Waveform might change for measurement condition and vehicle spec.
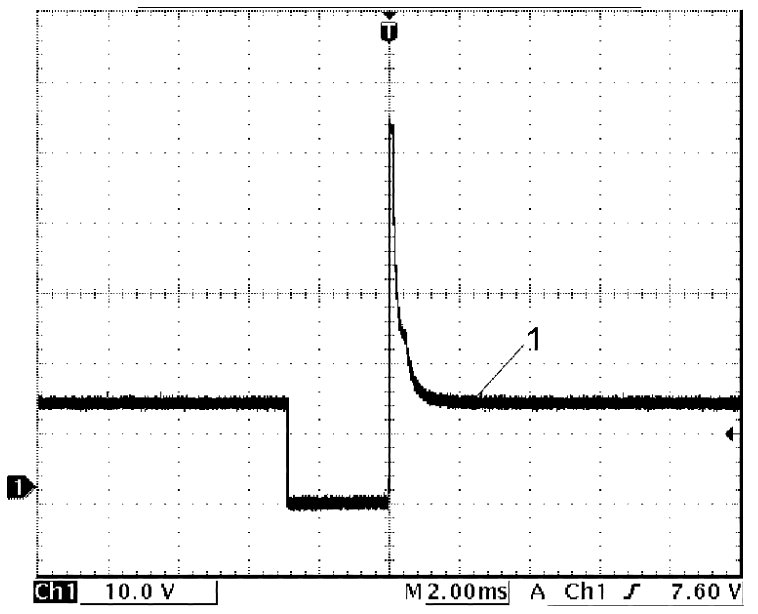
Fuel Injector Signal
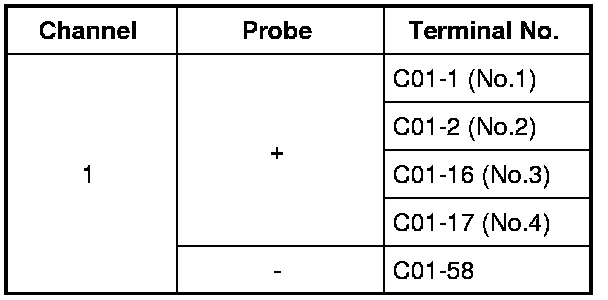
Measurement condition
- Engine: Idle speed after warm-up

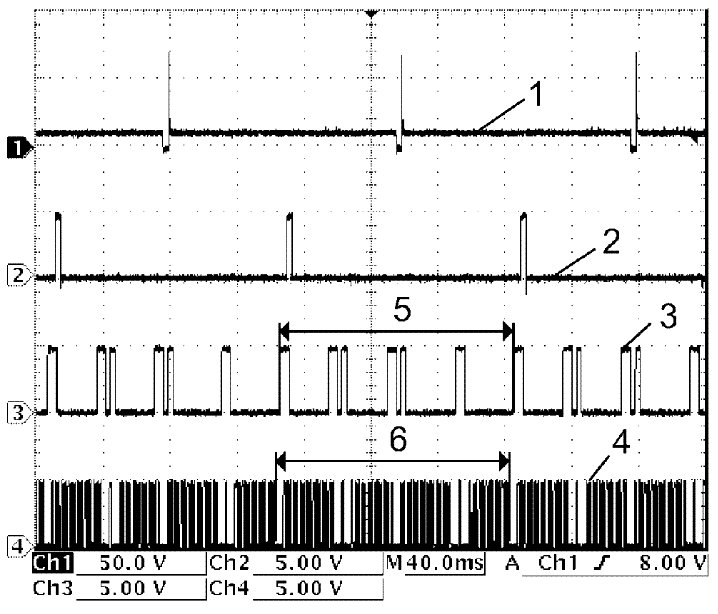
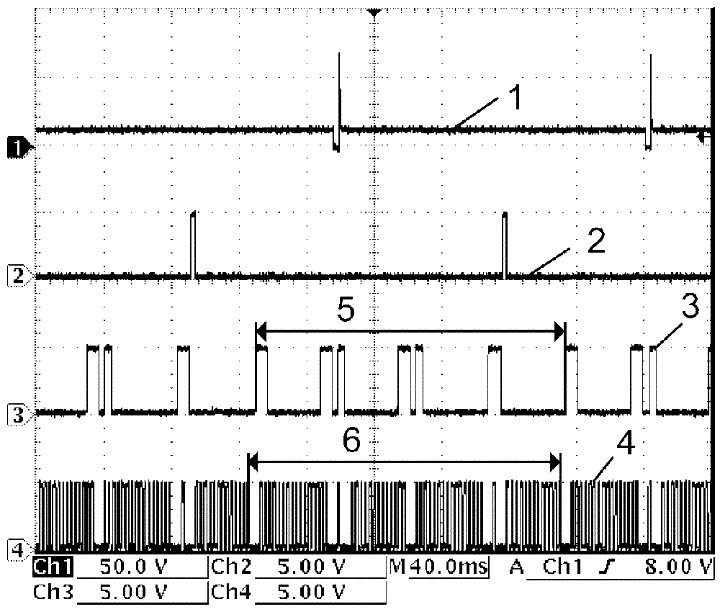
Fuel Injector No.1 Signal and Ignition Coil No.1 Signal
Fuel injector No.1 signal (1):
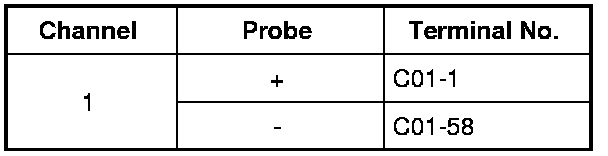
Ignition coil No.1 signal (2):
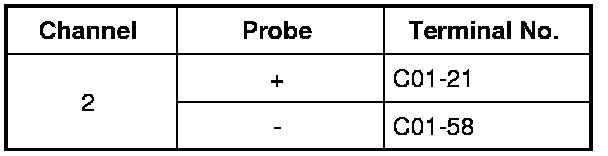
CMP sensor signal (3):
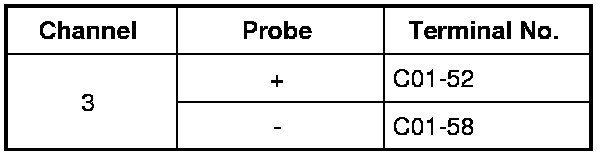
CKP sensor signal (4):
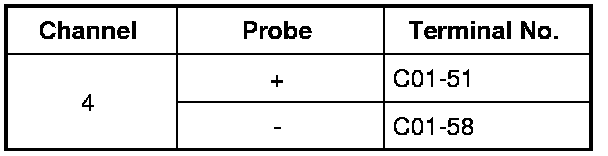
Measurement condition
- Engine: Idle speed after warm-up

Fuel Injector No.2 Signal and Ignition Coil No.2 Signal
Fuel injector No.2 signal (1):
Ignition coil No.2 signal (2):
CMP sensor signal (3):
CKP sensor signal (4):
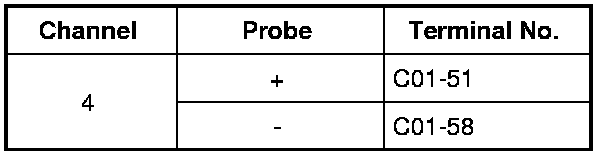
Measurement condition
- Engine: Idle speed after warm-up

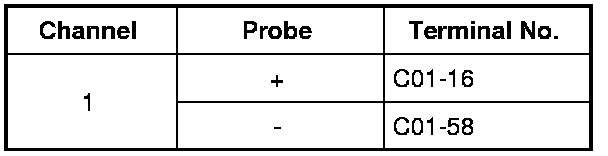
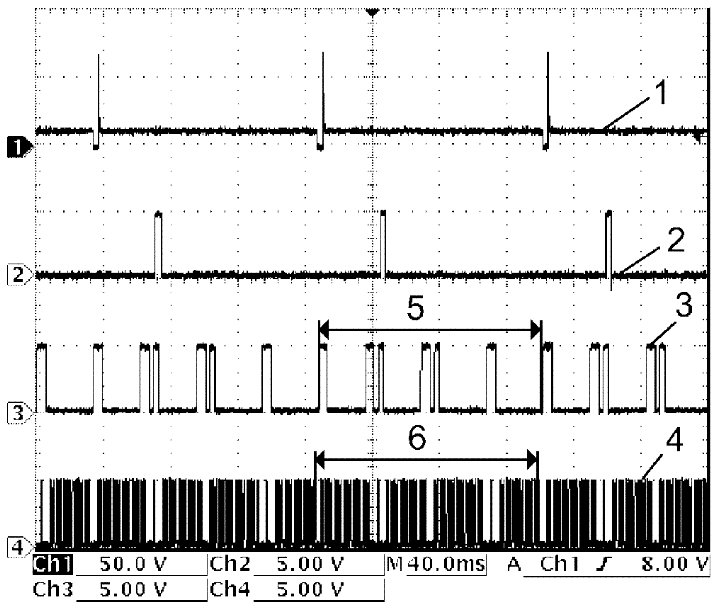
Fuel Injector No.3 Signal and Ignition Coil No.3 Signal
Fuel injector No.3 signal (1):
Ignition coil No.3 signal (2):
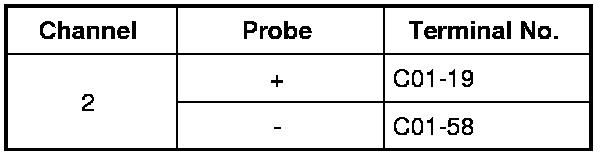
CMP sensor signal (3):
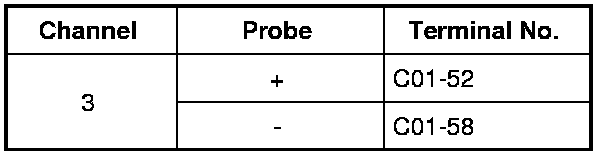
CKP sensor signal (4):
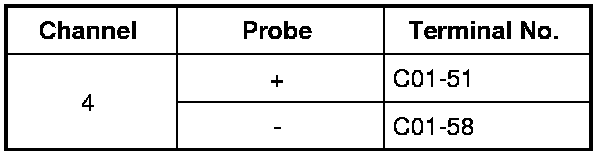
Measurement condition
- Engine: Idle speed after warm-up

Fuel Injector No.4 Signal and Ignition Coil No.4 Signal
Fuel injector No.4 signal (1):
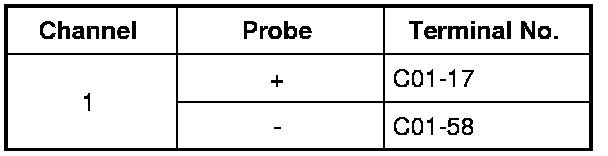
Ignition coil No.4 signal (2):
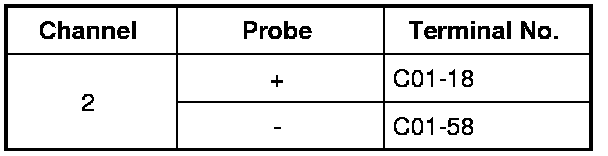
CMP sensor signal (3):
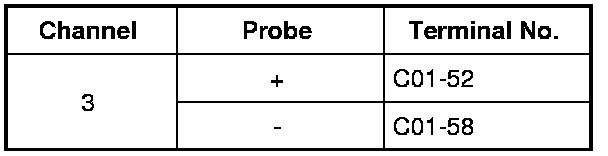
CKP sensor signal (4):
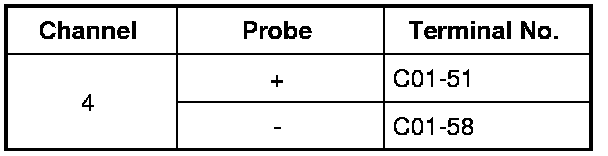
Measurement condition
- Engine: Idle speed after warm-up


Factory Service Tools
Use the Manual With the Right Hardware
Pair factory procedures with proven DIY tools so the instructions are easier to execute.
Disclosure: Verified tool recommendations may earn an affiliate commission at no cost to you.
When to See a Mechanic
Stop DIY work and contact a certified mechanic immediately if any of the following apply:
- • You smell fuel, burning insulation, or see smoke.
- • Brakes feel soft, pull hard to one side, or make grinding noises.
- • The engine overheats, stalls repeatedly, or misfires under load.
- • You are missing required tools, torque specs, or safe lifting equipment.
- • You are not confident in the next step or safety outcome.