
Safety Warning
DIY auto repair can cause serious injury, fire, or vehicle damage. These guides are for informational purposes only. Always follow OEM torque specs, wear PPE, and consult a certified mechanic if you are unsure. You are solely responsible for your safety.
2011 Subaru Outback F4-2.5L SOHCFACTORY OEM SERVICE PROCEDURE
Cruise Control Switch: Service and Repair
Cruise Control Command Switch
REMOVAL
CAUTION: Before handling the airbag module, refer to "CAUTION" of "General Description" in the "AIRBAG SYSTEM".
1. Position the front wheels straight ahead. (After moving a vehicle 5 m (16 ft) or more with front wheels positioned straight ahead, make sure that the vehicle moves straight ahead).)
2. Turn the ignition switch to OFF.
3. Disconnect the ground cable from battery and wait for at least 60 seconds before starting work.
4. Remove the driver's airbag module assembly.
Preparation tool: TORX(R) T30
1. Loosen the TORX(R) bolts located on the sides of the steering wheel.

2. Disconnect the horn harness and airbag connector and remove the airbag module assembly.

5. Remove the steering wheel.
CAUTION:
- Always use the steering wheel puller for removal to avoid deforming the steering wheel.
- If the steering wheel has been removed, make sure that the roll connector is not turned from the original position.
Preparation tool: Steering wheel puller
1. Disconnect the connector and remove the nut.
2. Put alignment marks and remove the steering wheel using a steering puller.

6. Remove the cruise control command switch.
1. Remove the screw, disconnect the connector and remove the paddle shift switch. (Model with paddle shift)

2. Disconnect the claws and then remove the lower cover.

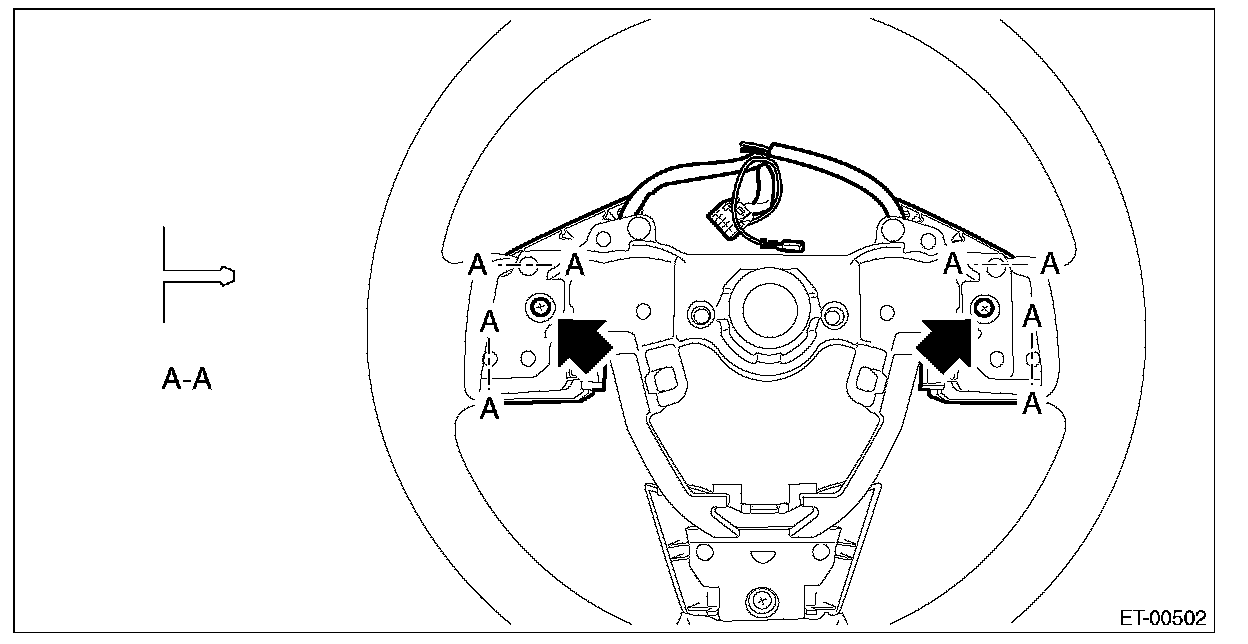
3. Remove the screw to remove the cruise control command switch assembly.
INSTALLATION
CAUTION:
- Before handling the airbag module, refer to "CAUTION" of "General Description" in the "AIRBAG SYSTEM".
- Do not allow harness and connectors to interfere or get tangled up with other parts.
1. Align the center position of the roll connector.
2. Align the alignment marks on the steering wheel and steering shaft.
3. Install each part in the reverse order of removal.
Tightening torque:
Airbag module: 10 N.m (1.02 kgf.m, 7.4 ft.lb)
Steering wheel: 39 N.m (3.98 kgf.m, 28.8 ft.lb)
Clearance between column cover and steering wheel: 2 - 4 mm (0.08 - 0.16 in)
REMOVAL
CAUTION: Before handling the airbag module, refer to "CAUTION" of "General Description" in the "AIRBAG SYSTEM".
1. Position the front wheels straight ahead. (After moving a vehicle 5 m (16 ft) or more with front wheels positioned straight ahead, make sure that the vehicle moves straight ahead).)
2. Turn the ignition switch to OFF.
3. Disconnect the ground cable from battery and wait for at least 60 seconds before starting work.
4. Remove the driver's airbag module assembly.
Preparation tool: TORX(R) T30
1. Loosen the TORX(R) bolts located on the sides of the steering wheel.
2. Disconnect the horn harness and airbag connector and remove the airbag module assembly.
5. Remove the steering wheel.
CAUTION:
- Always use the steering wheel puller for removal to avoid deforming the steering wheel.
- If the steering wheel has been removed, make sure that the roll connector is not turned from the original position.
Preparation tool: Steering wheel puller
1. Disconnect the connector and remove the nut.
2. Put alignment marks and remove the steering wheel using a steering puller.
6. Remove the cruise control command switch.
1. Remove the screw, disconnect the connector and remove the paddle shift switch. (Model with paddle shift)
2. Disconnect the claws and then remove the lower cover.
3. Remove the screw to remove the cruise control command switch assembly.
INSTALLATION
CAUTION:
- Before handling the airbag module, refer to "CAUTION" of "General Description" in the "AIRBAG SYSTEM".
- Do not allow harness and connectors to interfere or get tangled up with other parts.
1. Align the center position of the roll connector.
2. Align the alignment marks on the steering wheel and steering shaft.
3. Install each part in the reverse order of removal.
Tightening torque:
Airbag module: 10 N.m (1.02 kgf.m, 7.4 ft.lb)
Steering wheel: 39 N.m (3.98 kgf.m, 28.8 ft.lb)
Clearance between column cover and steering wheel: 2 - 4 mm (0.08 - 0.16 in)
Factory Service Tools
Use the Manual With the Right Hardware
Pair factory procedures with proven DIY tools so the instructions are easier to execute.
Disclosure: Verified tool recommendations may earn an affiliate commission at no cost to you.
When to See a Mechanic
Stop DIY work and contact a certified mechanic immediately if any of the following apply:
- • You smell fuel, burning insulation, or see smoke.
- • Brakes feel soft, pull hard to one side, or make grinding noises.
- • The engine overheats, stalls repeatedly, or misfires under load.
- • You are missing required tools, torque specs, or safe lifting equipment.
- • You are not confident in the next step or safety outcome.