
Safety Warning
DIY auto repair can cause serious injury, fire, or vehicle damage. These guides are for informational purposes only. Always follow OEM torque specs, wear PPE, and consult a certified mechanic if you are unsure. You are solely responsible for your safety.
2007 Subaru Outback F6-3.0L DOHCFACTORY OEM SERVICE PROCEDURE
Converter Case
Converter Case
REMOVAL
1. Remove the transmission assembly from vehicle.
2. Remove the torque converter assembly.
3. Remove the transmission harness connector from stay.
4. Remove the turbine speed sensor 1.
5. Remove the oil charge pipe.
6. Remove the ATF filter inlet and outlet pipes.
7. Remove the converter case aligning bolt.
8. Lay along the transmission body, and then remove the oil pan.

9. Remove the three converter case aligning bolts TORX.
ST 18676AA020 TORX WRENCH
10. Separate the converter case by lightly tapping with plastic hammer.
11. Remove the differential assembly.
12. Remove the oil seal from converter case.
INSTALLATION
1. Check the appearance of each component and clean them.

2. Press-fit the oil seal to converter case using ST.
ST 499587100 OIL SEAL INSTALLER
3. Install the differential assembly to case.
4. Install the left and right side retainers.

5. Apply proper amount of liquid gasket to the entire matching surface of converter case.
Liquid gasket: THREE BOND 1215 (Part No. 004403007)
6. Install the converter case assembly without damaging bushing and oil seal.
Tightening torque: 41 Nm (4.2 kgf-cm, 30.4 ft. lbs.)

7. Install the three converter case aligning bolts TORX.
ST 18676AA020 TORX WRENCH
Tightening torque: 41 Nm (4.2 kgf-cm, 30.4 ft. lbs.)
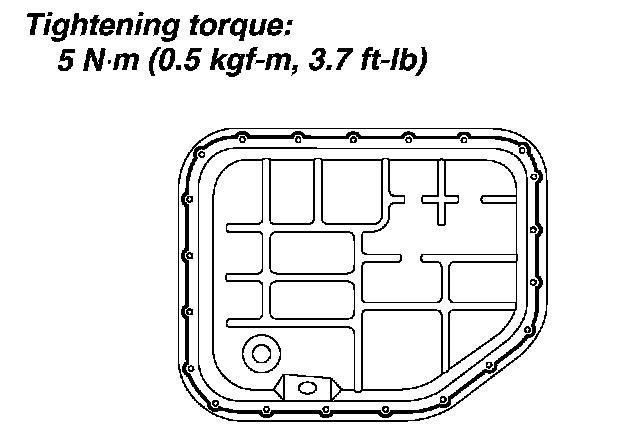
8. Apply proper amount of liquid gasket to the entire oil pan mating surface, and then install it.
Liquid gasket: THREE BOND 1217B (Part No. K0877YA020)
Tightening torque: 5 Nm (0.5 kgf-cm, 3.7 ft. lbs.)
9. Install the transmission harness connector to the stay.
10. Install the air breather hose.
11. Install the ATF filter pipe.
12. Install the oil charge pipe with O-ring.
13. Install the torque converter assembly.
14. Install the transmission assembly into vehicle.
INSPECTION
Measure the backlash, and then adjust it within specification.
REMOVAL
1. Remove the transmission assembly from vehicle.
2. Remove the torque converter assembly.
3. Remove the transmission harness connector from stay.
4. Remove the turbine speed sensor 1.
5. Remove the oil charge pipe.
6. Remove the ATF filter inlet and outlet pipes.
7. Remove the converter case aligning bolt.
8. Lay along the transmission body, and then remove the oil pan.
9. Remove the three converter case aligning bolts TORX.
ST 18676AA020 TORX WRENCH
10. Separate the converter case by lightly tapping with plastic hammer.
11. Remove the differential assembly.
12. Remove the oil seal from converter case.
INSTALLATION
1. Check the appearance of each component and clean them.
2. Press-fit the oil seal to converter case using ST.
ST 499587100 OIL SEAL INSTALLER
3. Install the differential assembly to case.
4. Install the left and right side retainers.
5. Apply proper amount of liquid gasket to the entire matching surface of converter case.
Liquid gasket: THREE BOND 1215 (Part No. 004403007)
6. Install the converter case assembly without damaging bushing and oil seal.
Tightening torque: 41 Nm (4.2 kgf-cm, 30.4 ft. lbs.)
7. Install the three converter case aligning bolts TORX.
ST 18676AA020 TORX WRENCH
Tightening torque: 41 Nm (4.2 kgf-cm, 30.4 ft. lbs.)
8. Apply proper amount of liquid gasket to the entire oil pan mating surface, and then install it.
Liquid gasket: THREE BOND 1217B (Part No. K0877YA020)
Tightening torque: 5 Nm (0.5 kgf-cm, 3.7 ft. lbs.)
9. Install the transmission harness connector to the stay.
10. Install the air breather hose.
11. Install the ATF filter pipe.
12. Install the oil charge pipe with O-ring.
13. Install the torque converter assembly.
14. Install the transmission assembly into vehicle.
INSPECTION
Measure the backlash, and then adjust it within specification.
Factory Service Tools
Use the Manual With the Right Hardware
Pair factory procedures with proven DIY tools so the instructions are easier to execute.
Disclosure: Verified tool recommendations may earn an affiliate commission at no cost to you.
When to See a Mechanic
Stop DIY work and contact a certified mechanic immediately if any of the following apply:
- • You smell fuel, burning insulation, or see smoke.
- • Brakes feel soft, pull hard to one side, or make grinding noises.
- • The engine overheats, stalls repeatedly, or misfires under load.
- • You are missing required tools, torque specs, or safe lifting equipment.
- • You are not confident in the next step or safety outcome.