
Safety Warning
DIY auto repair can cause serious injury, fire, or vehicle damage. These guides are for informational purposes only. Always follow OEM torque specs, wear PPE, and consult a certified mechanic if you are unsure. You are solely responsible for your safety.
2012 Scion tC L4-2.5L (2AR-FE)FACTORY OEM SERVICE PROCEDURE
Front Wheel Alignment
ALIGNMENT / HANDLING DIAGNOSIS: FRONT WHEEL ALIGNMENT: ADJUSTMENT
1. INSPECT TIRES
Component Tests and General Diagnostics
2. MEASURE VEHICLE HEIGHT
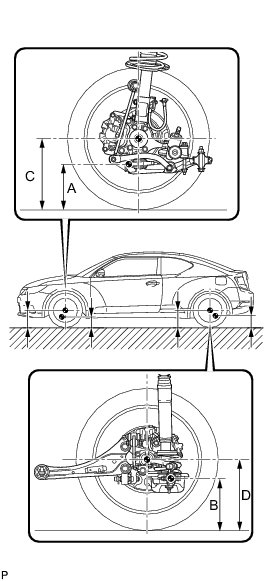
NOTICE:
* Before inspecting the wheel alignment, adjust the vehicle height to the specified value.
* Be sure to perform the measurement on a level surface.
* If it is necessary to go under the vehicle for measurement, make sure that the parking brake is applied and the vehicle is secured with chocks.
(a) Bounce the vehicle up and down at the corners several times to stabilize the suspension.
(b) Measure the vehicle height.
Measuring points:
A
Ground clearance of center of front No. 1 lower suspension arm bushing set bolt
B
Ground clearance of center of rear No. 2 suspension arm bushing set bolt
C
Ground clearance of center of front wheel
D
Ground clearance of center of rear wheel
Standard Vehicle Height (Unloaded Vehicle):
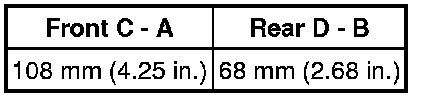
NOTICE:
The standard value shown here is a value that is used for adjusting the wheel alignment and does not indicate the height of an actual vehicle.
3. INSPECT CAMBER, CASTER AND STEERING AXIS INCLINATION
(a) Install a camber-caster-kingpin gauge or place the front wheels on the center of a wheel alignment tester.
Text in Illustration
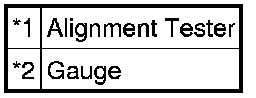
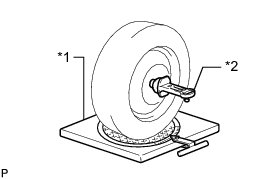
(b) Inspect the camber, caster and steering axis inclination.
Standard Camber Inclination (Unloaded Vehicle):

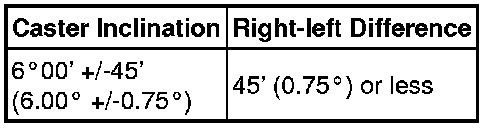
Standard Caster Inclination (Unloaded Vehicle):
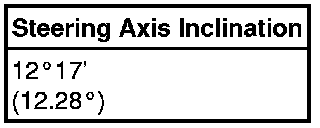
Standard Steering Axis Inclination (Unloaded Vehicle):
4. ADJUST CAMBER
NOTICE:
Inspect toe-in after the camber has been adjusted.
(a) Remove the front wheel.*1
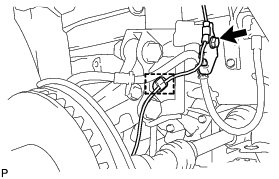
(b) Remove the bolt, detach the clamp and disconnect the front speed sensor.*2
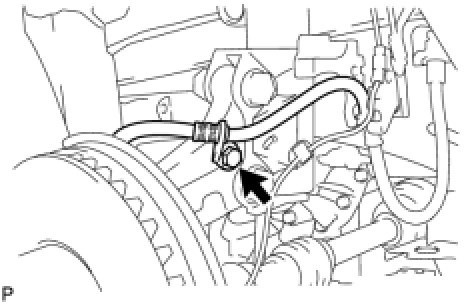
(c) Remove the bolt and disconnect the front flexible hose.*3
(d) Remove the 2 nuts on the lower side of the front shock absorber.
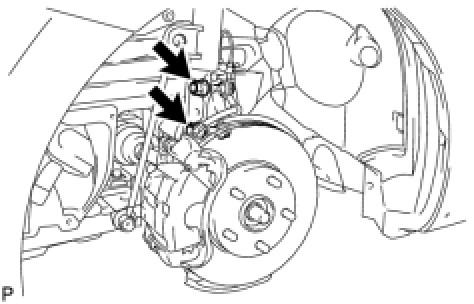
NOTICE:
Keep the bolts inserted.
(e) Clean the installation surfaces of the front shock absorber and steering knuckle.
(f) Temporarily install the 2 nuts (Step A).
(g) Fully push or pull the front axle hub in the direction of the required adjustment (Step B).
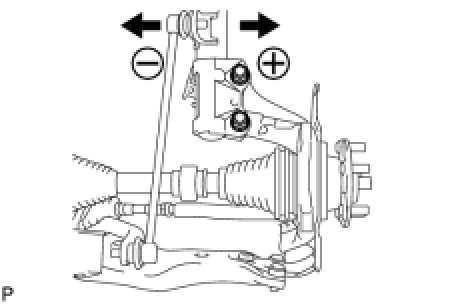
(h) Tighten the nuts.*4
Torque : 240 Nm (2447 kgf-cm, 177 ft-lbf)
NOTICE:
Prevent the bolts from rotating when tightening the nuts.
(i) Connect the front flexible hose to the steering knuckle with the bolt.*5
Torque : 19 Nm (192 kgf-cm, 14 ft-lbf)
(j) Connect the front flexible hose and front speed sensor with the bolt.*6
Torque : 19 Nm (192 kgf-cm, 14 ft-lbf)
NOTICE:
Do not twist the front speed sensor when installing it.
(k) Attach the clamp of the front speed sensor.*7
(l) Install the front wheel.*8
Torque : 103 Nm (1050 kgf-cm, 76 ft-lbf)
(m) Check the camber.
Standard Camber Inclination (Unloaded Vehicle):

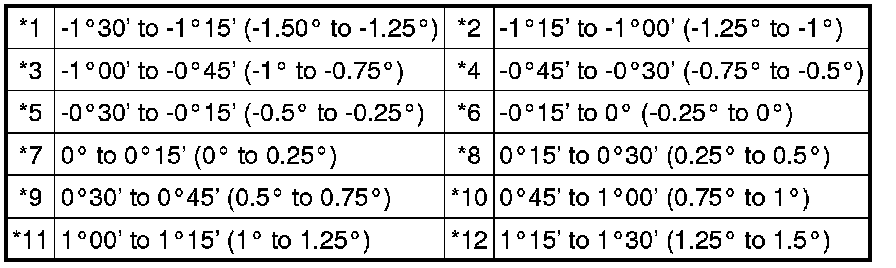
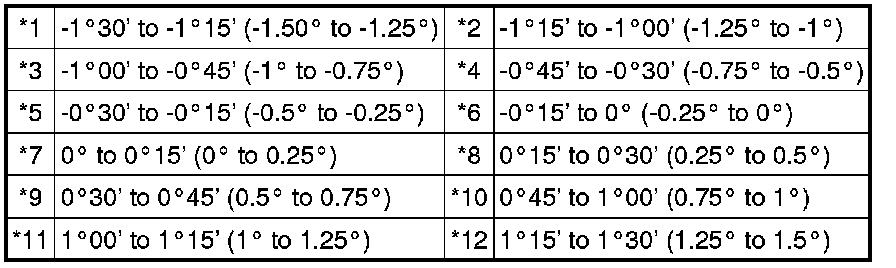
(n) Perform steps *1 to *3.
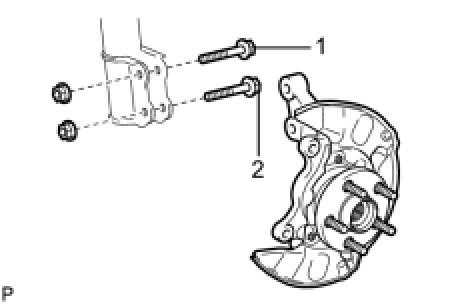
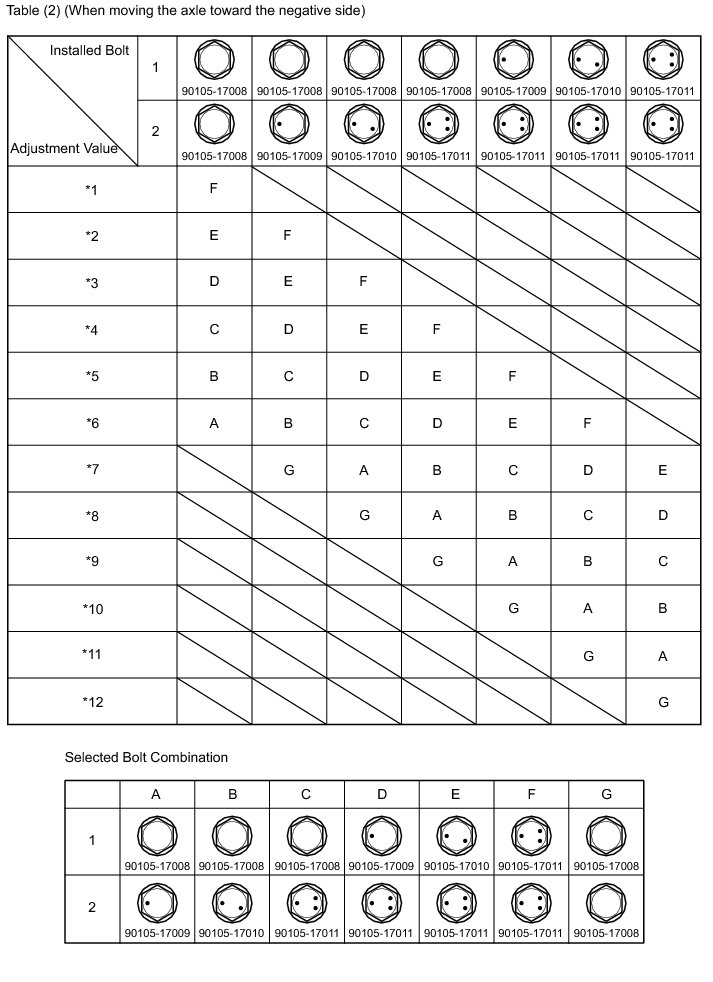
If the measured value is not within the specification, calculate the required adjustment amount using the formula below.
Camber adjustment amount = center value of the specified range - measured value.
Check the combination of installed bolts. Select appropriate bolts from the table below to adjust the camber to the specified values.
HINT
Try to adjust the camber to the center of the specified range.

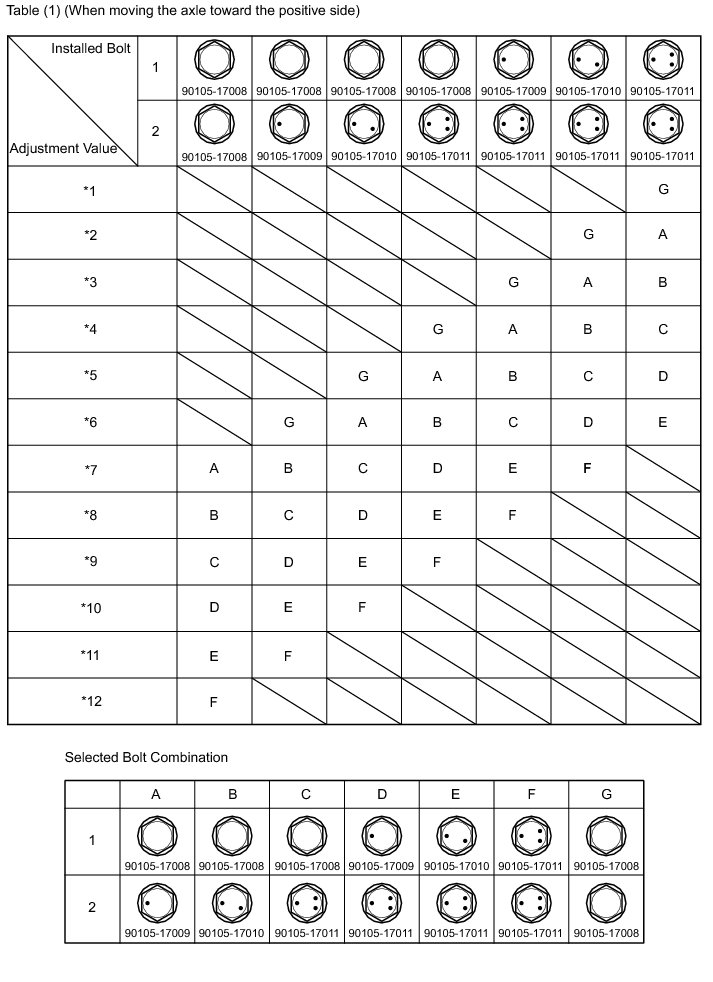
Text in Illustration
Text in Illustration
NOTICE:
Replace the nut with a new one when replacing a bolt.
(O) Remove the 2 nuts on the lower side of the front shock absorber.
(p) Replace the adjustment bolts with the selected ones.
(q) Install the 2 nuts on the lower side of the front shock absorber.
(r) Check the camber.
The body and suspension may be damaged if the camber is not correctly adjusted according to the table above.
(s) Perform steps *4 to *8.
5. INSPECT TOE-IN
(a) Bounce the vehicle up and down at the corners to stabilize the suspension.
(b) Release the parking brake and move the shift lever to N.
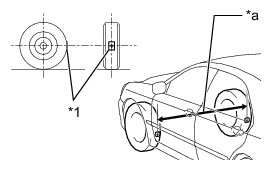
(c) Push the vehicle straight ahead approximately 5 m (16.4 ft.).*1
(d) Put tread center marks on the rearmost points of the front wheels and measure the distance between the marks (dimension B).
Text in Illustration

(e) Slowly push the vehicle straight ahead to rotate the front wheels 180° using the front tire valve as a reference point.
HINT
Do not allow the wheels to rotate more than 180°. If the wheels rotate more than 180°, perform the procedure from *1 again.
(f) Measure the distance between the tread center marks on the front side of the wheels (dimension A).
Text in Illustration
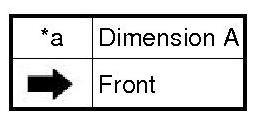
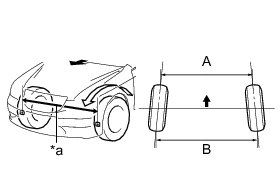
Toe-in:
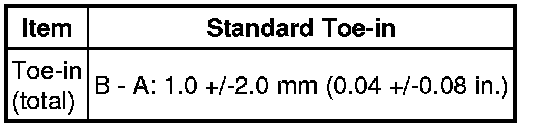
HINT
If toe-in is not within the specified range, adjust it at the rack ends.
6. ADJUST TOE-IN
(a) Make sure that the lengths of the right and left rack ends are almost the same.
Text in Illustration

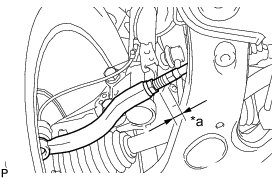
Standard difference:
1.5 mm (0.06 in.) or less
(b) Remove the boot clips.
(c) Loosen the tie rod end lock nuts.
Text in Illustration
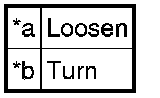
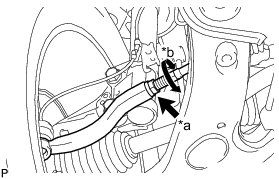
(d) Turn the right and left rack ends by an equal amount to adjust the toe-in to the center value.
(e) Tighten the tie rod end lock nuts.
Torque : 88 Nm (897 kgf-cm, 65 ft-lbf)
(f) Place the boots on the seats and install the clips.
HINT
Make sure that the boots are not twisted.
7. INSPECT WHEEL ANGLE
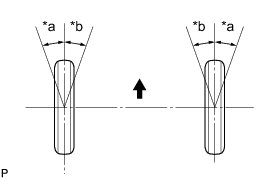
(a) Turn the steering wheel to the left and right full lock positions and measure the turning angle.
Text in Illustration
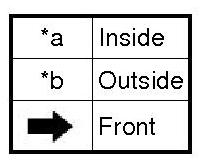
Standard Wheel Turning Angle (Unloaded Vehicle):
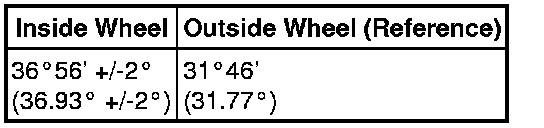
* If the angles are not as specified, check and adjust the right and left rack end lengths.
8. PLACE FRONT WHEELS FACING STRAIGHT AHEAD
9. PERFORM YAW RATE SENSOR ZERO POINT CALIBRATION
Programming and Relearning
Factory Service Tools
Use the Manual With the Right Hardware
Pair factory procedures with proven DIY tools so the instructions are easier to execute.
Disclosure: Verified tool recommendations may earn an affiliate commission at no cost to you.
When to See a Mechanic
Stop DIY work and contact a certified mechanic immediately if any of the following apply:
- • You smell fuel, burning insulation, or see smoke.
- • Brakes feel soft, pull hard to one side, or make grinding noises.
- • The engine overheats, stalls repeatedly, or misfires under load.
- • You are missing required tools, torque specs, or safe lifting equipment.
- • You are not confident in the next step or safety outcome.