
Safety Warning
DIY auto repair can cause serious injury, fire, or vehicle damage. These guides are for informational purposes only. Always follow OEM torque specs, wear PPE, and consult a certified mechanic if you are unsure. You are solely responsible for your safety.
2008 Pontiac G5 L4-2.4LFACTORY OEM SERVICE PROCEDURE
Timing Component Alignment Marks: Locations
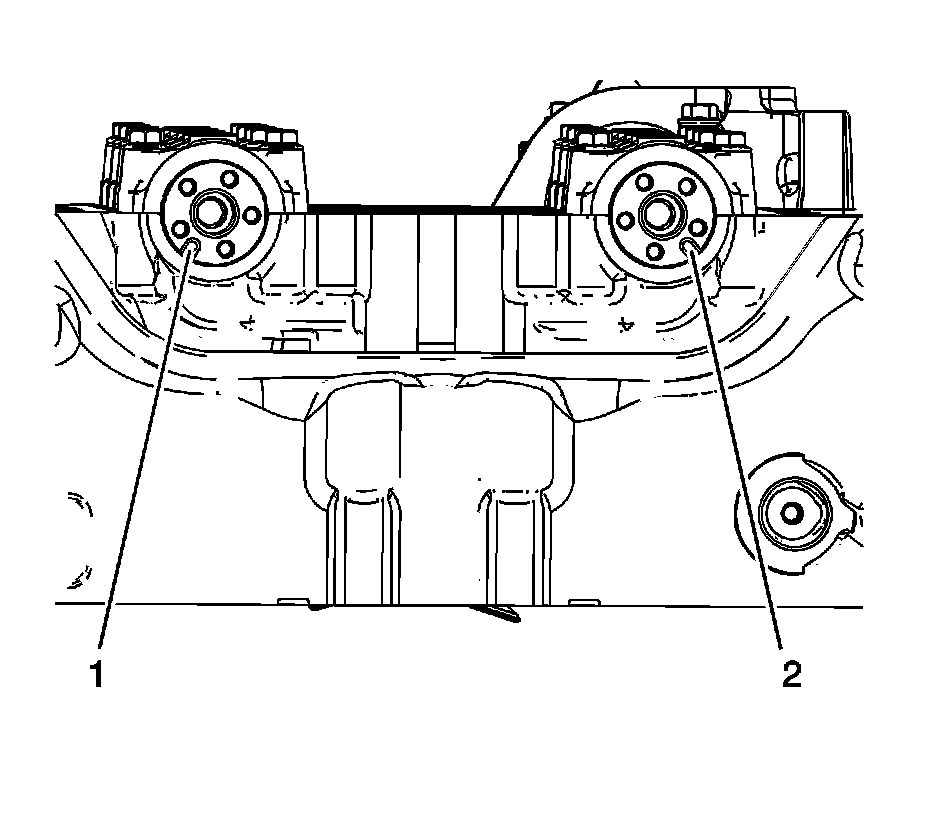
^ Ensure the intake camshaft notch is in the 5 o'clock position (2) and the exhaust camshaft notch is in the 7 o'clock position (1). The number 1 piston should be at top dead center (TDC), crankshaft key at 12 o'clock.
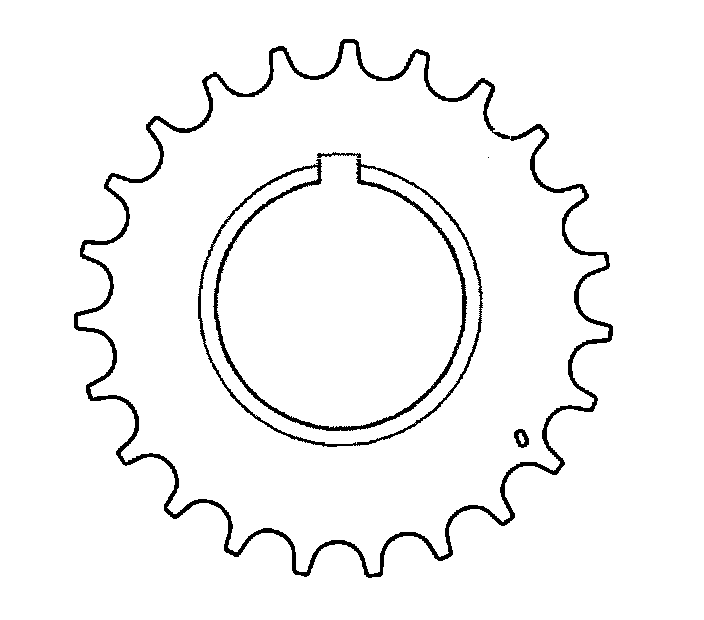
^ Install the timing chain drive sprocket to the crankshaft with the timing mark in the 5 o'clock position and the front of the sprocket facing out.
Important:
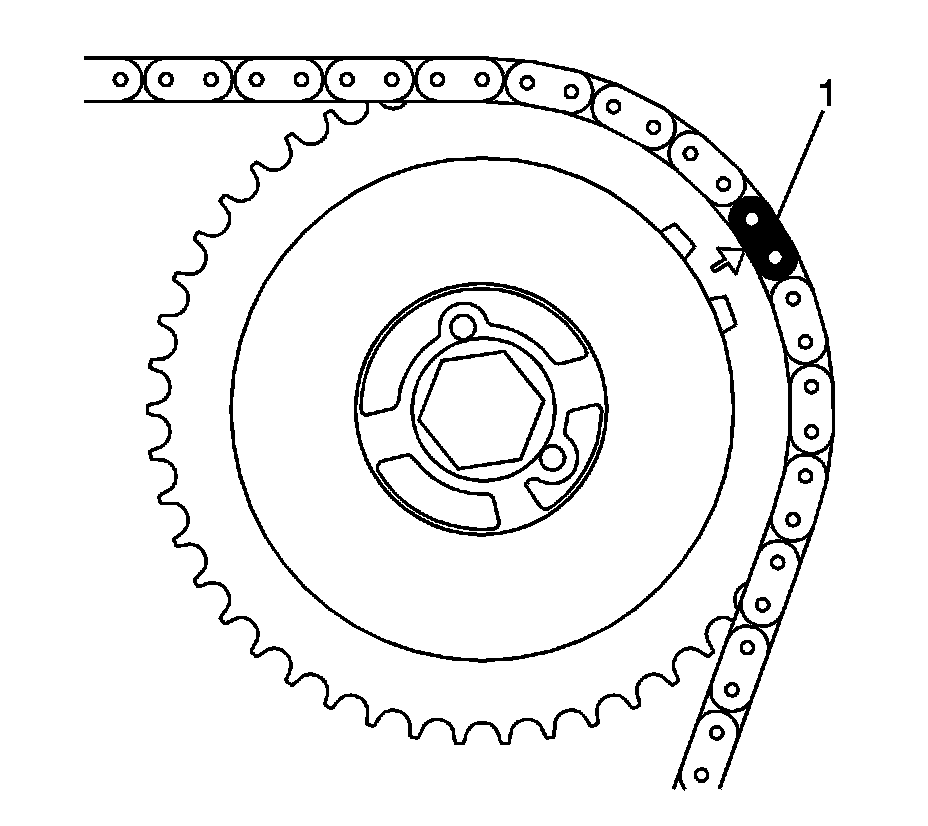
* There are 3 colored links on the timing chain. Two links are of matching color, and 1 link is of a unique color. Use the following procedure to line up the links with the actuators. Orient the chain so that the colored links are visible.
* Always use new actuator bolts.
^ Assemble the intake camshaft actuator into the timing chain with the timing mark lined up with the uniquely colored link (1).
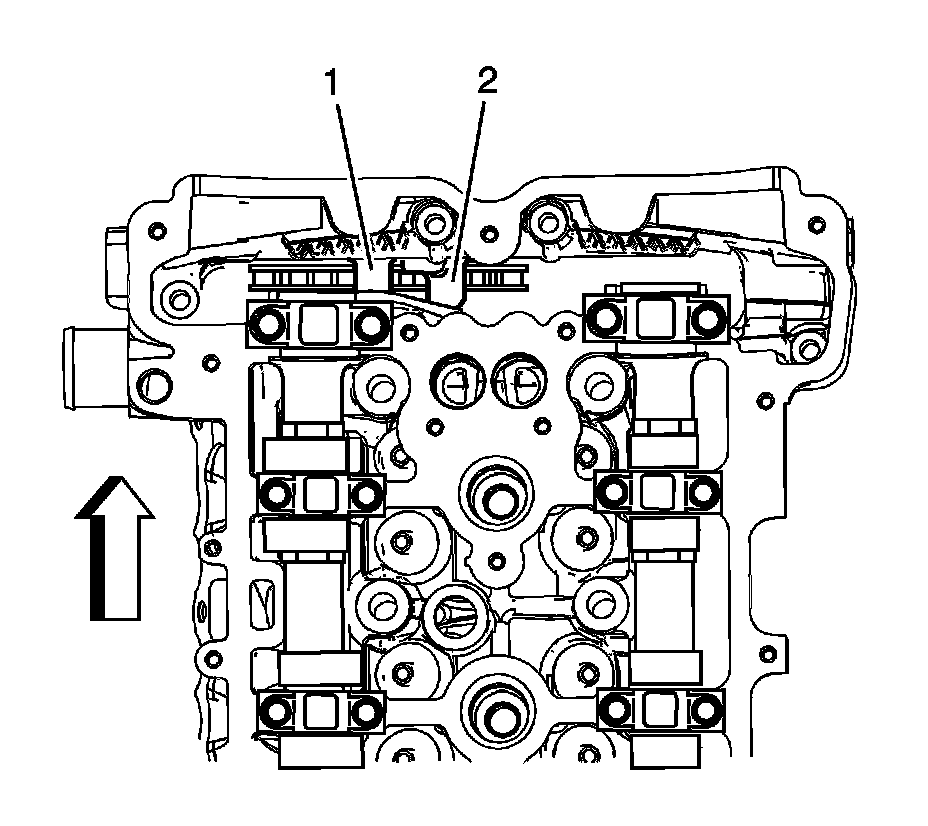
^ Lower the timing chain through the opening in the cylinder head. Use care to ensure that the chain goes around both sides of the cylinder block bosses (1, 2).
^ Install the intake camshaft actuator onto the intake camshaft while aligning the dowel pin into the camshaft slot.
^ Hand tighten the new intake camshaft actuator bolt.
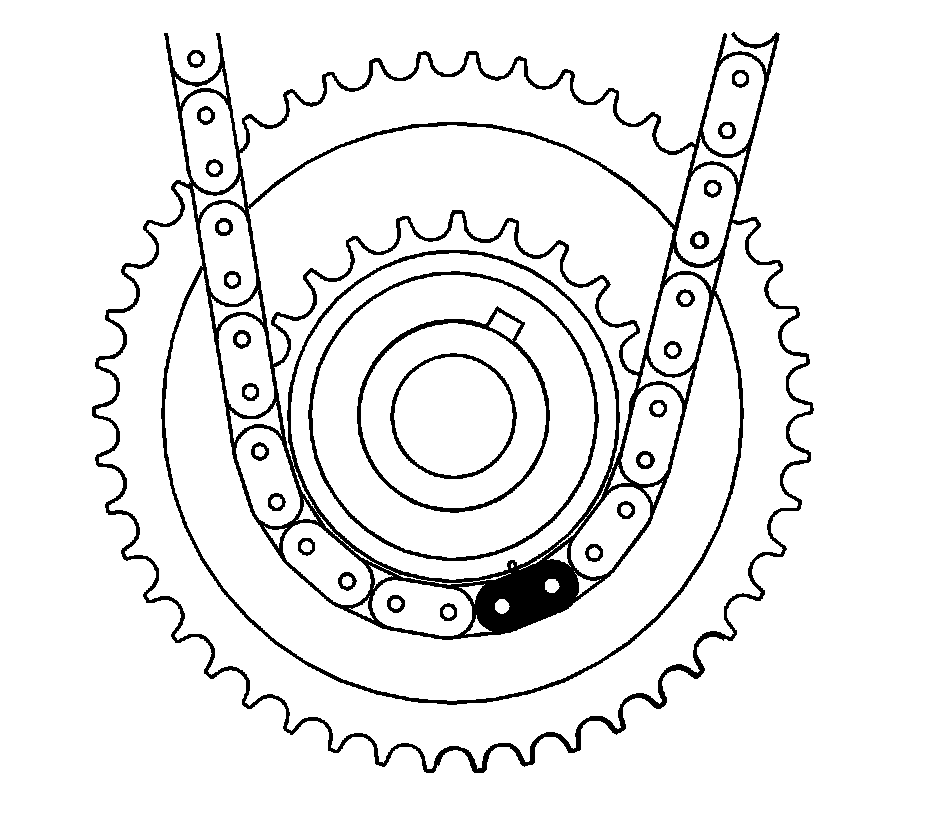
^ Route the timing chain around the crankshaft sprocket and line up the first matching colored link (2) with the timing mark on the crankshaft sprocket, in approximately the 5 o'clock position.
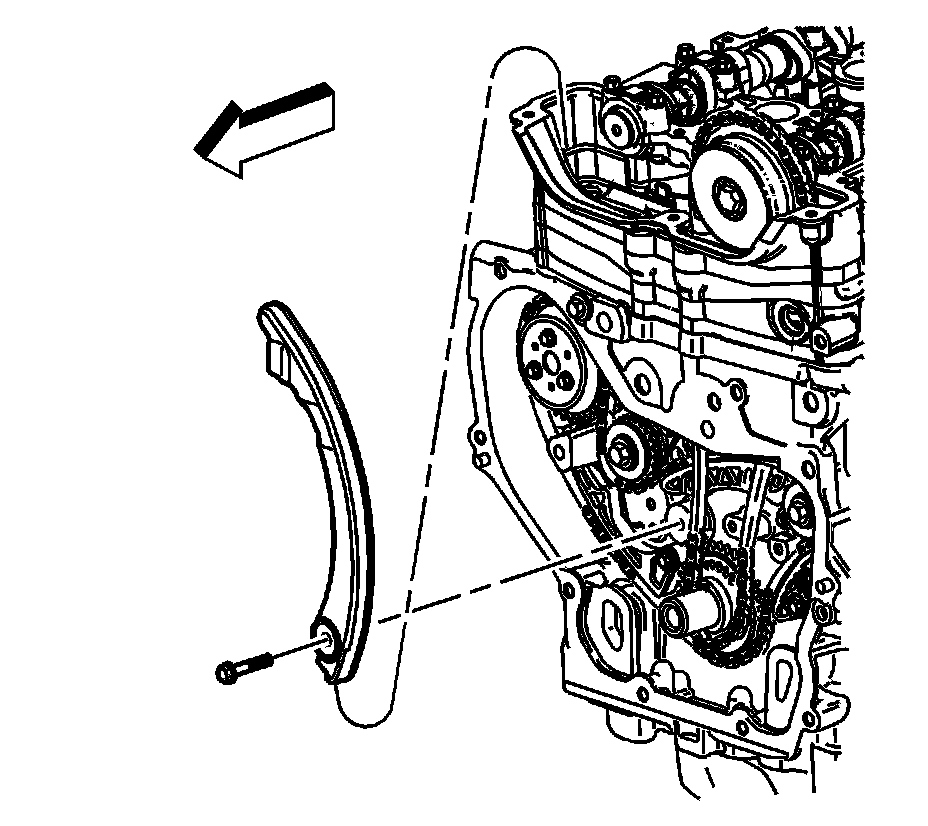
^ Rotate the crankshaft clockwise to remove all chain slack. Do not rotate the intake camshaft.
^ Install the adjustable timing chain guide down through the opening in the cylinder head and install the adjustable timing chain bolt.
^ Tighten the adjustable timing chain guide bolt to 10 N.m (89 lb in).
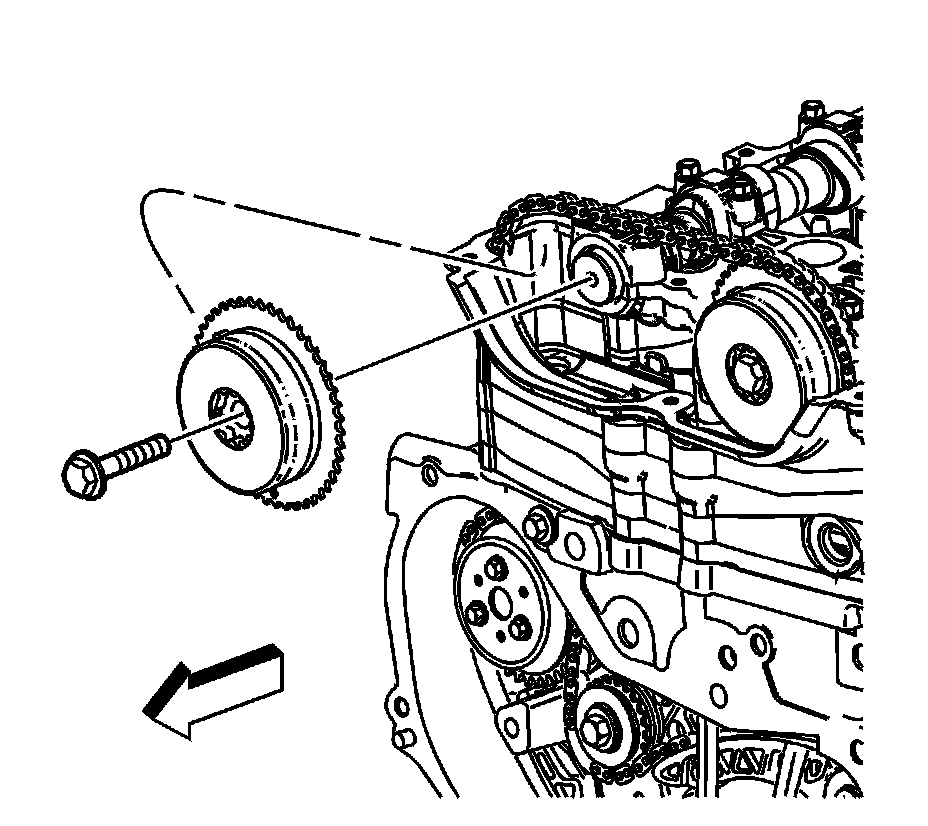
Important: Always install NEW actuator bolts.
^ Install the exhaust camshaft actuator into the timing chain with the timing mark lined up with the second matching colored link.
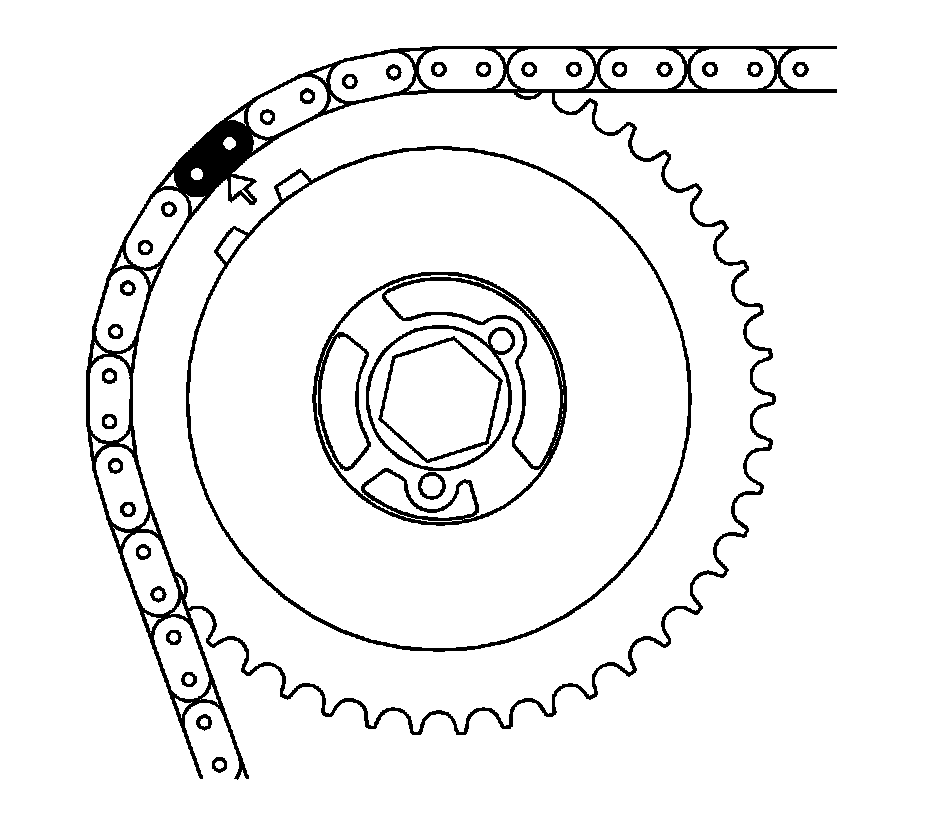
^ Install the exhaust camshaft actuator onto the exhaust camshaft, aligning the dowel pin into the camshaft slot.
^ Using a 23 mm open end wrench, rotate the exhaust camshaft approximately 45 degrees until the dowel pin in the camshaft actuator goes into the camshaft slot.
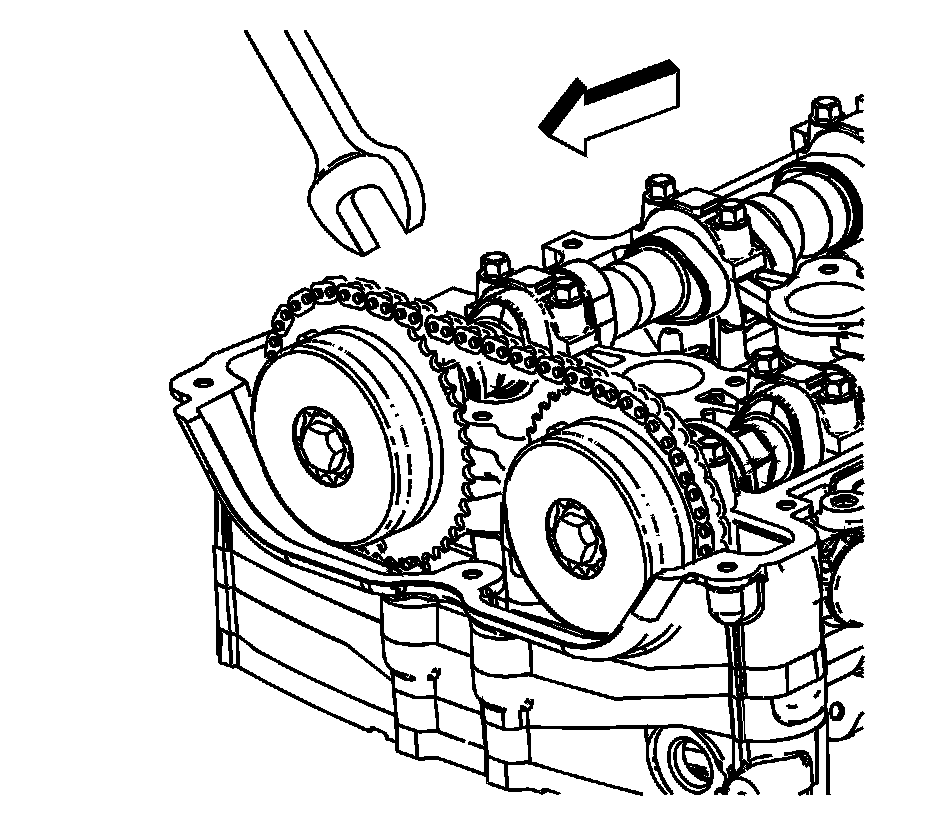
^ When the actuator seats on the cam, tighten the new exhaust camshaft actuator bolt hand tight.
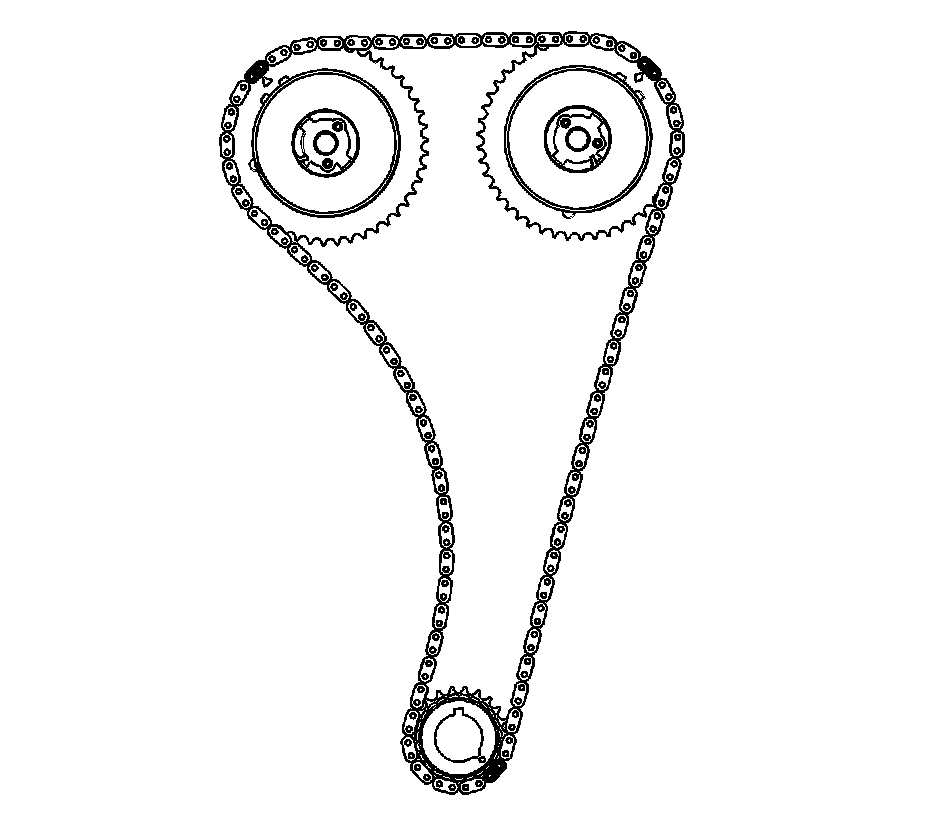
^ Verify that all of the colored links and the appropriate timing marks are still aligned. If they are not aligned, repeat the portion of the procedure necessary to align the timing marks.
Factory Service Tools
Use the Manual With the Right Hardware
Pair factory procedures with proven DIY tools so the instructions are easier to execute.
Disclosure: Verified tool recommendations may earn an affiliate commission at no cost to you.
When to See a Mechanic
Stop DIY work and contact a certified mechanic immediately if any of the following apply:
- • You smell fuel, burning insulation, or see smoke.
- • Brakes feel soft, pull hard to one side, or make grinding noises.
- • The engine overheats, stalls repeatedly, or misfires under load.
- • You are missing required tools, torque specs, or safe lifting equipment.
- • You are not confident in the next step or safety outcome.