
Safety Warning
DIY auto repair can cause serious injury, fire, or vehicle damage. These guides are for informational purposes only. Always follow OEM torque specs, wear PPE, and consult a certified mechanic if you are unsure. You are solely responsible for your safety.
2002 Nissan-Datsun Sentra SE-R L4-2.5L (QR25DE)FACTORY OEM SERVICE PROCEDURE
Service Procedure
Remove/discard the Foam from the inside of the ECM Case Holder as follows. The ECM Case Holder will have to be re-positioned (moved) to do this procedure.
NOTE:
^ Use suitable covers to protect vehicle paint, trim, etc. when doing this procedure.
^ Step one (below) only applies to vehicles equipped with a Strut Tower Cross Bar.
^ Doing step one will allow clearance for removing the ECM Case Holder from the engine room wall.
1. If equipped, re-position the Strut Tower Cross Bar and remove the Strut Tower Cross Bar Mounting Bracket as follows:
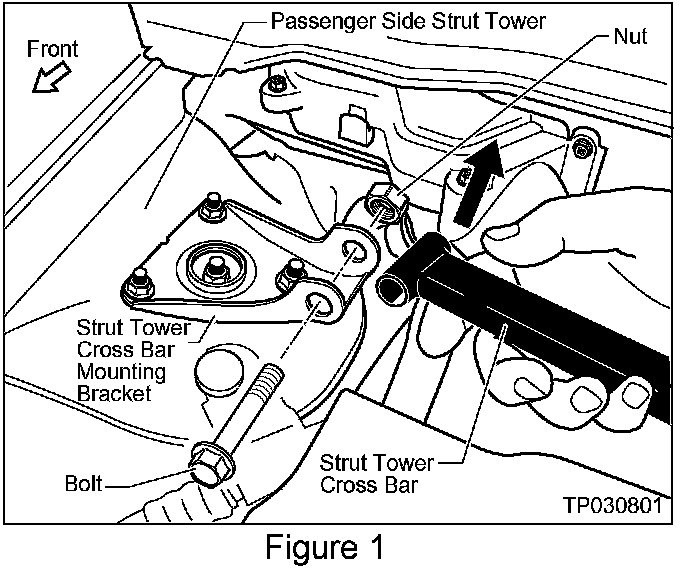
a. Remove the nut/bolt that holds the Strut Tower Cross Bar to the Strut Tower Cross Bar Mounting Bracket (see Figure 1).
b. Reposition the Strut Tower Cross Bar UP and OUT of the way.

c. Take off three Nuts and remove the Strut Tower Cross Bar Mounting Bracket (see Figure 2).
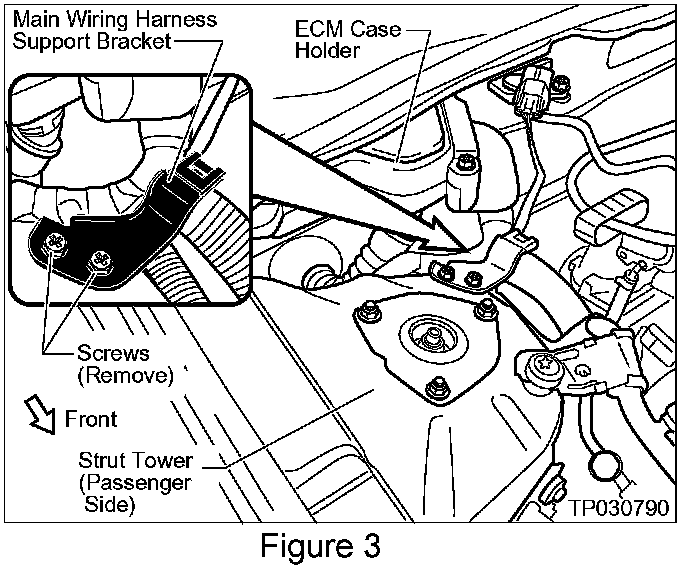
2. Remove two Screws that hold the Main Wiring Harness Support Bracket to the Strut Tower (see Figure 3).
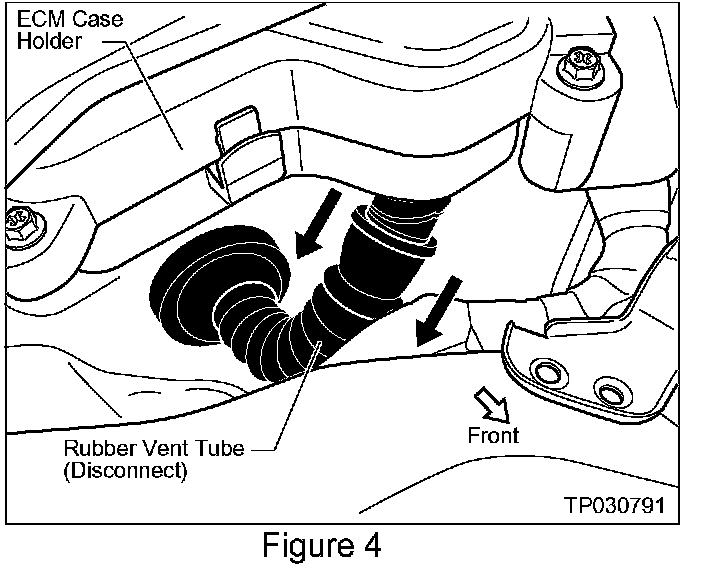
3. Disconnect the Rubber Vent Tube from the ECM Case Holder (see Figure 4).
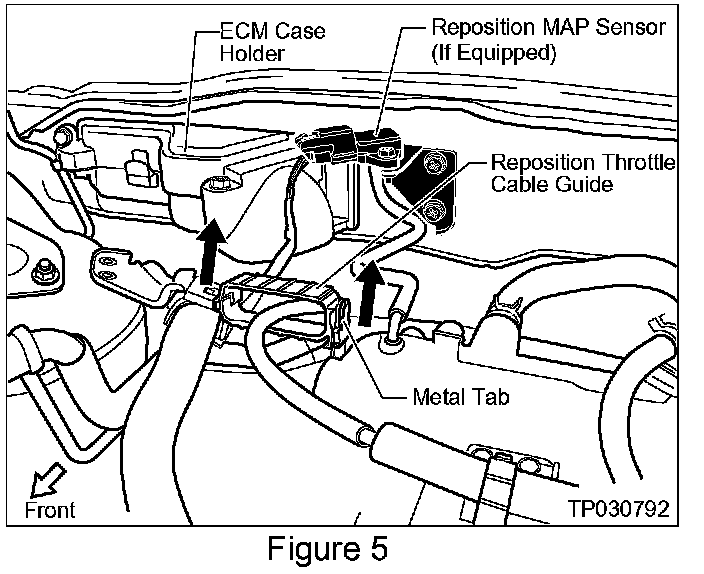
4. If equipped, remove two Screws and re-position the Manifold Absolute Pressure (MAP) Sensor (see Figure 5).
5. Re-position the Throttle Cable Guide by removing it from the Metal Tab (see Figure 5).
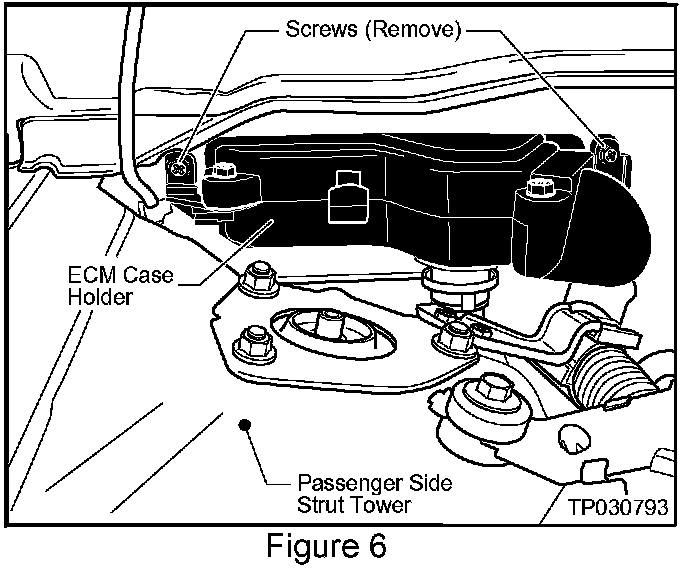
6. Remove two Screws that hold the ECM Case Holder to the engine room wall (see Figure 6).
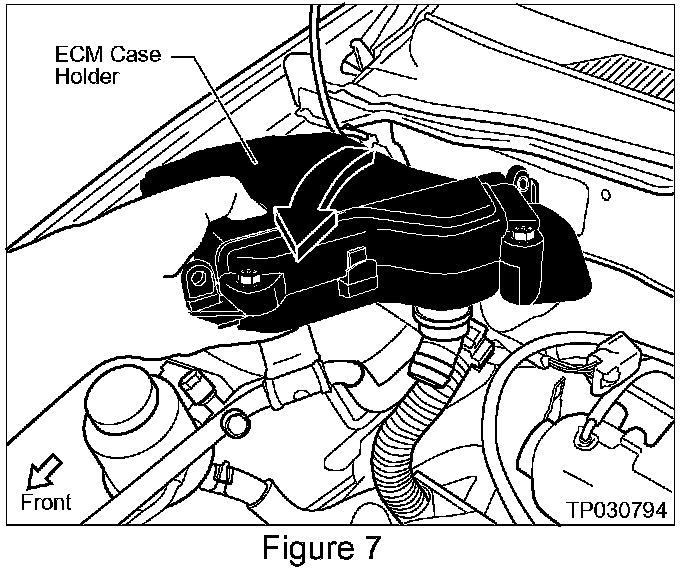
7. Carefully pull the ECM Case Holder out of the engine room wall and set it on top of the passenger side Strut Tower (see Figure 7).
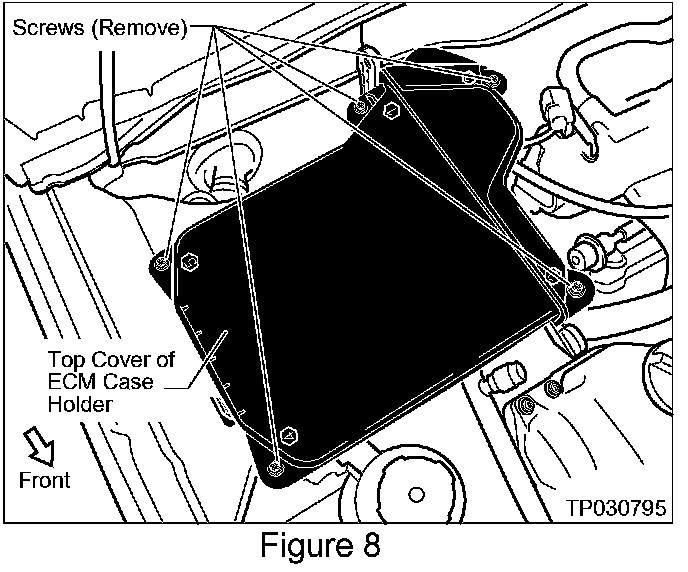
8. Take out five Screws and remove the Top Cover of the ECM Case Holder (see Figure 8).
NOTE:
Do NOT disconnect the vehicle wire harness from the ECM.

9. Remove the three Screws that secure the ECM to the base of the Case Holder (see Figure 9).
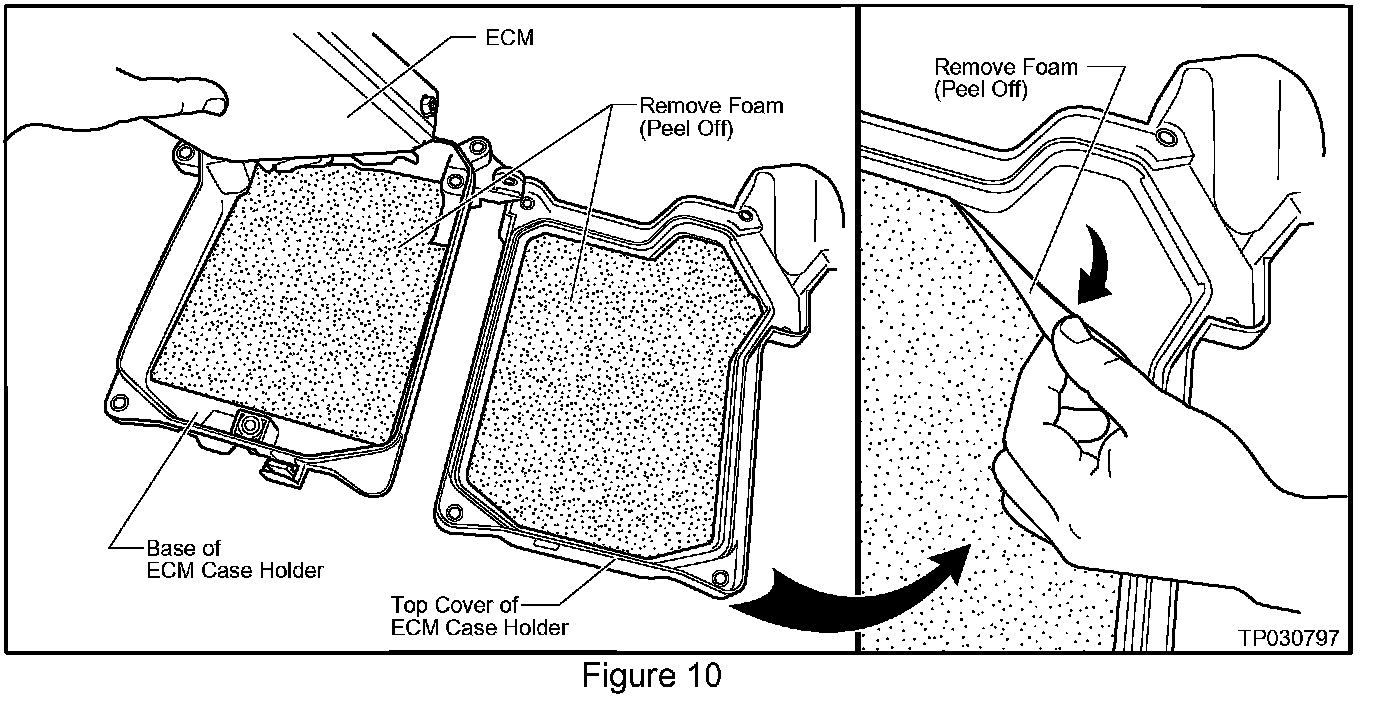
10. Lift UP the ECM and remove/discard the Foam from the Base and Top Cover of the ECM Case Holder (see Figure 10).
^ Make sure you remove/discard all the Foam and that the Base and Top Cover are clean and free of dirt, dust, and debris.
11. Re-install the ECM to the Base of the ECM Case Holder with the three Screws.
12. Install the Top Cover and tighten the five Screws:
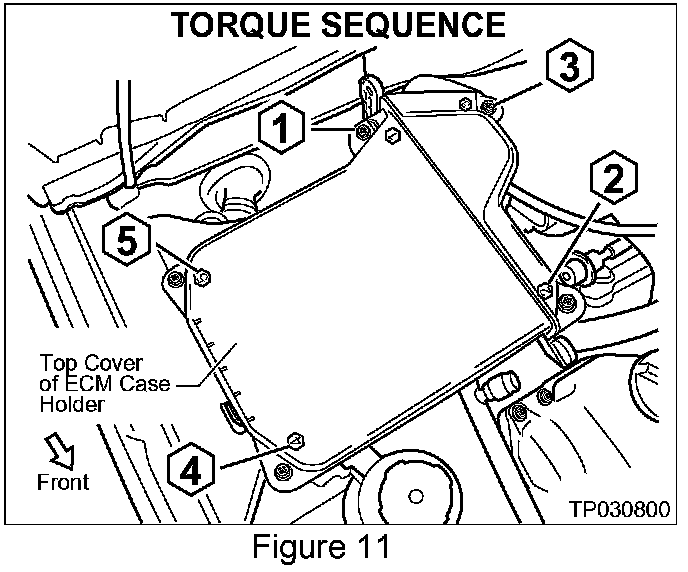
^ In the order shown in Figure 11
^ To 3.9 - 6.8 Nm (34.5 - 60 in-lb)
13. Re-install all components in the reverse order they were removed.
NOTES:
^ When re-installing the ECM Case Holder in the engine room wall, make sure the rear of the housing lines up and is inserted into the clip (at the back of the engine room wall pocket).
^ Make sure the Throttle Cable Guide is re-installed properly.
14. Start the vehicle and confirm the engine operates normally and the Malfunction Indicator Light is OFF.
NOTE:
^ Use suitable covers to protect vehicle paint, trim, etc. when doing this procedure.
^ Step one (below) only applies to vehicles equipped with a Strut Tower Cross Bar.
^ Doing step one will allow clearance for removing the ECM Case Holder from the engine room wall.
1. If equipped, re-position the Strut Tower Cross Bar and remove the Strut Tower Cross Bar Mounting Bracket as follows:
a. Remove the nut/bolt that holds the Strut Tower Cross Bar to the Strut Tower Cross Bar Mounting Bracket (see Figure 1).
b. Reposition the Strut Tower Cross Bar UP and OUT of the way.
c. Take off three Nuts and remove the Strut Tower Cross Bar Mounting Bracket (see Figure 2).
2. Remove two Screws that hold the Main Wiring Harness Support Bracket to the Strut Tower (see Figure 3).
3. Disconnect the Rubber Vent Tube from the ECM Case Holder (see Figure 4).
4. If equipped, remove two Screws and re-position the Manifold Absolute Pressure (MAP) Sensor (see Figure 5).
5. Re-position the Throttle Cable Guide by removing it from the Metal Tab (see Figure 5).
6. Remove two Screws that hold the ECM Case Holder to the engine room wall (see Figure 6).
7. Carefully pull the ECM Case Holder out of the engine room wall and set it on top of the passenger side Strut Tower (see Figure 7).
8. Take out five Screws and remove the Top Cover of the ECM Case Holder (see Figure 8).
NOTE:
Do NOT disconnect the vehicle wire harness from the ECM.
9. Remove the three Screws that secure the ECM to the base of the Case Holder (see Figure 9).
10. Lift UP the ECM and remove/discard the Foam from the Base and Top Cover of the ECM Case Holder (see Figure 10).
^ Make sure you remove/discard all the Foam and that the Base and Top Cover are clean and free of dirt, dust, and debris.
11. Re-install the ECM to the Base of the ECM Case Holder with the three Screws.
12. Install the Top Cover and tighten the five Screws:
^ In the order shown in Figure 11
^ To 3.9 - 6.8 Nm (34.5 - 60 in-lb)
13. Re-install all components in the reverse order they were removed.
NOTES:
^ When re-installing the ECM Case Holder in the engine room wall, make sure the rear of the housing lines up and is inserted into the clip (at the back of the engine room wall pocket).
^ Make sure the Throttle Cable Guide is re-installed properly.
14. Start the vehicle and confirm the engine operates normally and the Malfunction Indicator Light is OFF.
Factory Service Tools
Use the Manual With the Right Hardware
Pair factory procedures with proven DIY tools so the instructions are easier to execute.
Disclosure: Verified tool recommendations may earn an affiliate commission at no cost to you.
When to See a Mechanic
Stop DIY work and contact a certified mechanic immediately if any of the following apply:
- • You smell fuel, burning insulation, or see smoke.
- • Brakes feel soft, pull hard to one side, or make grinding noises.
- • The engine overheats, stalls repeatedly, or misfires under load.
- • You are missing required tools, torque specs, or safe lifting equipment.
- • You are not confident in the next step or safety outcome.