
Safety Warning
DIY auto repair can cause serious injury, fire, or vehicle damage. These guides are for informational purposes only. Always follow OEM torque specs, wear PPE, and consult a certified mechanic if you are unsure. You are solely responsible for your safety.
2011 Mazda 3 L4-2.5LFACTORY OEM SERVICE PROCEDURE
Compressor HVAC: Service and Repair
A/C COMPRESSOR REMOVAL/INSTALLATION
1. Disconnect the negative battery cable.
2. Discharge the refrigerant. Refrigerant Charging
3. Remove the front under cover.
4. Remove the drive belt. Service and Repair Service and Repair
5. Remove the water hose bracket.
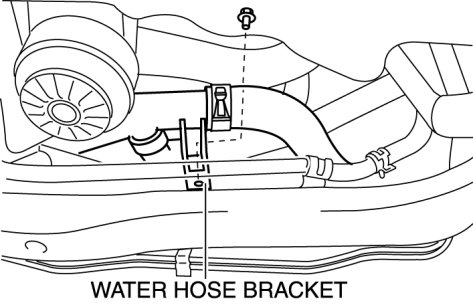
CAUTION:
- If moisture or foreign material enters the refrigeration cycle, cooling ability will be lowered and abnormal noise or other malfunction could occur. Always plug open fittings immediately after removing any refrigeration cycle parts.
6. Remove the clip.
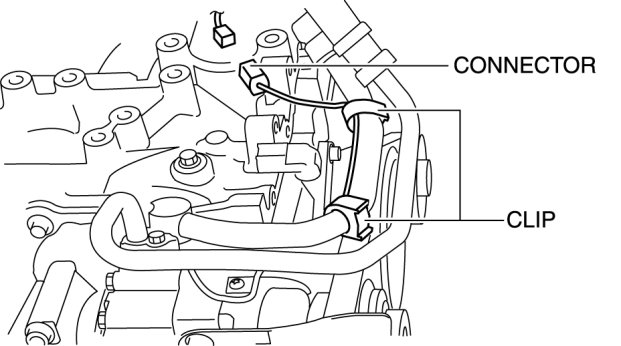
7. Disconnect the connector.
8. Remove the bolt A.
L5, L3 WITH TC

LF

9. Remove the cooler hose (LO). Service and Repair
10. Remove the cooler hose (HI). Service and Repair
11. Remove the bolt B.
12. Remove the A/C compressor. Do not allow compressor oil to spill.
13. Install in the reverse order of removal.
14. Perform the refrigerant system performance test. Refrigerant System Performance Test
A/C Compressor Installation Note
CAUTION:
- Due to the high moisture-absorption characteristics of the compressor oil, it may absorb moisture if left over a long period of time thereby negatively affecting A/C operation. Drain the compressor oil and refill within 10 min. of each other.
1. Rotate new A/C compressor shaft six to eight revolutions while collecting refrigerant oil in a clean measuring device. Use this refrigerant oil to refill new compressor. Do not allow refrigerant oil to become contaminated.
2. Rotate old A/C compressor shaft six to eight revolutions while collecting refrigerant oil in a separate, clean measuring device.
3. Compare those oil amounts. The amount of the oil drained from the new A/C compressor should be greater than the old one.
4. Pour the same amount oil of drained from the old A/C compressor back into the new A/C compressor.

A/C compressor oil type
- FD46XG
A/C compressor oil sealed volume (approx. quantity)
- 120 ml {120 cc, 4.06 fl oz}
Factory Service Tools
Use the Manual With the Right Hardware
Pair factory procedures with proven DIY tools so the instructions are easier to execute.
Disclosure: Verified tool recommendations may earn an affiliate commission at no cost to you.
When to See a Mechanic
Stop DIY work and contact a certified mechanic immediately if any of the following apply:
- • You smell fuel, burning insulation, or see smoke.
- • Brakes feel soft, pull hard to one side, or make grinding noises.
- • The engine overheats, stalls repeatedly, or misfires under load.
- • You are missing required tools, torque specs, or safe lifting equipment.
- • You are not confident in the next step or safety outcome.