
Safety Warning
DIY auto repair can cause serious injury, fire, or vehicle damage. These guides are for informational purposes only. Always follow OEM torque specs, wear PPE, and consult a certified mechanic if you are unsure. You are solely responsible for your safety.
2003 Hummer H2 V8-6.0LFACTORY OEM SERVICE PROCEDURE
Compressor Replacement
COMPRESSOR REPLACEMENT
TOOLS REQUIRED
J 39400 A Halogen Leak Detector
REMOVAL PROCEDURE
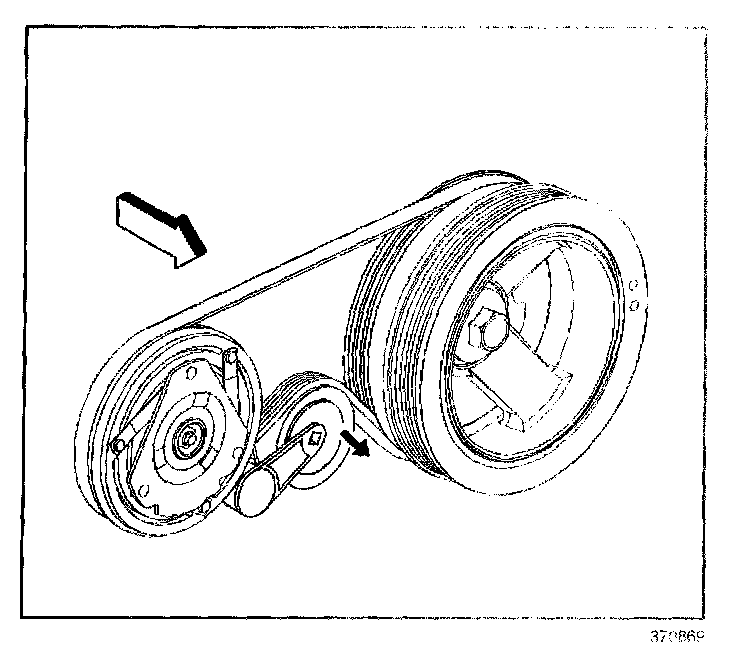
1. Recover the refrigerant. Refer to Refrigerant Recovery and Recharging.
2. Remove the fan shroud.
3. Install a ratchet into the air conditioning (A/C) belt tensioner adapter opening.
4. Rotate the A/C belt tensioner clockwise in order to relieve the tension on the belt.
5. Remove the A/C belt from tire A/C compressor.
6. Slowly release the tension on the A/C belt tensioner.
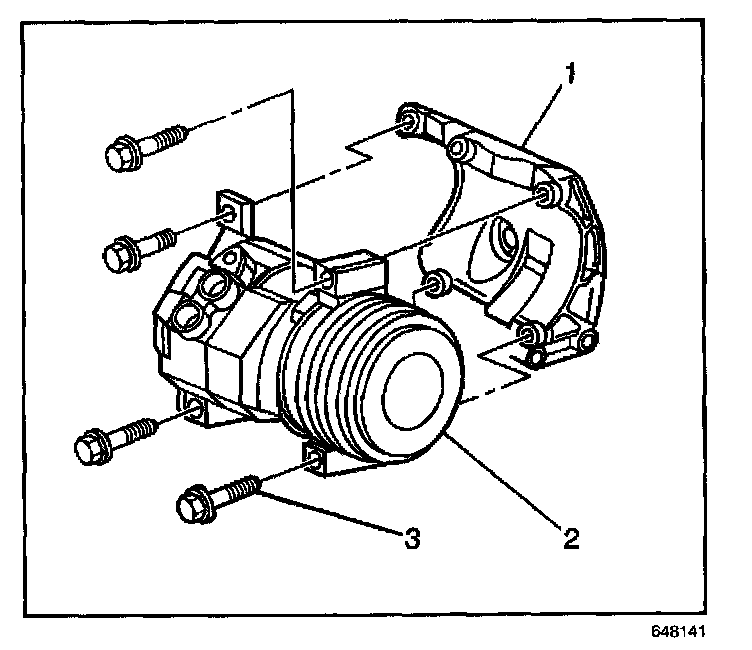
7. Remove the A/C discharge hose bolt from the A/C compressor.
8. Remove the A/C discharge hose from the A/C compressor.
9. Remove the A/C suction hose bolt from the A/C compressor.
10. Remove the A/C suction hose from the A/C compressor.
11. Discard the sealing washers.
12. Cap or tape all of the hose and line ends.
13. Disconnect the electrical connector from the A/C compressor coil.
14. Remove the A/C compressor mounting bolts.
15. Remove the A/C compressor (2) from the bracket (1).
16. If replacing the A/C compressor. Refer to Compressor Oil Balancing.
INSTALLATION PROCEDURE
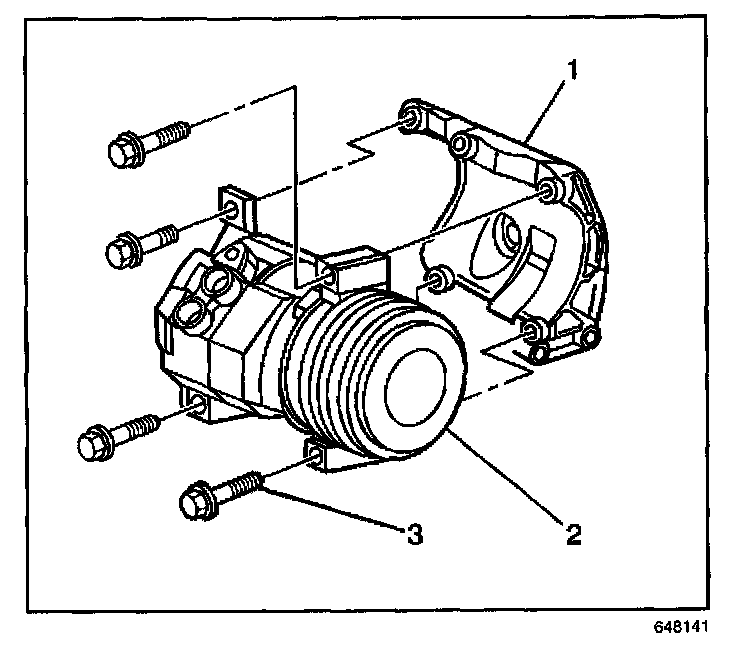
1. Add the proper amount of PAG oil to the compressor crankcase. Refer to Refrigerant System Capacities.
2. Install the A/C compressor (2) to the bracket (1).
NOTE: Refer to Fastener Notice in Service Precautions.
3. Install the A/C compressor mounting bolts.
Tighten
Tighten the bolts to 50 N.m (37 lb ft).
4. Connect the electrical connector to the A/C compressor coil.
5. Install the new sealing washers.
6. Install the A/C discharge hose to the A/C compressor.
7. Install the A/C discharge hose bolt to the A/C compressor.
Tighten
Tighten the bolt to 16 N.m (12 lb ft).
8. Install the A/C suction hose to the compressor.
9. Install the A/C suction hose bolt to the A/C compressor.
Tighten
Tighten the bolt to 16 N.m (12 lb ft).
10. Install the A/C drive belt.
11. Install the fan shroud.
12. Evacuate and recharge the A/C system. Refer to Refrigerant Recovery and Recharing .
13. Leak test the fittings of the component using the J 39400-A
TOOLS REQUIRED
J 39400 A Halogen Leak Detector
REMOVAL PROCEDURE
1. Recover the refrigerant. Refer to Refrigerant Recovery and Recharging.
2. Remove the fan shroud.
3. Install a ratchet into the air conditioning (A/C) belt tensioner adapter opening.
4. Rotate the A/C belt tensioner clockwise in order to relieve the tension on the belt.
5. Remove the A/C belt from tire A/C compressor.
6. Slowly release the tension on the A/C belt tensioner.
7. Remove the A/C discharge hose bolt from the A/C compressor.
8. Remove the A/C discharge hose from the A/C compressor.
9. Remove the A/C suction hose bolt from the A/C compressor.
10. Remove the A/C suction hose from the A/C compressor.
11. Discard the sealing washers.
12. Cap or tape all of the hose and line ends.
13. Disconnect the electrical connector from the A/C compressor coil.
14. Remove the A/C compressor mounting bolts.
15. Remove the A/C compressor (2) from the bracket (1).
16. If replacing the A/C compressor. Refer to Compressor Oil Balancing.
INSTALLATION PROCEDURE
1. Add the proper amount of PAG oil to the compressor crankcase. Refer to Refrigerant System Capacities.
2. Install the A/C compressor (2) to the bracket (1).
NOTE: Refer to Fastener Notice in Service Precautions.
3. Install the A/C compressor mounting bolts.
Tighten
Tighten the bolts to 50 N.m (37 lb ft).
4. Connect the electrical connector to the A/C compressor coil.
5. Install the new sealing washers.
6. Install the A/C discharge hose to the A/C compressor.
7. Install the A/C discharge hose bolt to the A/C compressor.
Tighten
Tighten the bolt to 16 N.m (12 lb ft).
8. Install the A/C suction hose to the compressor.
9. Install the A/C suction hose bolt to the A/C compressor.
Tighten
Tighten the bolt to 16 N.m (12 lb ft).
10. Install the A/C drive belt.
11. Install the fan shroud.
12. Evacuate and recharge the A/C system. Refer to Refrigerant Recovery and Recharing .
13. Leak test the fittings of the component using the J 39400-A
Factory Service Tools
Use the Manual With the Right Hardware
Pair factory procedures with proven DIY tools so the instructions are easier to execute.
Disclosure: Verified tool recommendations may earn an affiliate commission at no cost to you.
When to See a Mechanic
Stop DIY work and contact a certified mechanic immediately if any of the following apply:
- • You smell fuel, burning insulation, or see smoke.
- • Brakes feel soft, pull hard to one side, or make grinding noises.
- • The engine overheats, stalls repeatedly, or misfires under load.
- • You are missing required tools, torque specs, or safe lifting equipment.
- • You are not confident in the next step or safety outcome.