
Safety Warning
DIY auto repair can cause serious injury, fire, or vehicle damage. These guides are for informational purposes only. Always follow OEM torque specs, wear PPE, and consult a certified mechanic if you are unsure. You are solely responsible for your safety.
1992 GMC Suburban 1/2 Ton 2WD V8-350 5.7LFACTORY OEM SERVICE PROCEDURE
Control Valve Assembly
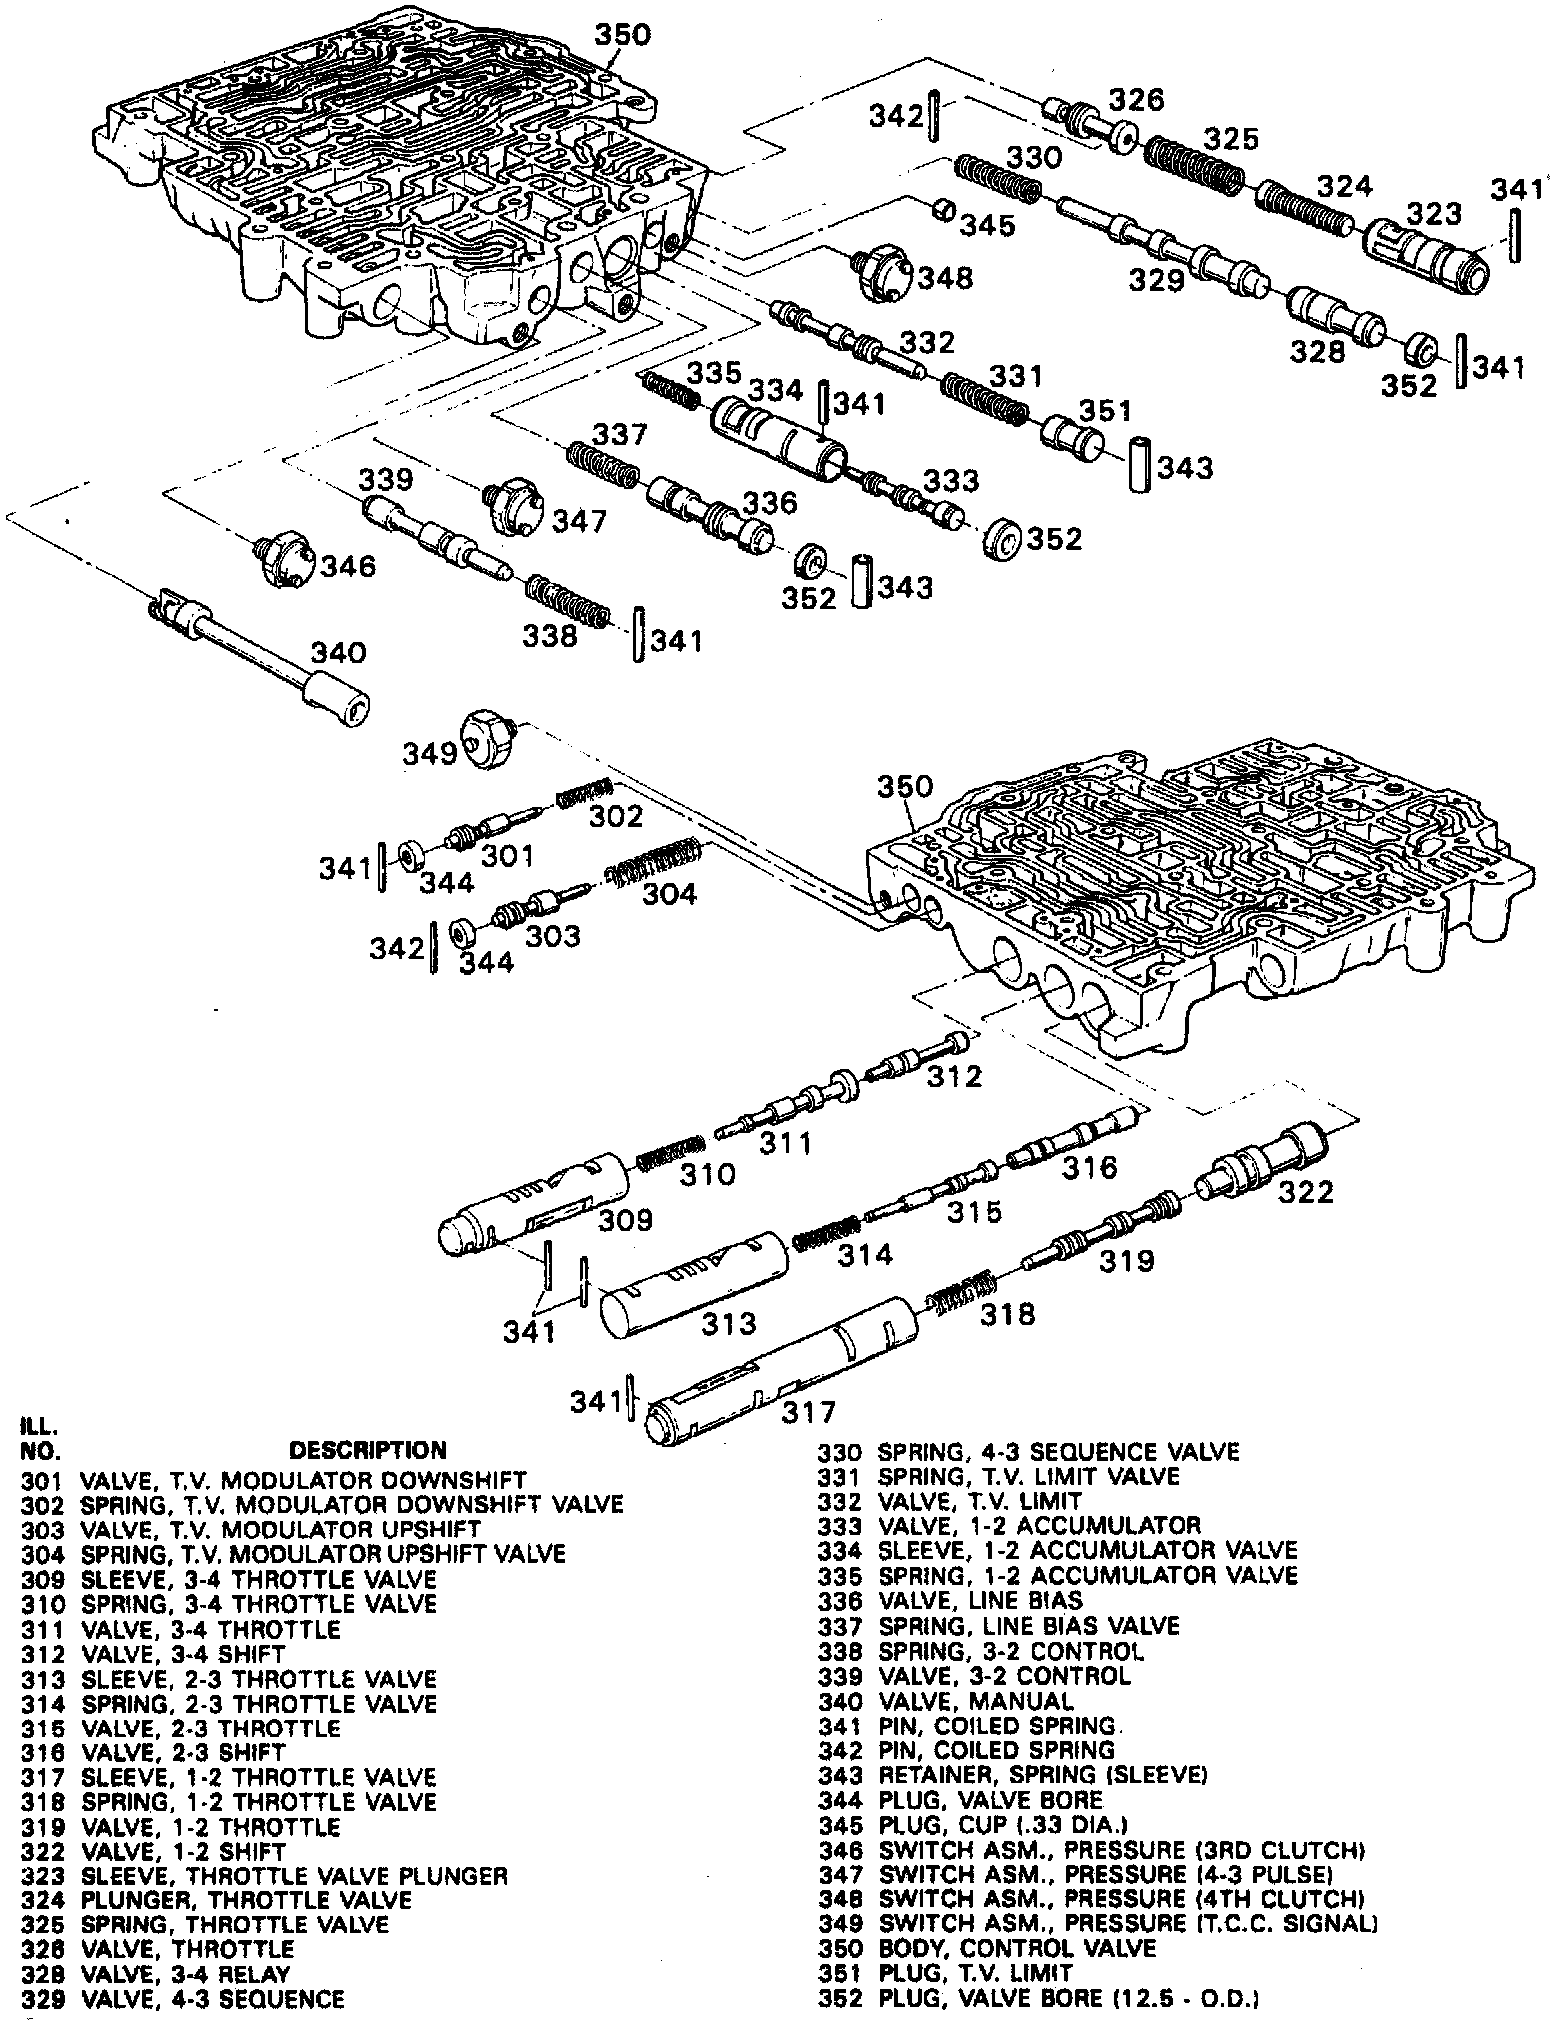
Refer to this image when performing repair procedures to the control valve body.
1. Clean control valve assembly with suitable solvent, then allow to air dry.
2. Disassemble control valve assembly as follows:
a. Place assembly on clean surface, then remove valve trains beginning with the upper left hand corner. Some valves are under pressure. Cover bores while removing roll pins.
b. Remove blind hole roll pins using a suitable tool.
c. Valves, springs and bushings should be laid out on clean surface in the exact sequence they are removed.
d. Remove pressure switches.
3. Clean all valves, springs and control valve body in suitable solvent, then dry using compressed air.
4. Inspect all valves and bushings for porosity, scoring, nicks and scratches.
5. Inspect springs for damage or distorted coils.
6. Inspect valve body casting for porosity, cracks, interconnected oil passages and damaged machine surfaces.
7. Assemble control valve assembly as shown. Note position of valve lands and bushing passages.
Valve Body Check Balls:
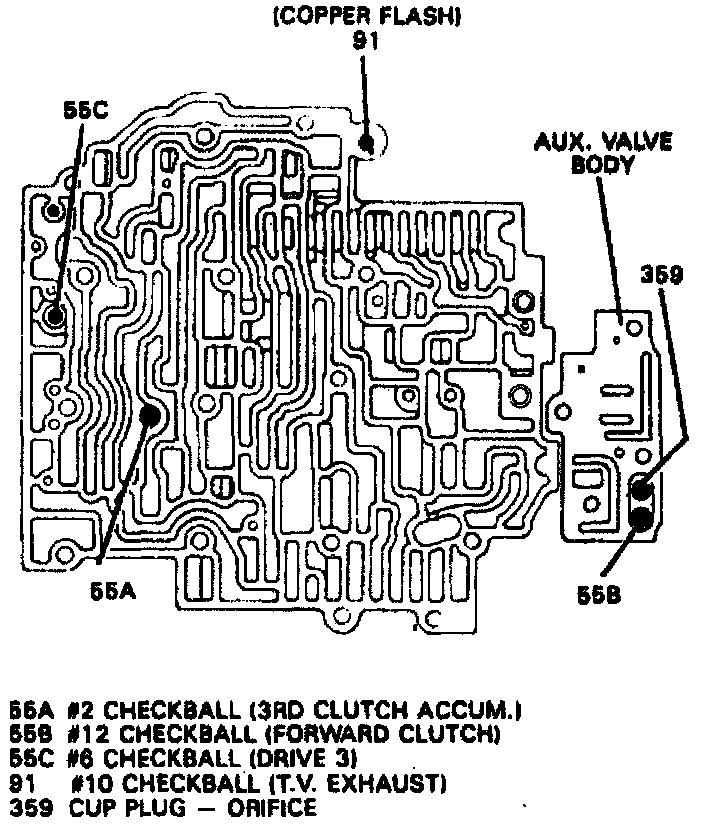
8. Install check balls into valve body assembly. Use a suitable grease to retain check balls in their position.
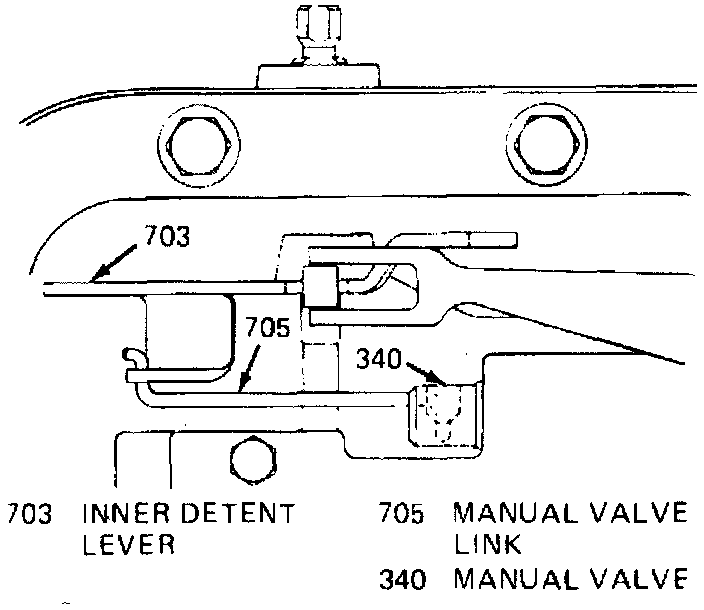
9. Install valve body assembly. Connect manual valve link to the inside detent lever.
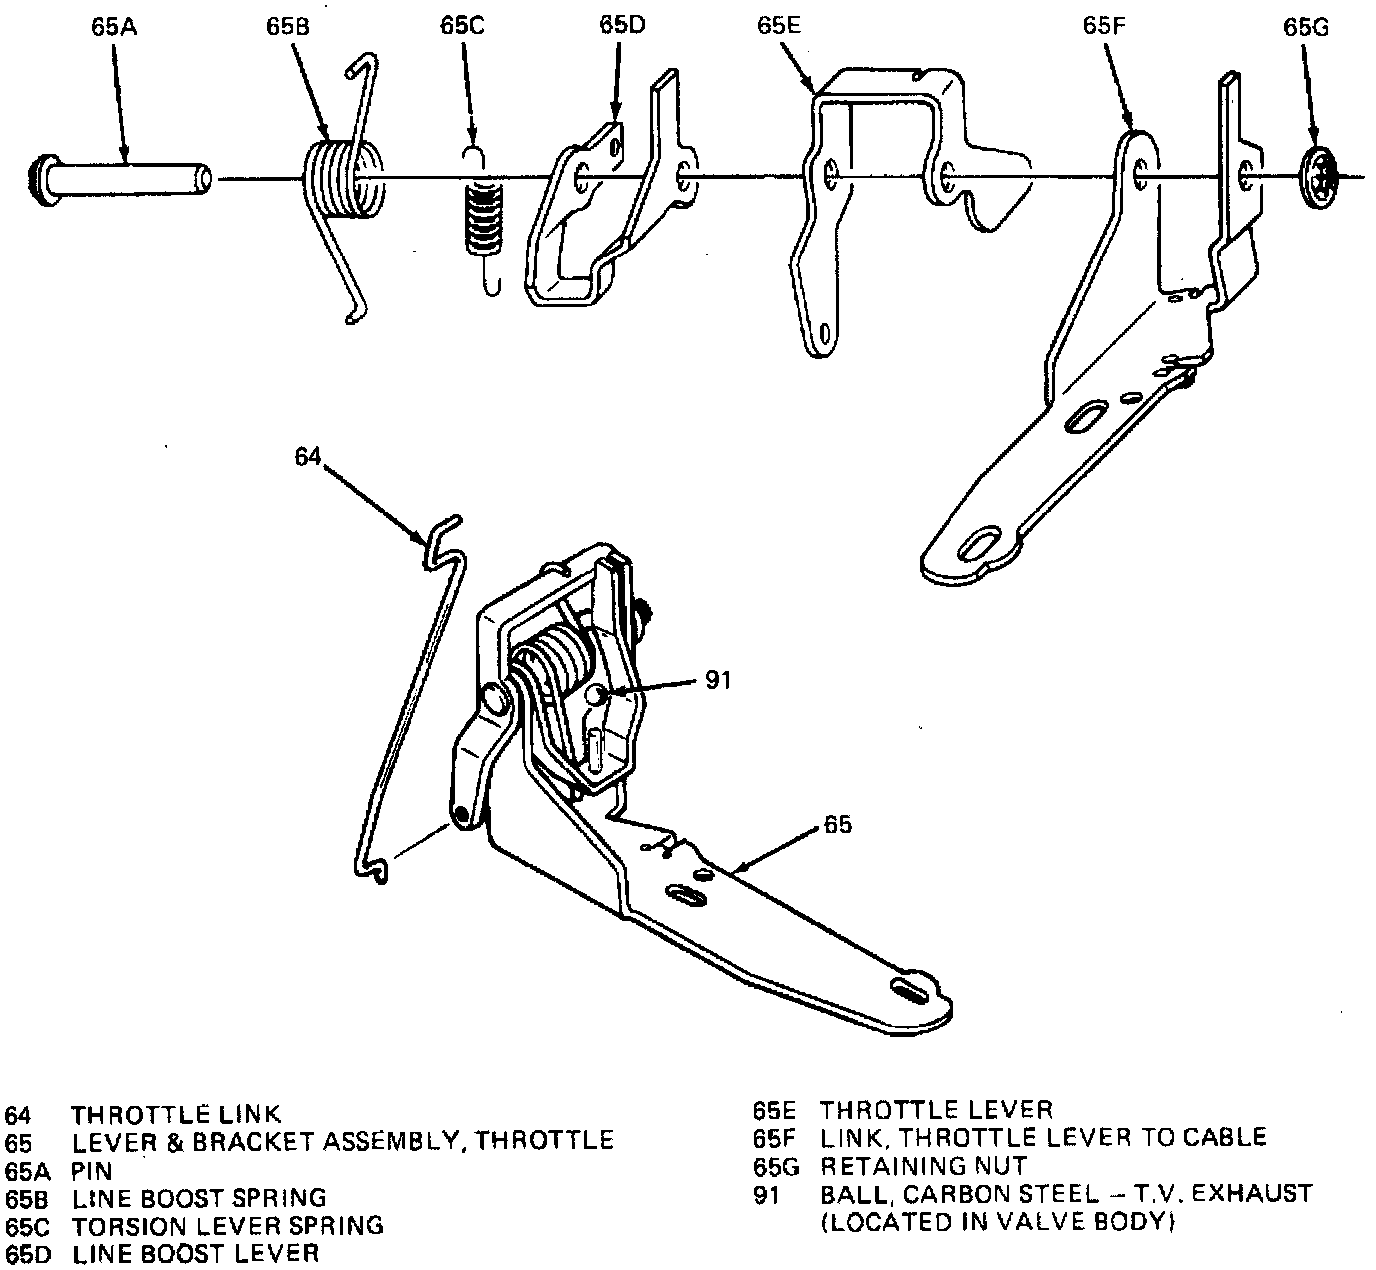
10. Inspect throttle lever and bracket assembly for sticking binding or damage. Ensure assembly operates freely without restrictions.
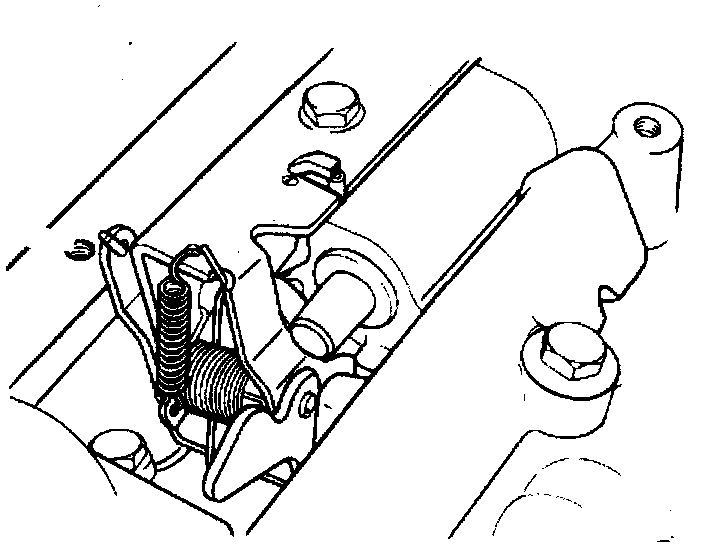
11. Install TV link onto the TV lever and bracket, then the TV lever and bracket assembly onto the valve body as shown.
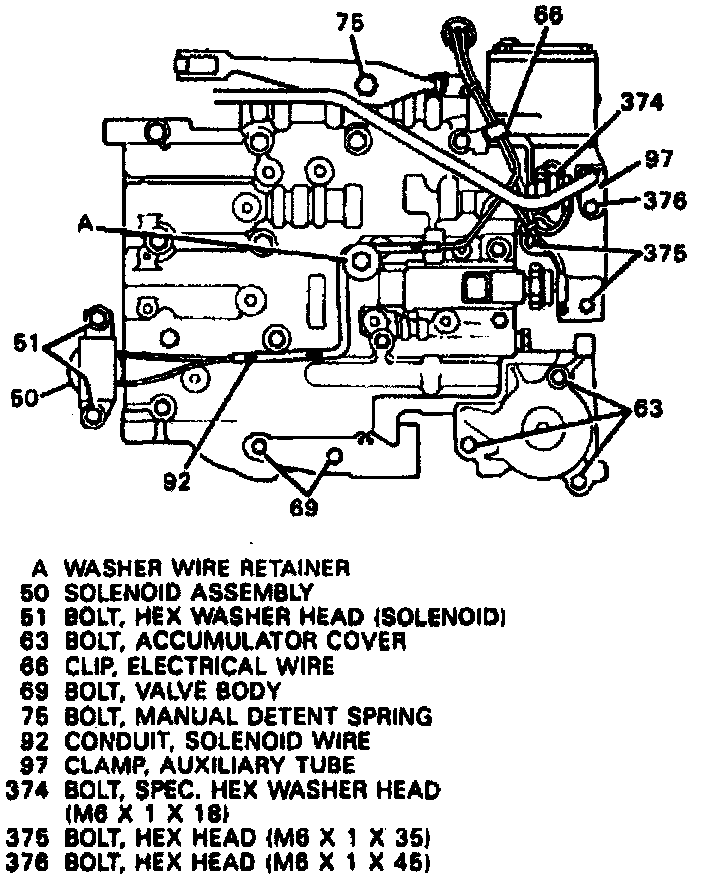
12. Install wiring harness clips, filter retaining clip, manual spring assembly, wire retaining washer and remaining valve body to case attaching bolts. Torque attaching bolts to specification.
13. Install O-ring seal onto the electrical connector, then the electrical connector into the case.
14. Install O-ring seal on the solenoid assembly.
15. Install solenoid assembly into case, then two solenoid attaching bolts. Torque attaching bolts to specification.
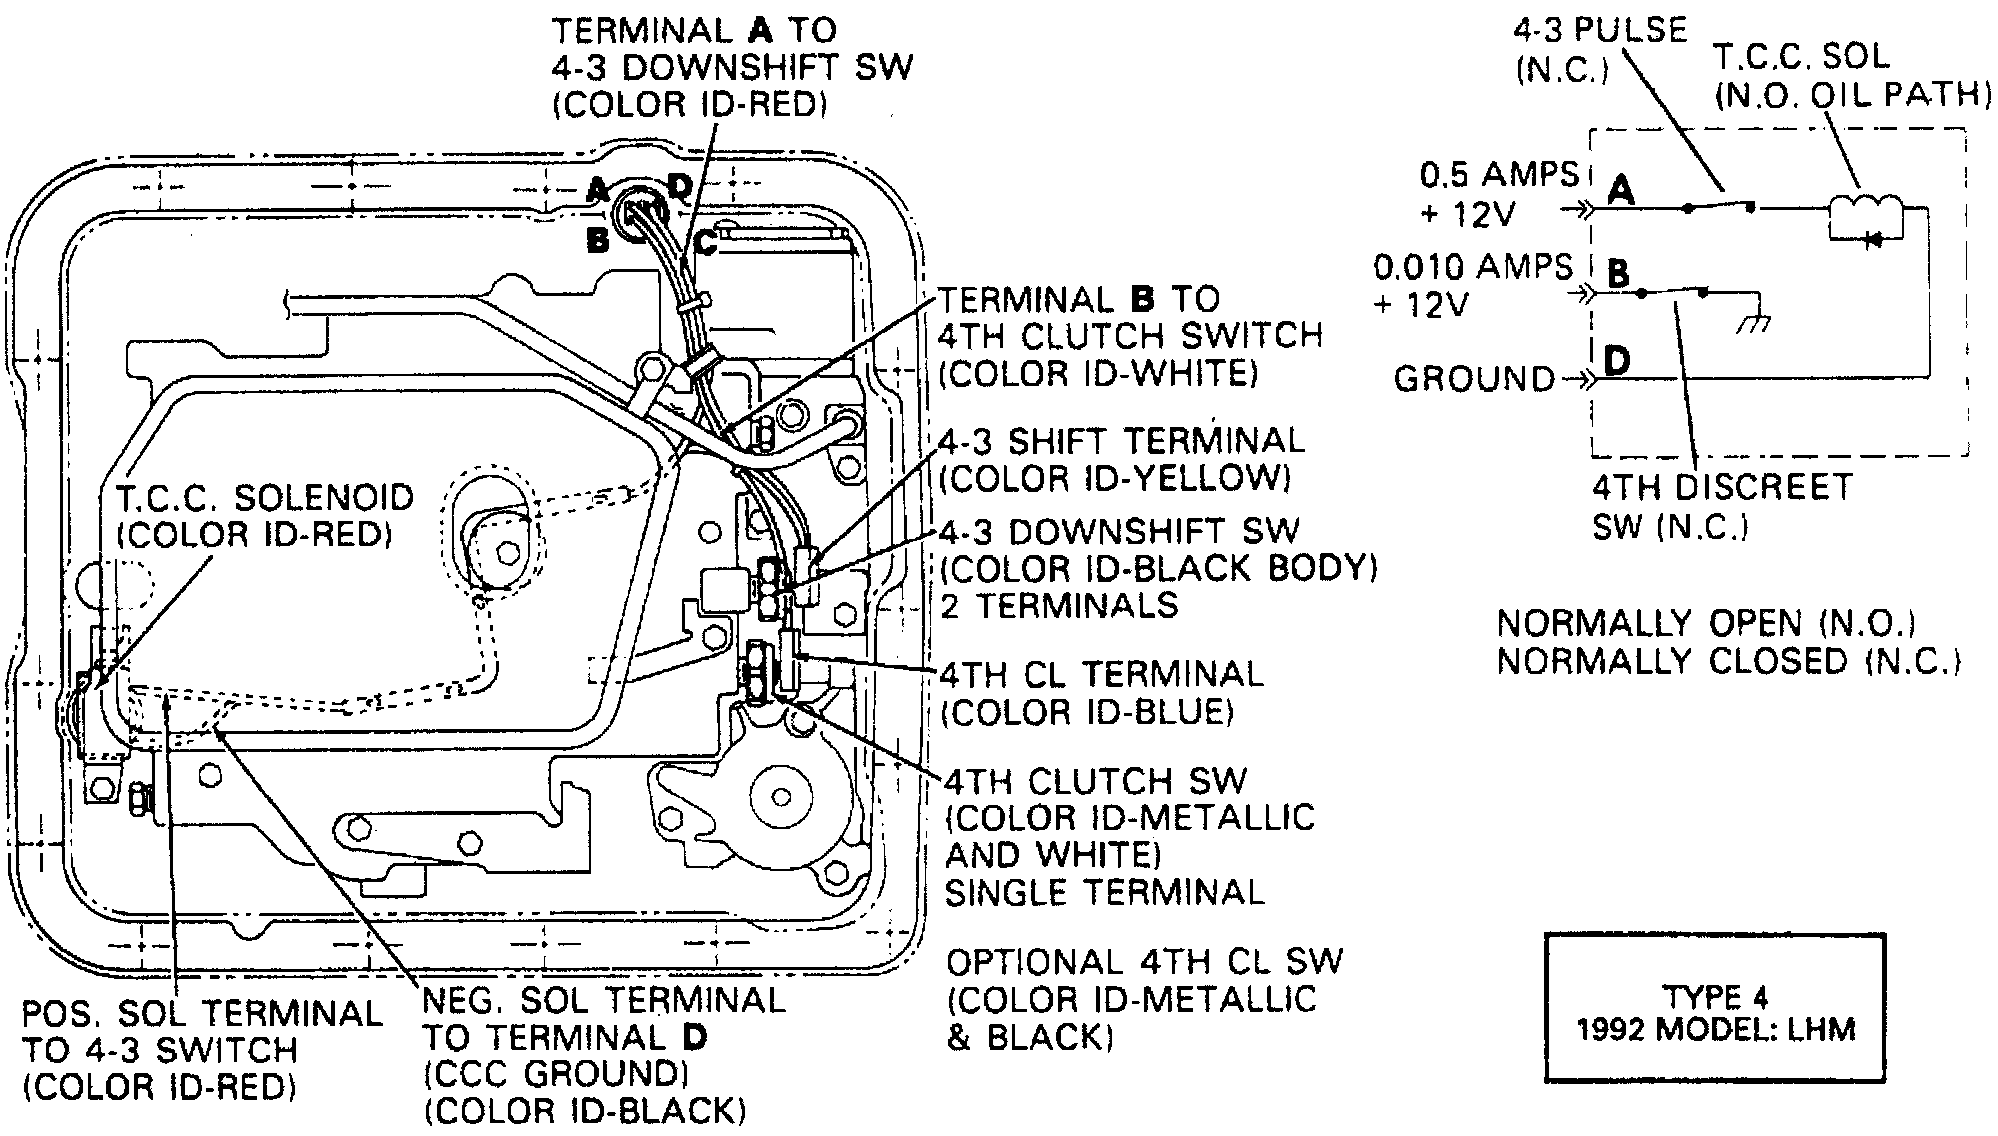
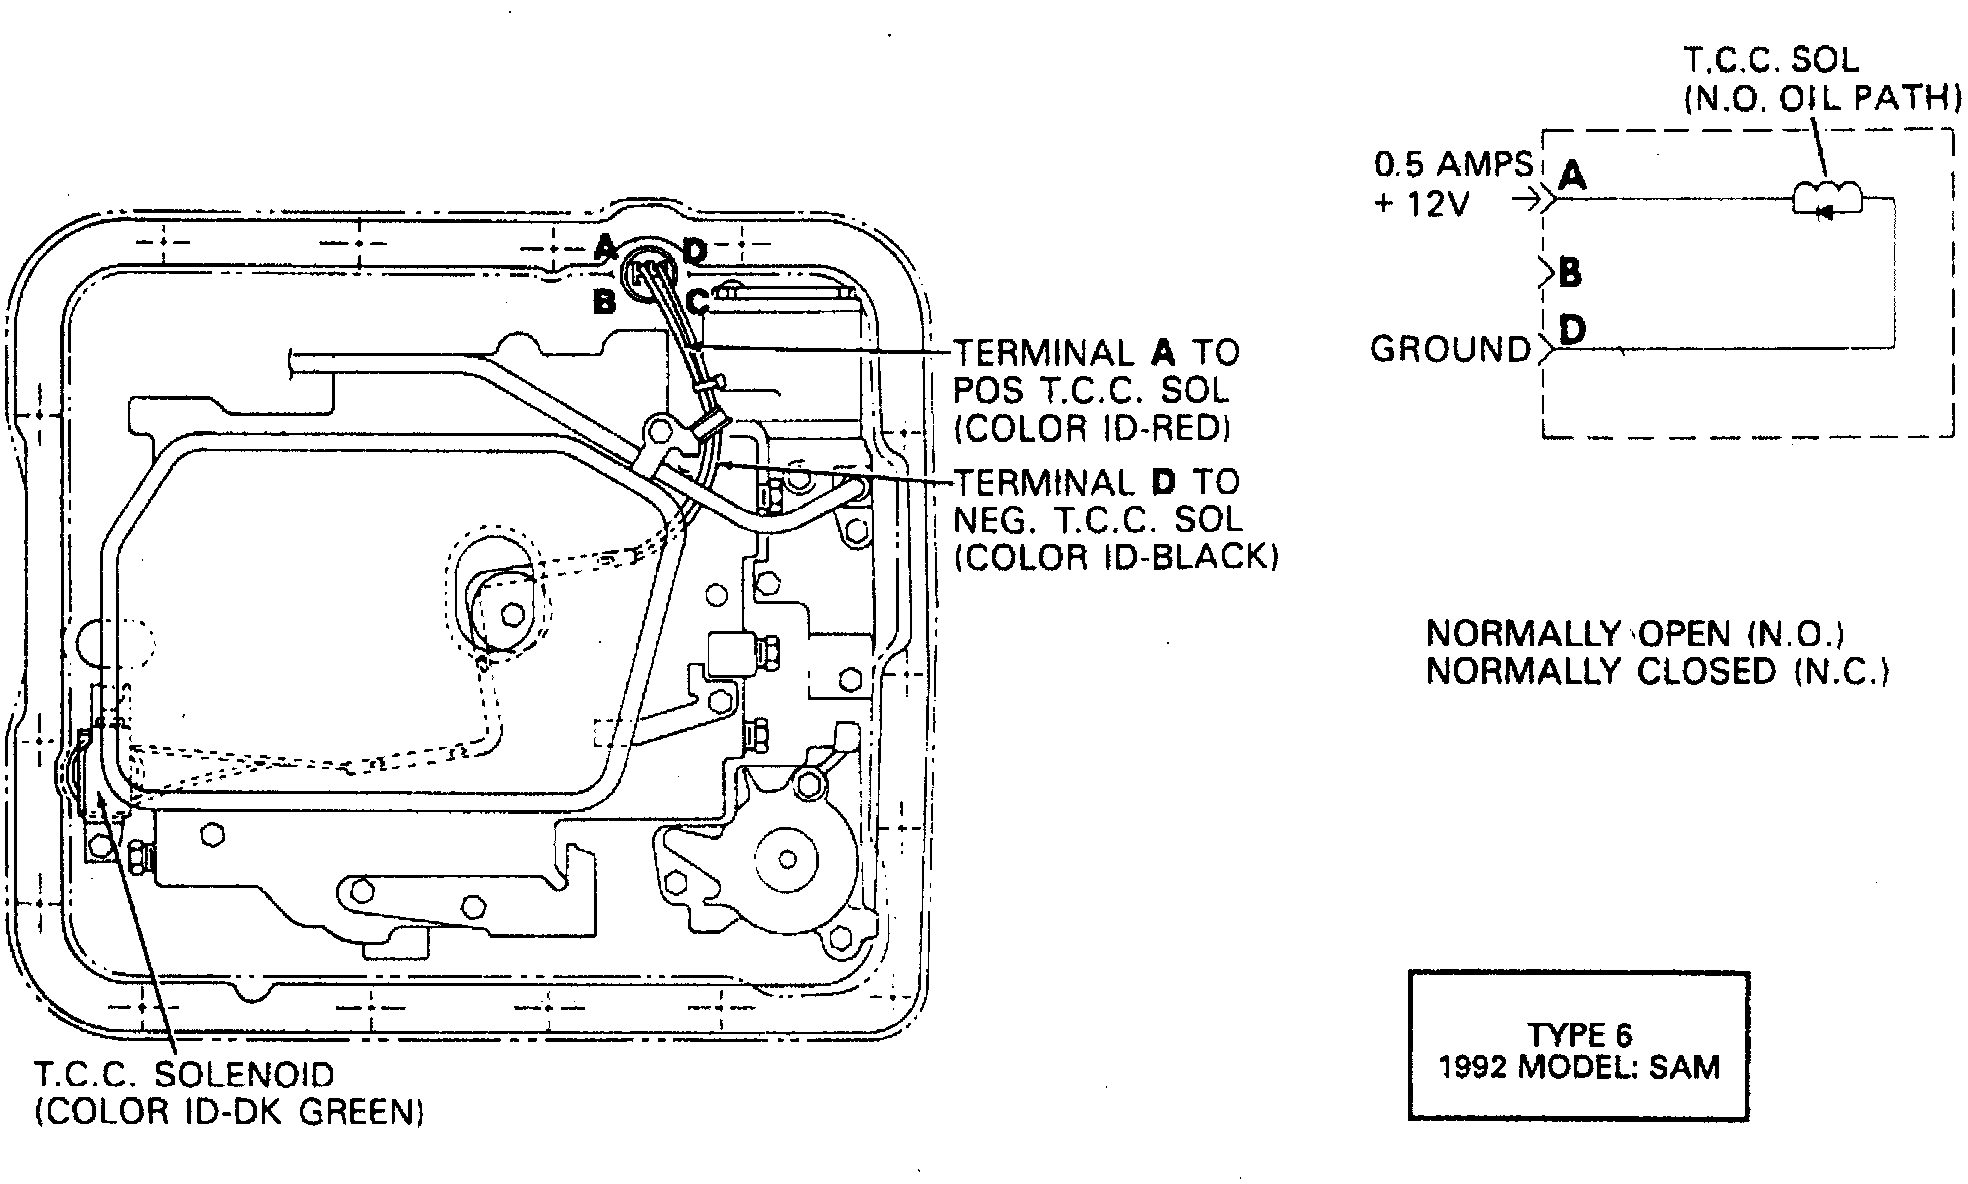
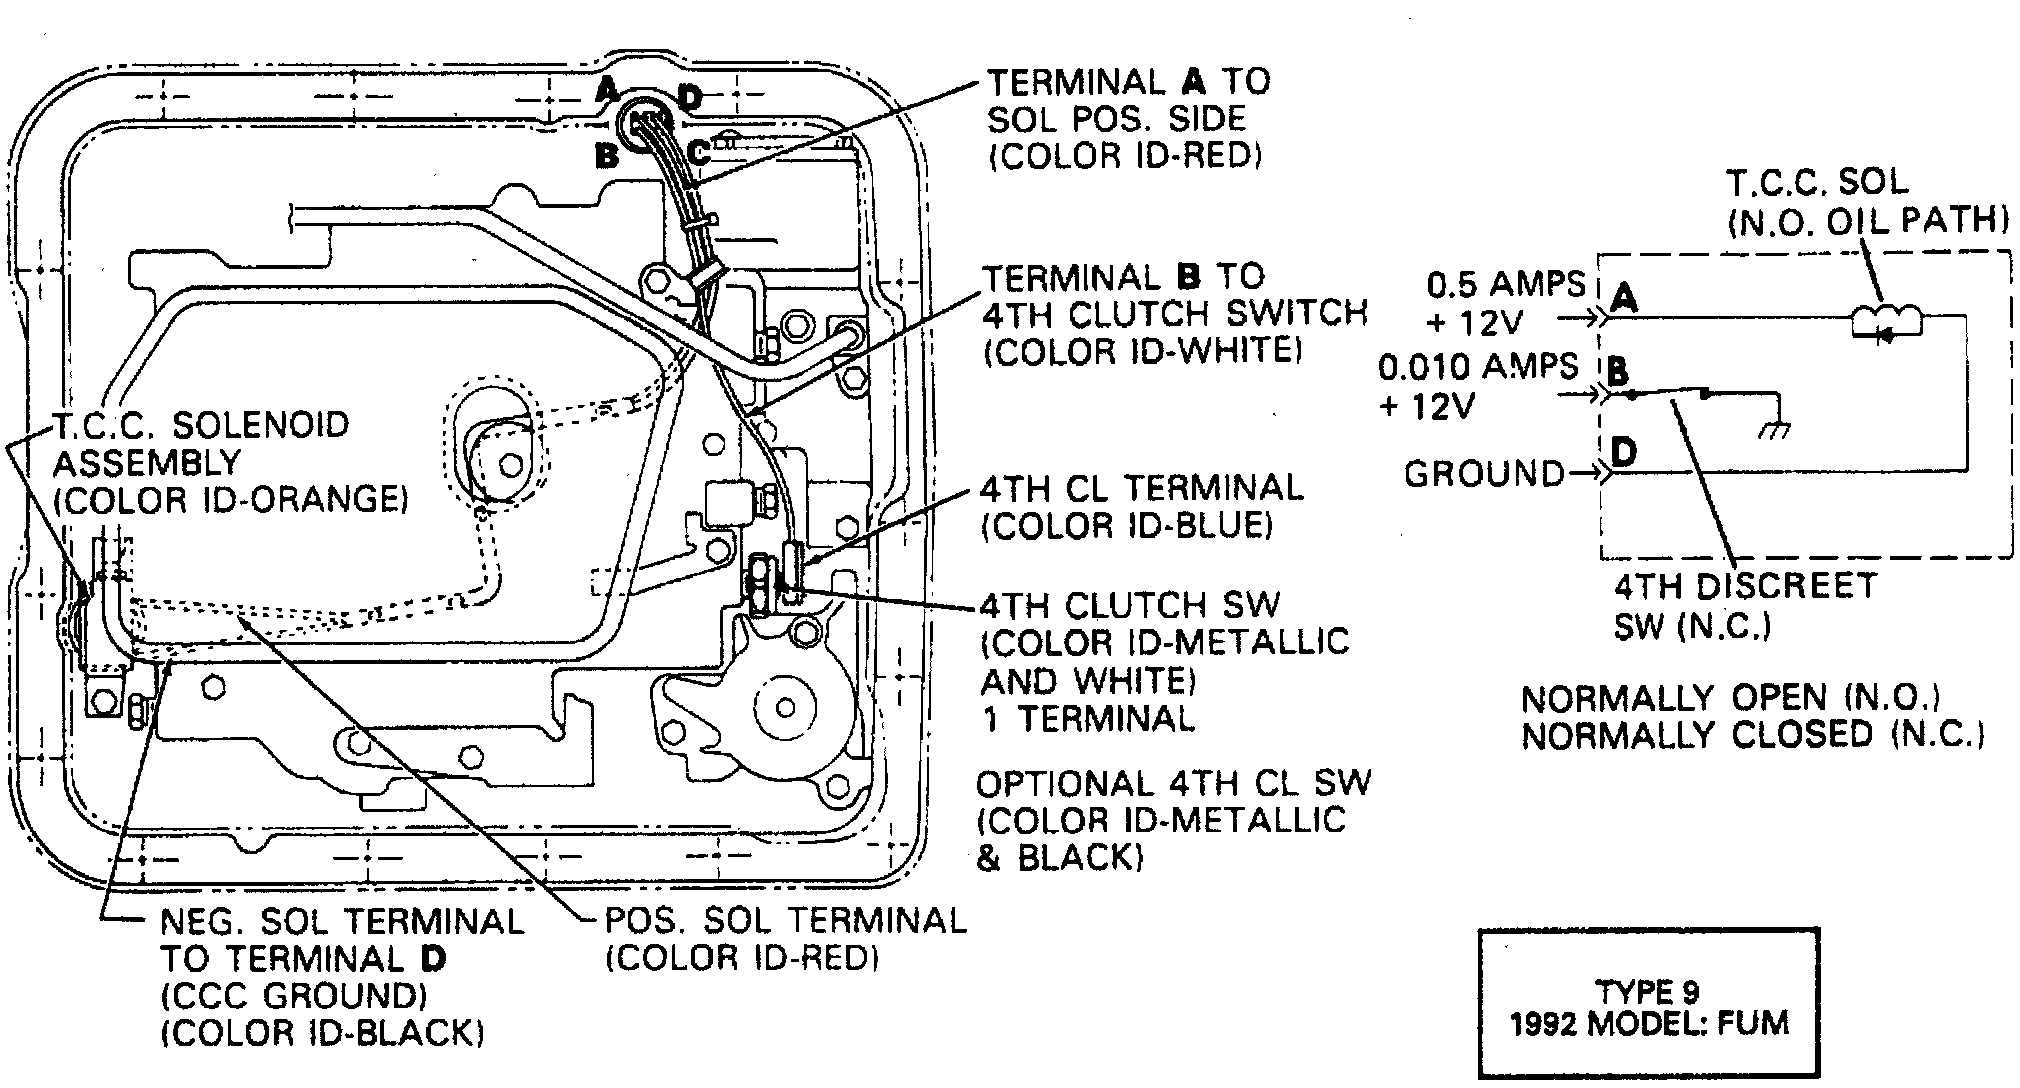
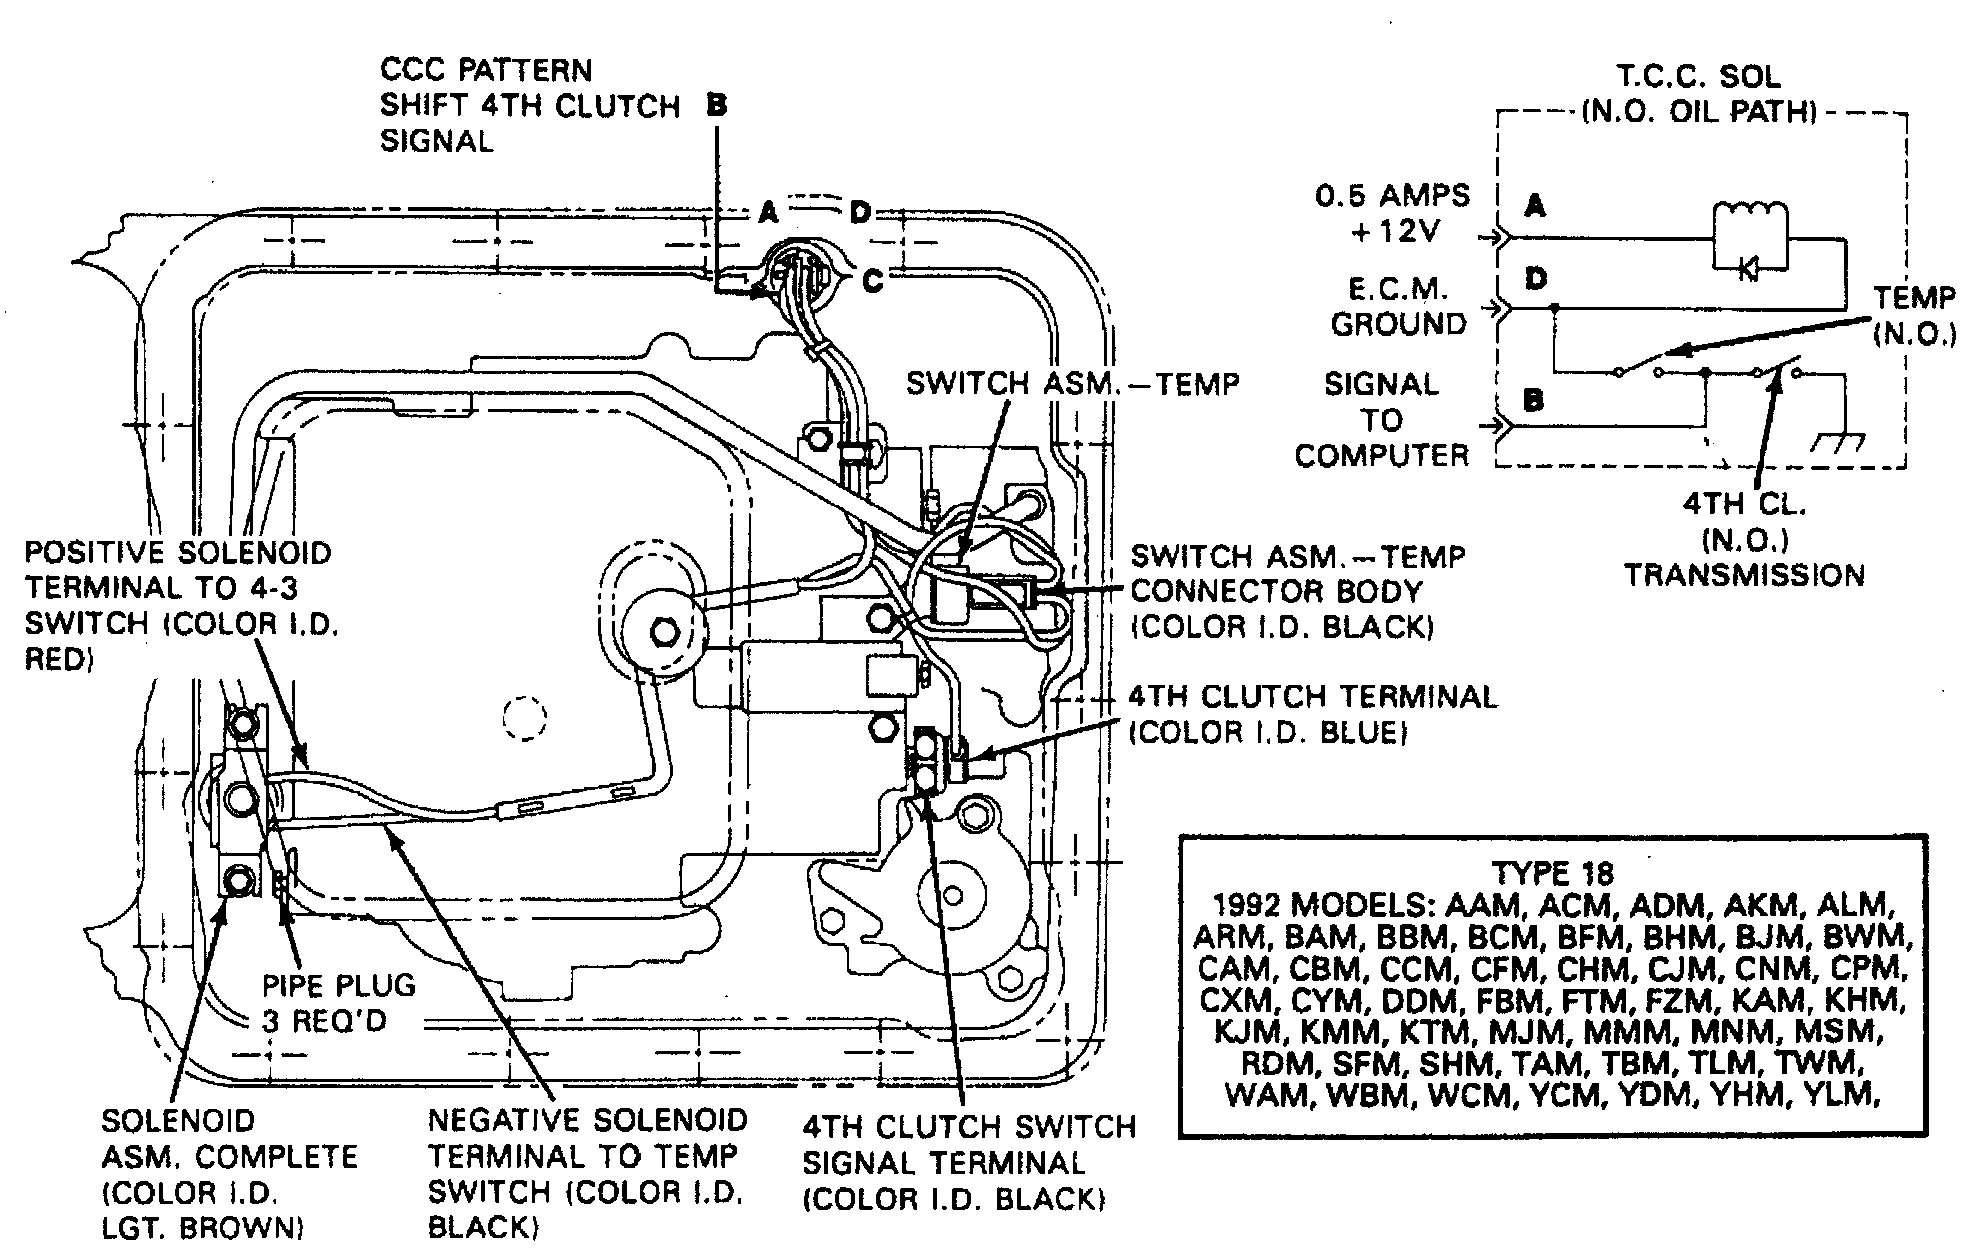
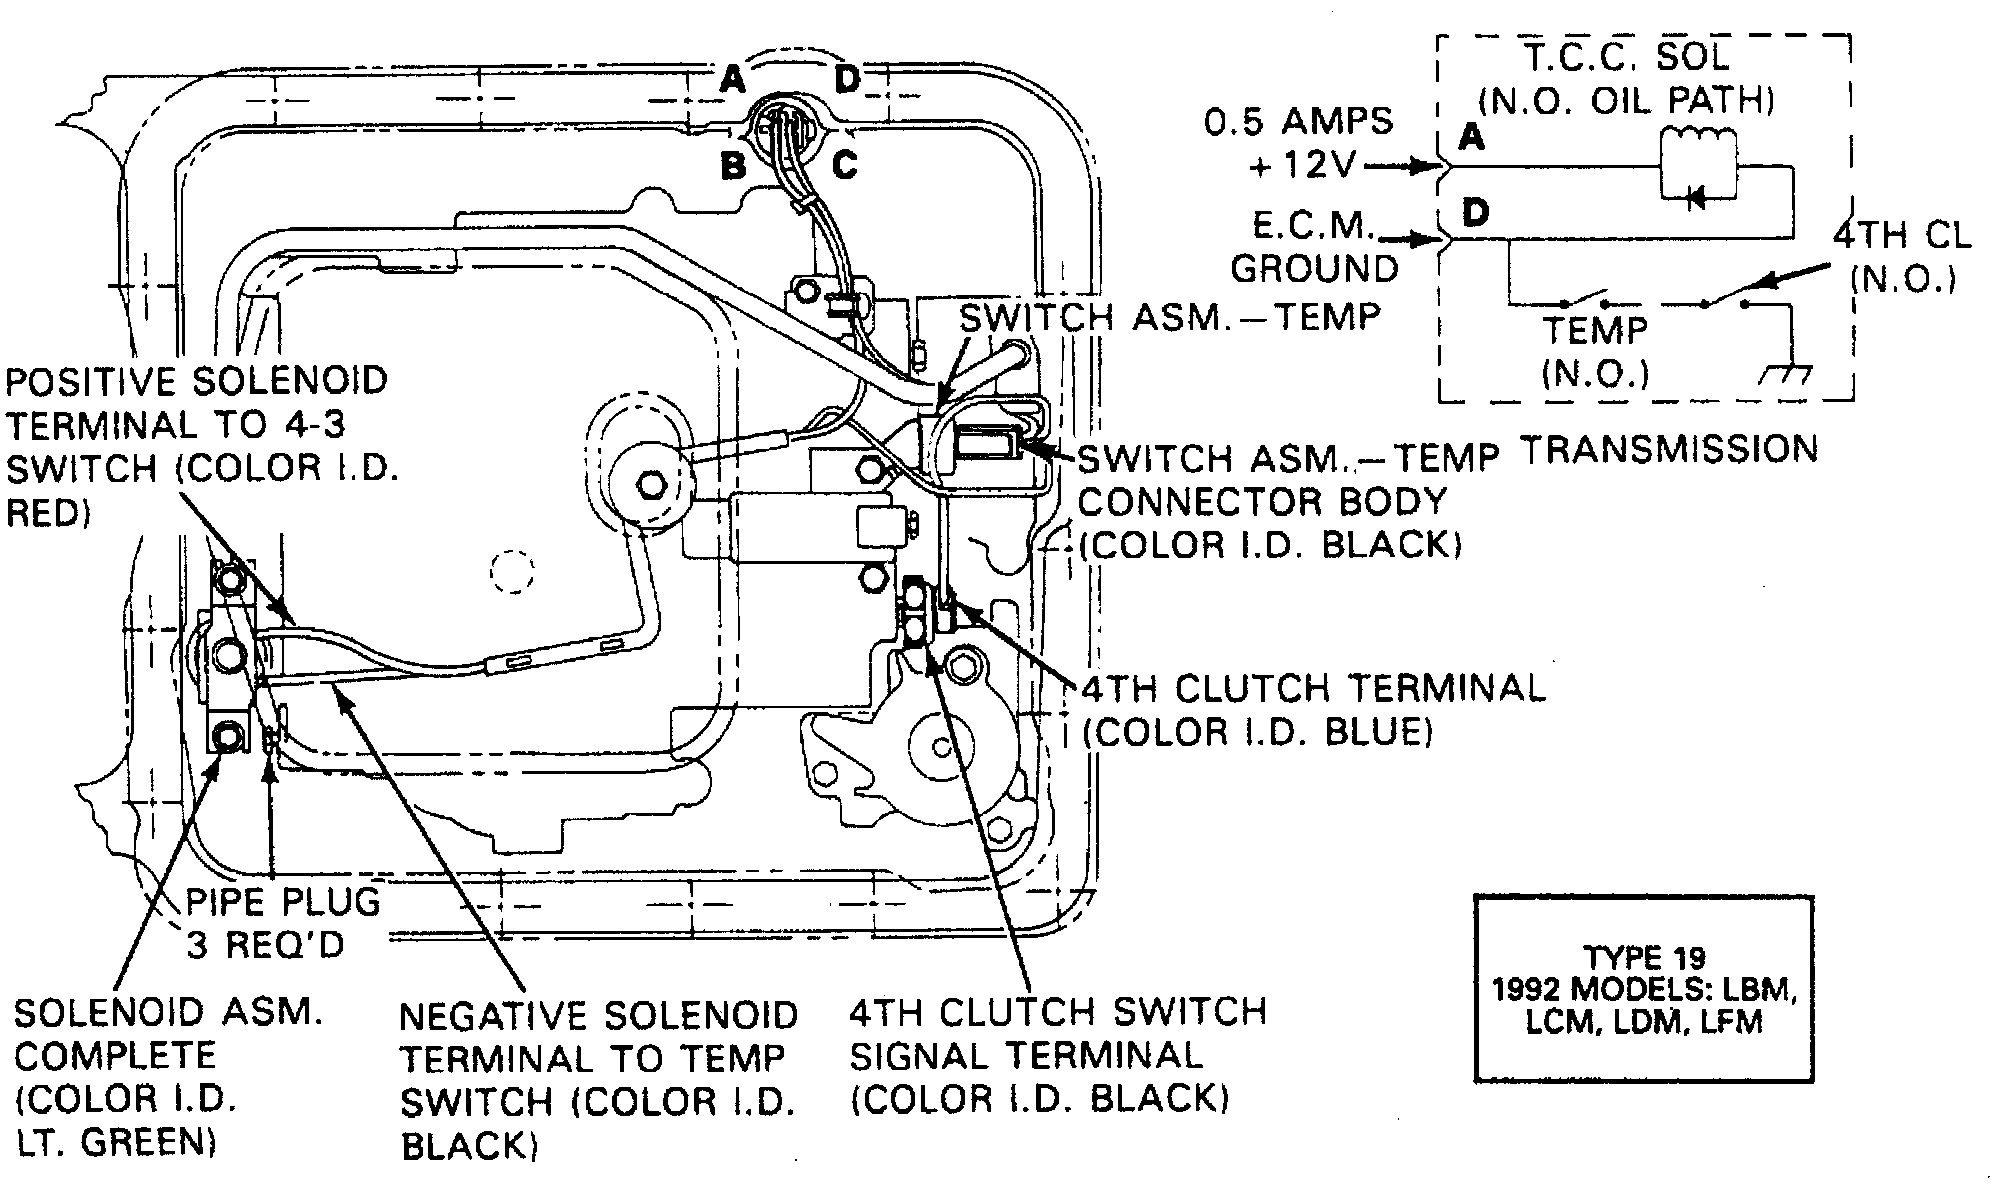
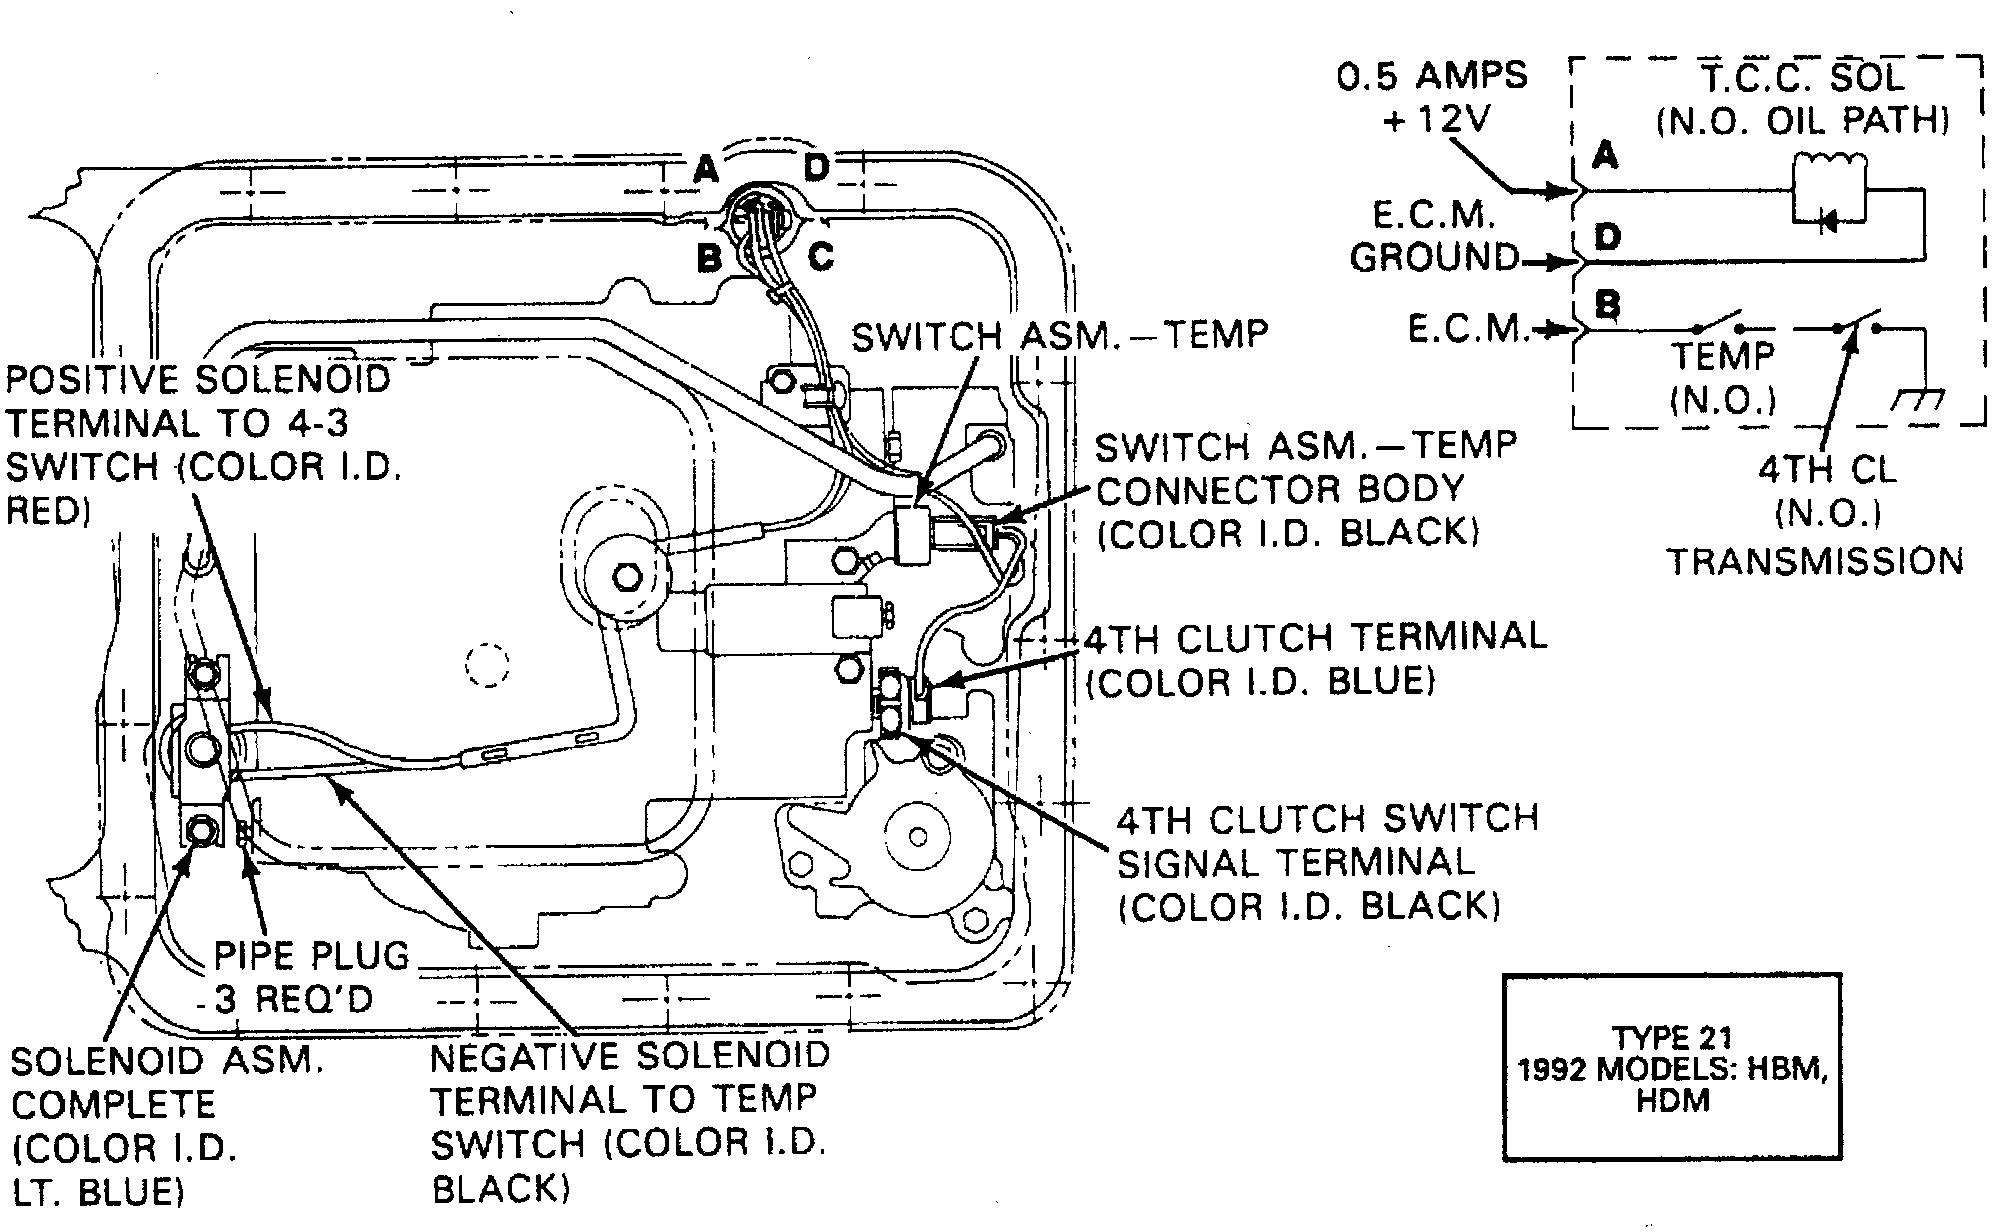
16. Select the proper transmission model code from the images - the model code designation is found within a box in the image. Correctly route and connect solenoid assembly wiring. The wire connectors are color coded to correspond to the information in the wiring diagram. On switches which take two connectors, the terminals are reversible.
17. Install parking bracket and bracket attaching bolts. Tighten attaching bolts to specifications.
18. Install oil passage cover and cover attaching bolts. Tighten attaching bolts to specifications.
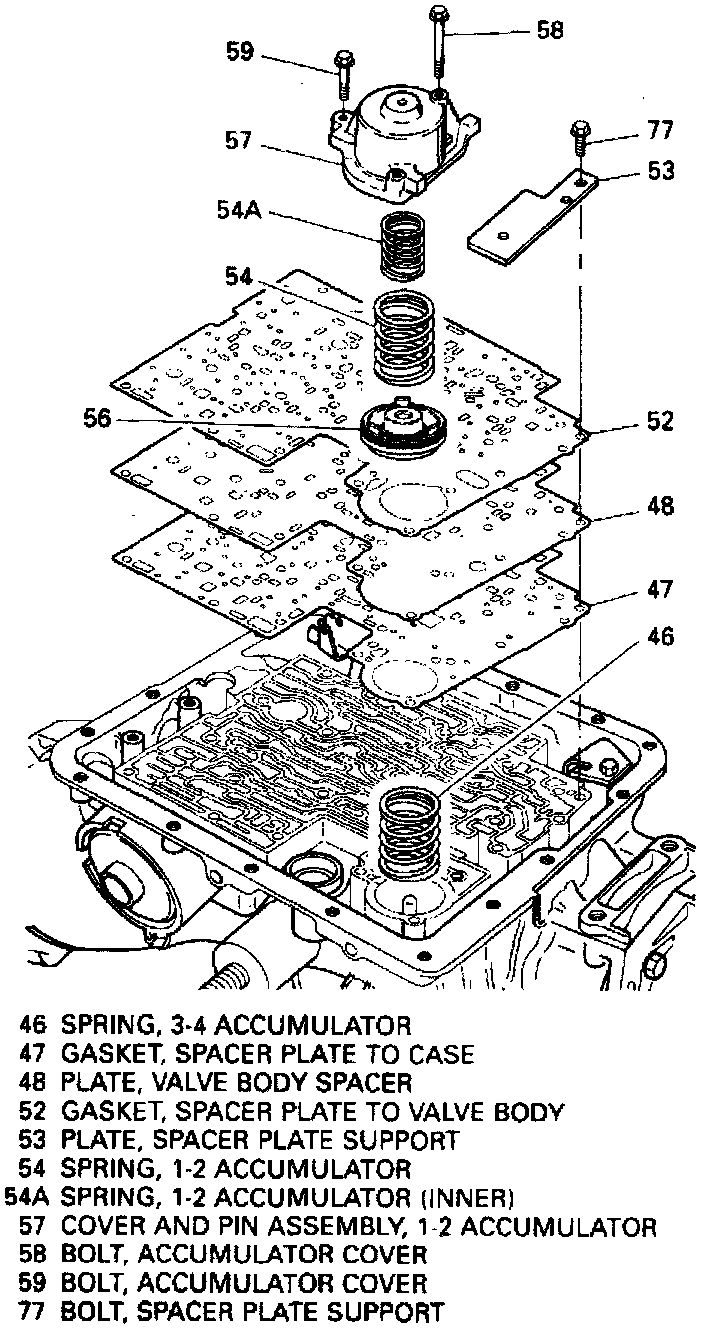
19. Install 1-2 accumulator piston seal onto the 1-2 accumulator piston.
20. Install 1-2 accumulator piston into the 1-2 accumulator cover and pin assembly. Ensure three legs on piston face up toward case when installed.
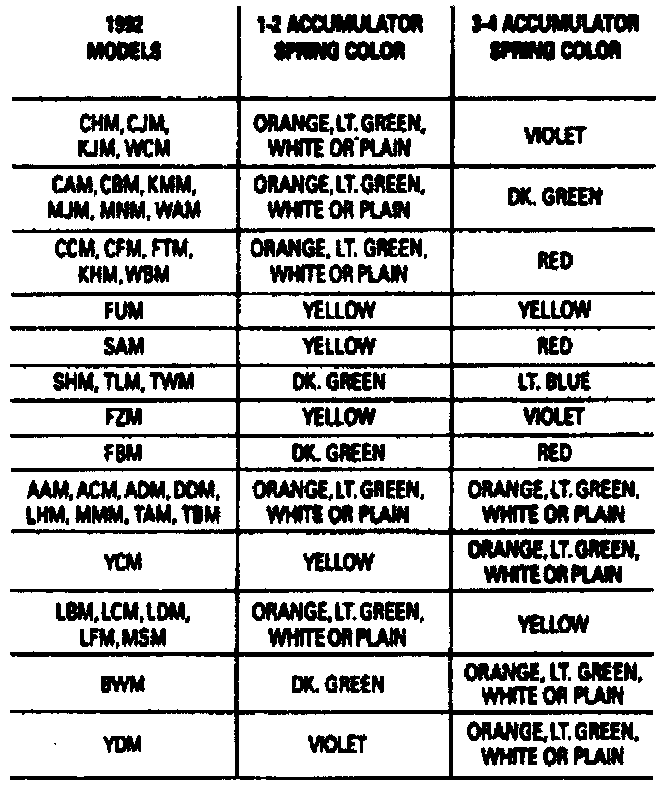
21. Install 1-2 accumulator spring onto the piston.
22. Install 1-2 accumulator cover and pin assembly onto case.
23. Install O-ring seal onto oil filter, then the oil filter.
24. Install oil pan gasket, then the chip magnet into oil pan.
25. Install oil pan and pan attaching bolts. Tighten attaching bolts to specifications.
Factory Service Tools
Use the Manual With the Right Hardware
Pair factory procedures with proven DIY tools so the instructions are easier to execute.
Disclosure: Verified tool recommendations may earn an affiliate commission at no cost to you.
When to See a Mechanic
Stop DIY work and contact a certified mechanic immediately if any of the following apply:
- • You smell fuel, burning insulation, or see smoke.
- • Brakes feel soft, pull hard to one side, or make grinding noises.
- • The engine overheats, stalls repeatedly, or misfires under load.
- • You are missing required tools, torque specs, or safe lifting equipment.
- • You are not confident in the next step or safety outcome.
Rather have a pro handle this?
A certified mobile mechanic comes to your home or office. They bring the tools, you stay comfortable. No tow truck, no waiting room, no surprises.
Comes to youSame-day available12-month warranty
Get a Free QuoteNo obligation. See pricing before you book.