
Safety Warning
DIY auto repair can cause serious injury, fire, or vehicle damage. These guides are for informational purposes only. Always follow OEM torque specs, wear PPE, and consult a certified mechanic if you are unsure. You are solely responsible for your safety.
2008 Freightliner Sprinter 2500 V6-3.0L DSL TurboFACTORY OEM SERVICE PROCEDURE
System Specifications
ENGINE SPECIFICATIONS
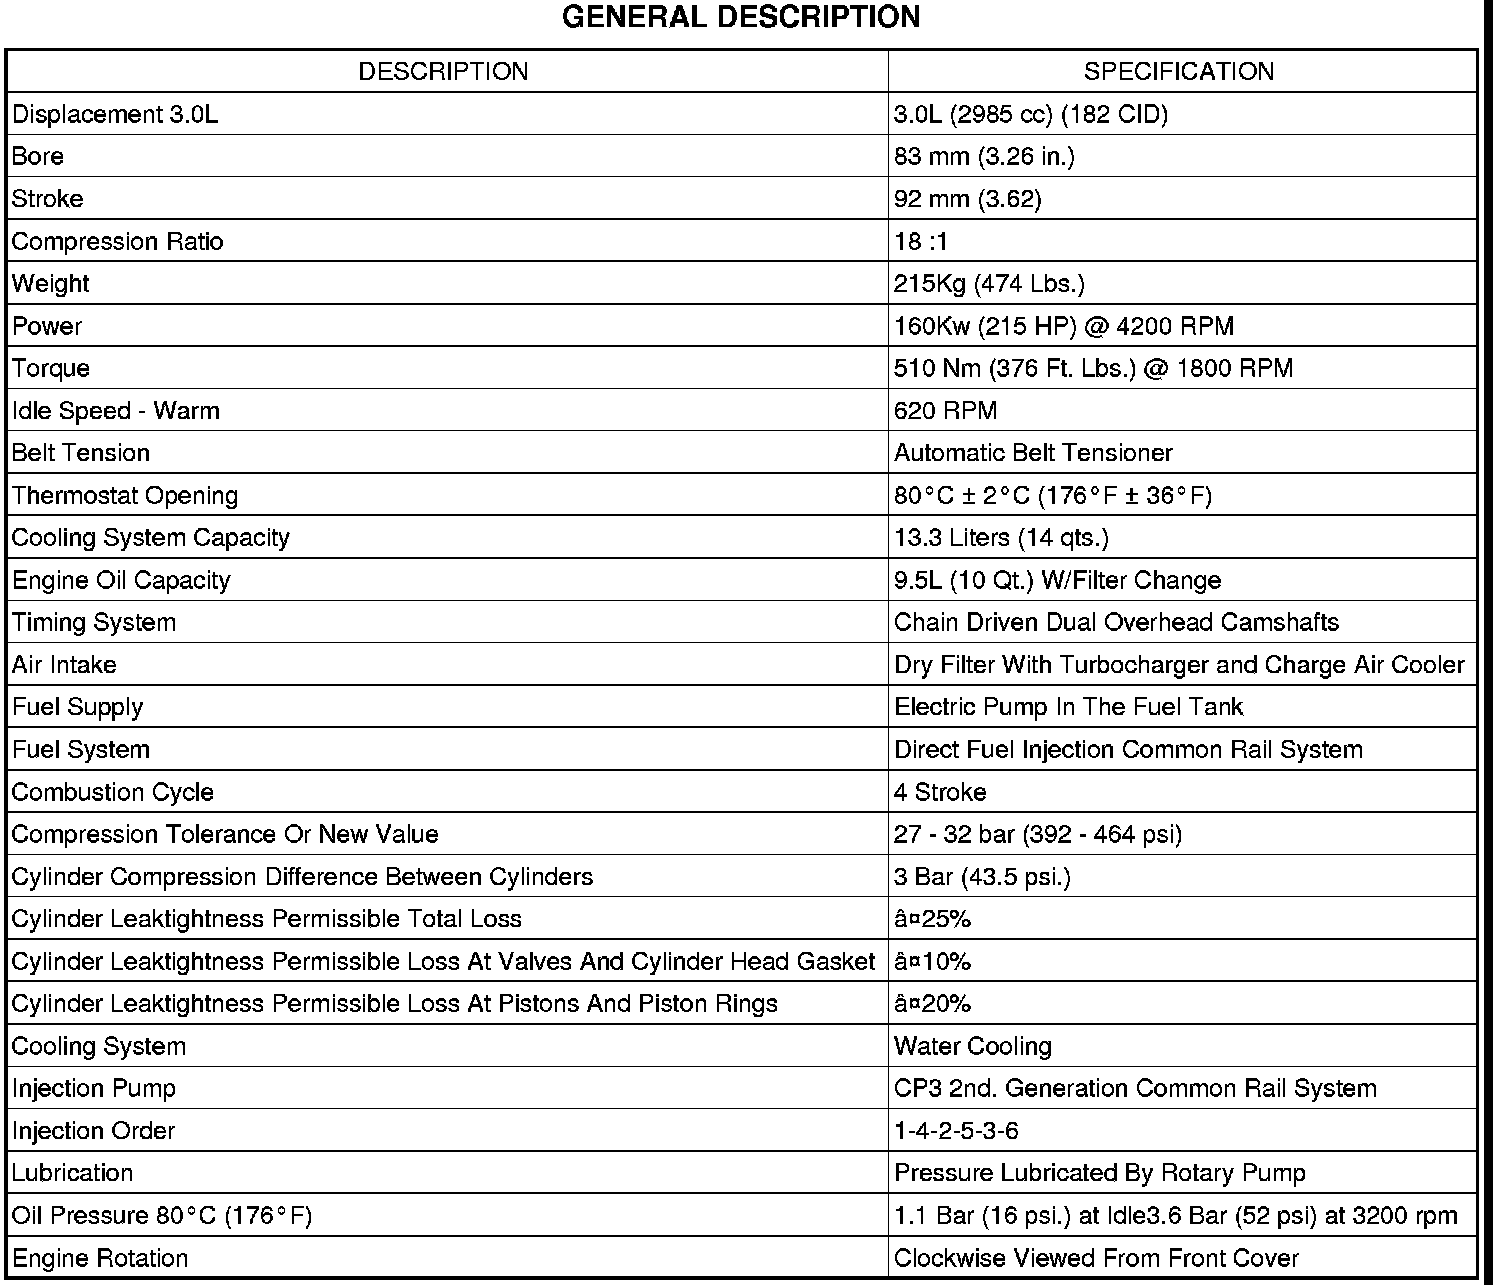

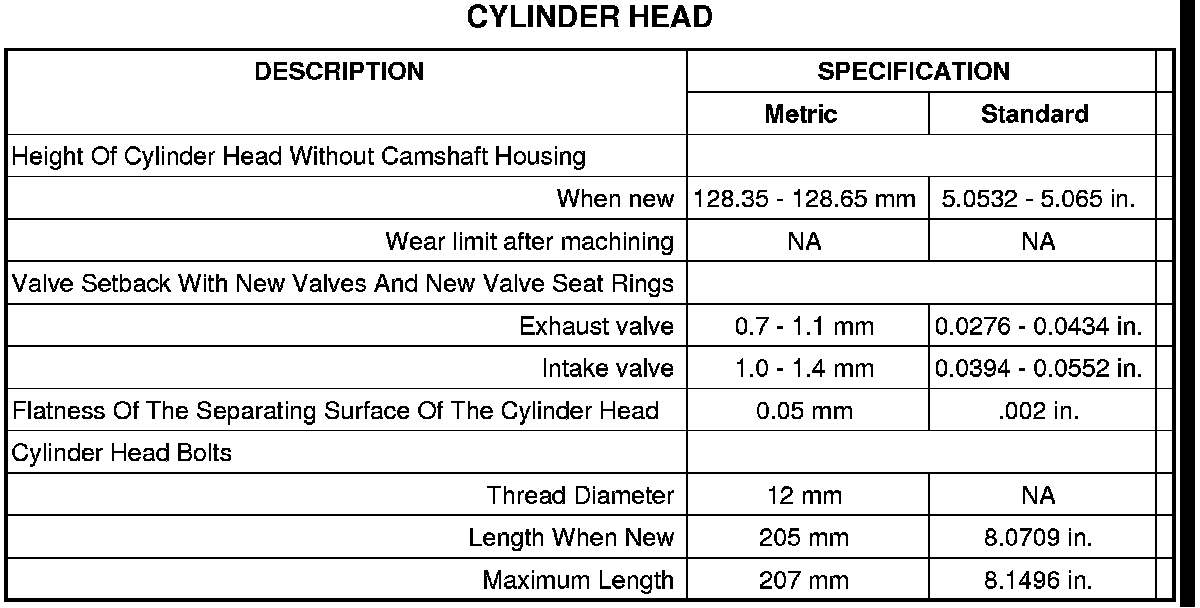
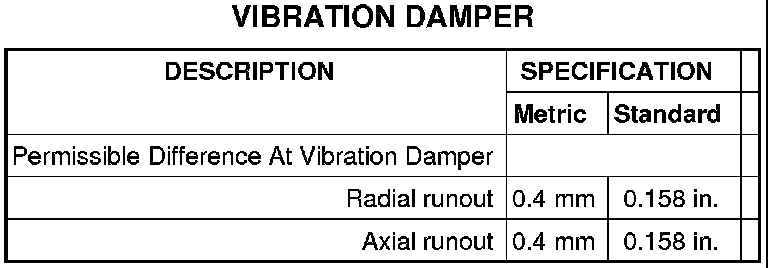

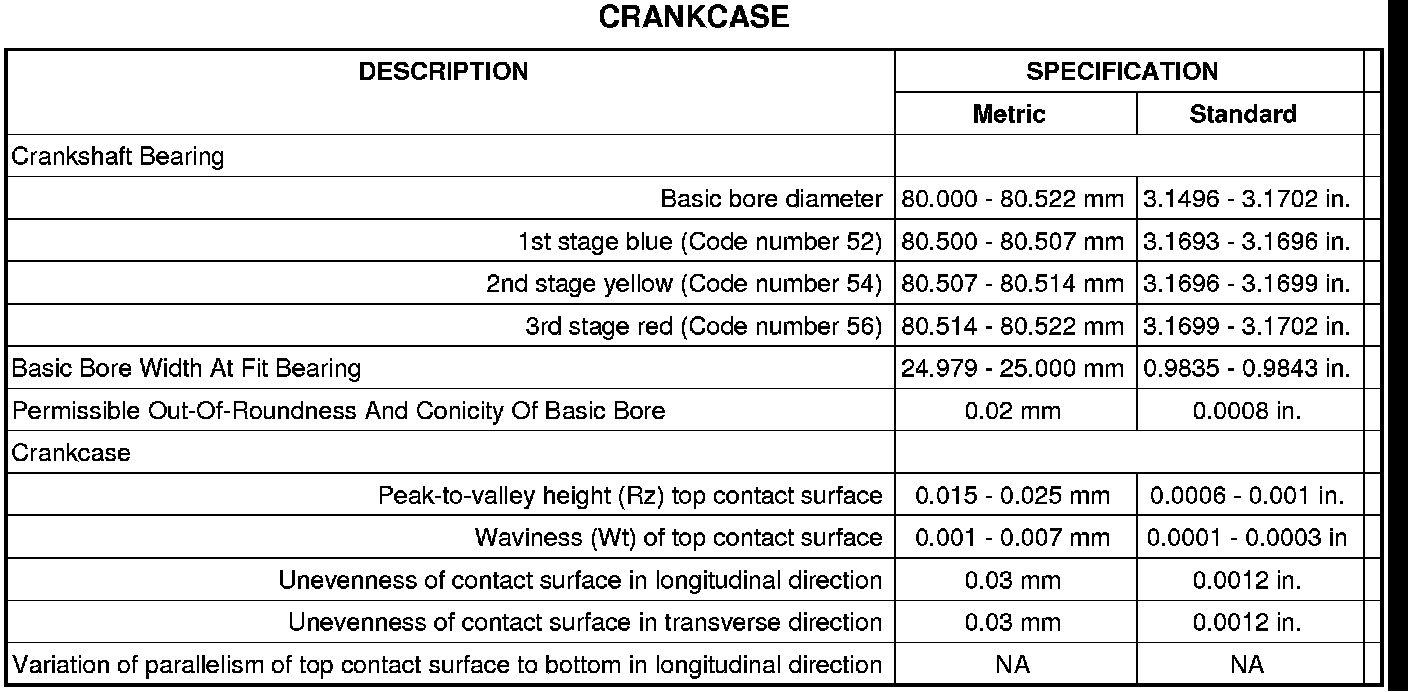
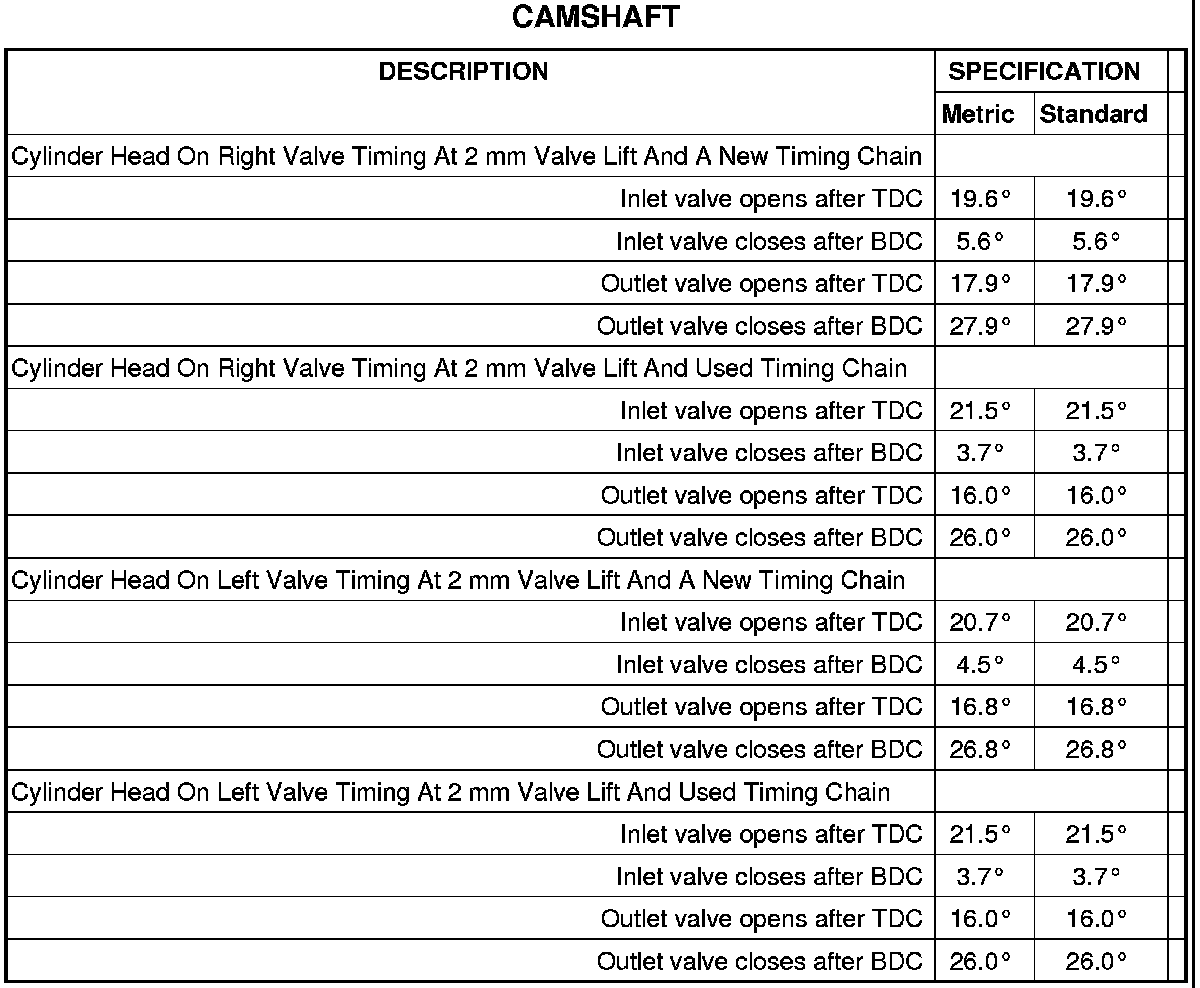

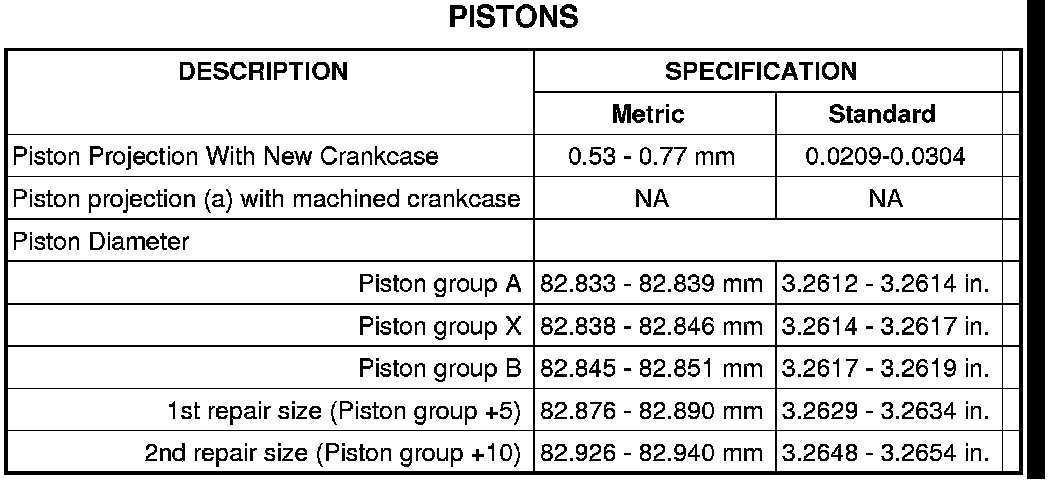

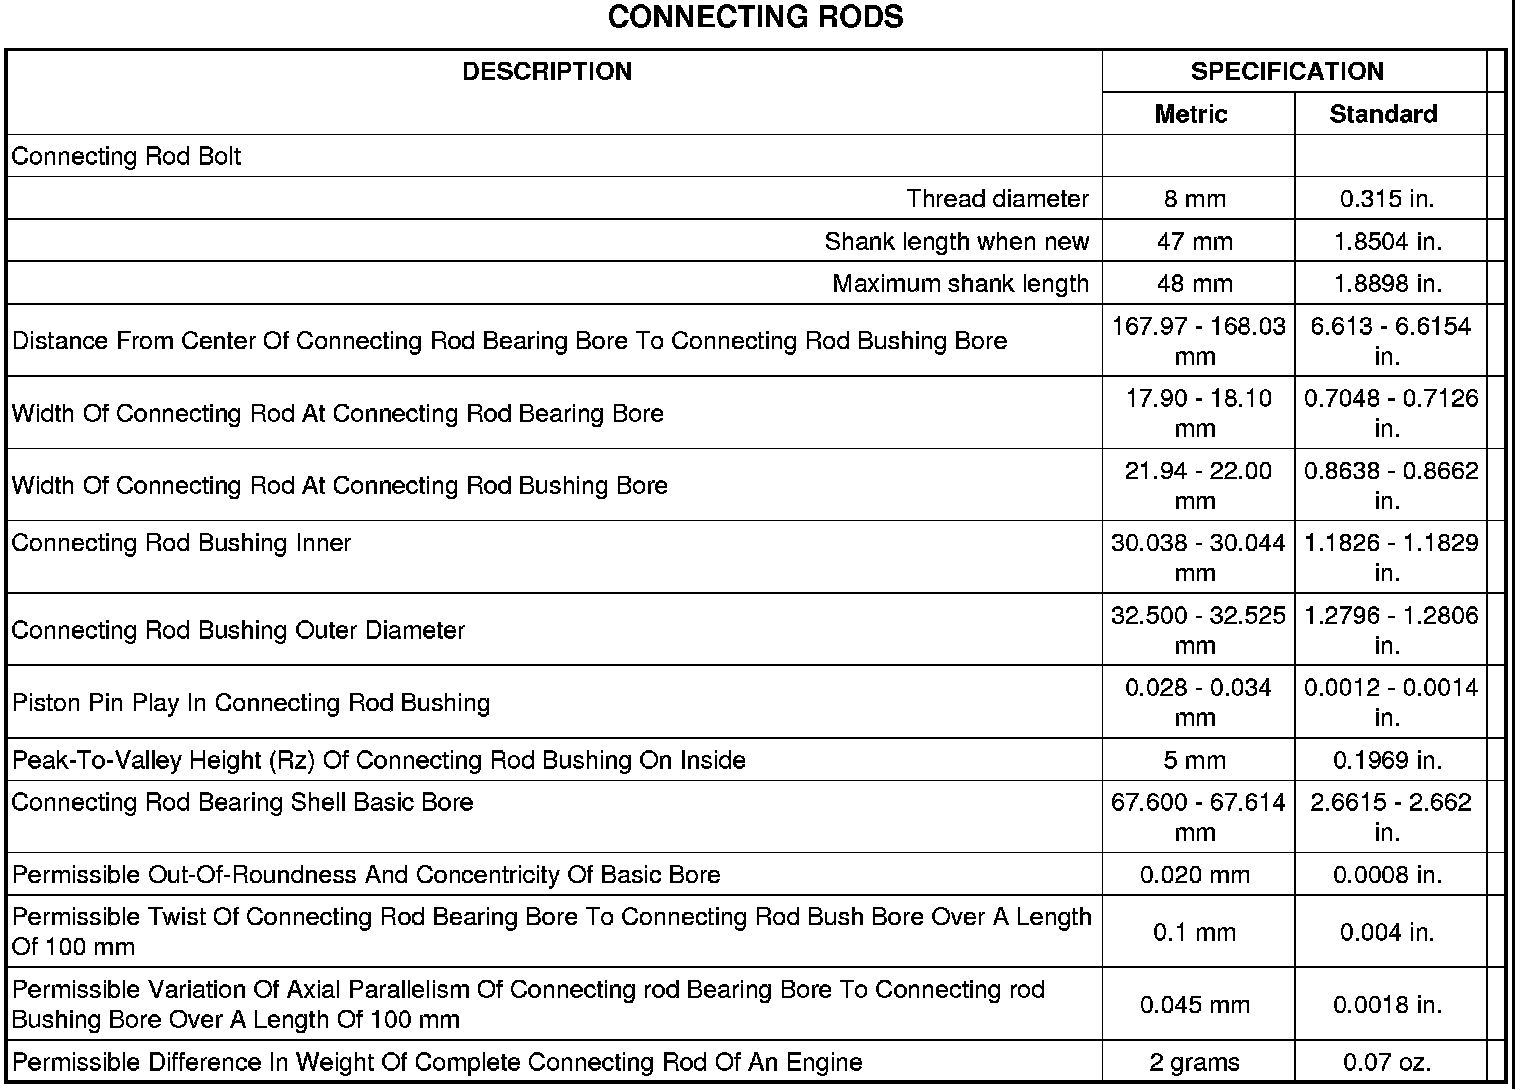
MAIN BEARING SIZE CODES
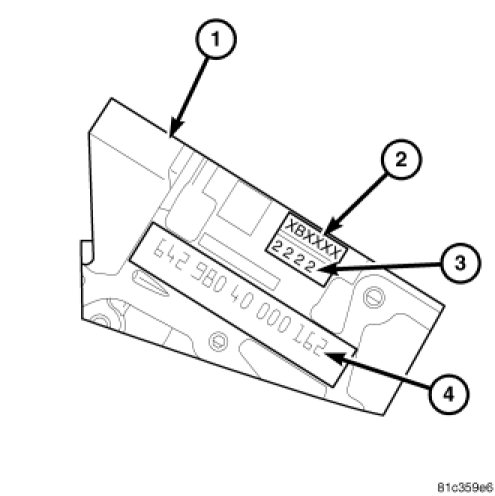
Each color-coded bearing is matched to its respective journal for the best fit possible (select fit). In production, the select fit is obtained by matching the color-coded bearings to grade identification marks on the cylinder block and crankshaft. Letters marked on the cylinder block identify the color of each upper-half main bearing, while letters marked on the front end of the crankshaft indicate the color of each lower-half main bearing. A group of four letters located on the machined surface of the cylinder block, above the engine identification number, identifies the upper-half main bearings installed.
- The letter "B" indicates a blue bearing
- The letter "G" indicates a yellow bearing
- The letter "R" indicates a red bearing
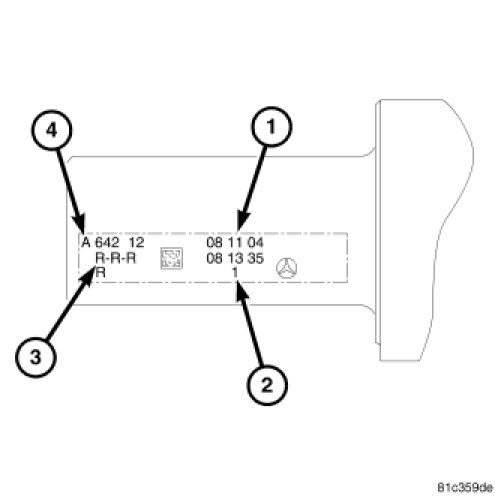
The front end of the crankshaft is engraved using laser marking technology. A group of letters identifies the color of each lower-half main bearing.
- The letter "B" indicates a blue bearing
- The letter "G" indicates a yellow bearing
- The letter "R" indicates a red bearing
- The letter "W" indicates a white bearing
- The letter "V" indicates a violet bearing
Check the grade identification marks on the cylinder block and crankshaft to properly select the main bearings. For example, if the crankshaft has the letter "B" in position No.2 and the cylinder block has the letter "R" in position No.2, the proper select bearing color code is red for the upper main bearing and blue for the lower main bearing.
CRANKSHAFT TORQUE AND SEQUENCE

NOTE: Do not reuse the main bearing cap bolts. Always install new bolts.
NOTE: Add a light coating of oil to the crankshaft side of the bearing.
1. Lubricate bolts on the thread and bolt head contact surfaces with engine oil. Install all crankshaft bearing cap bolts finger tight.
2. Stage 1: In the sequence shown in the graphic, tighten the crankshaft bearing cap bolts (1-13) to 35 Nm (26 ft lbs)
3. Stage 2: Turn crankshaft bearing cap bolts an additional 95 degrees.
4. Stage 3: Turn crankshaft bearing cap bolts an additional 95 degrees.
5. Stage 4: In the sequence shown in the graphic, tighten the lateral (side of the block, 1- 8) crankshaft bearing cap bolts to 53 Nm (39 ft lbs).
6. Make sure that the crankshaft turns freely.
HARMONIC BALANCER TORQUE
Tighten the bolt to 304 Nm, plus 90 degrees (224 ft. lbs. plus 90 degrees).
Factory Service Tools
Use the Manual With the Right Hardware
Pair factory procedures with proven DIY tools so the instructions are easier to execute.
Disclosure: Verified tool recommendations may earn an affiliate commission at no cost to you.
When to See a Mechanic
Stop DIY work and contact a certified mechanic immediately if any of the following apply:
- • You smell fuel, burning insulation, or see smoke.
- • Brakes feel soft, pull hard to one side, or make grinding noises.
- • The engine overheats, stalls repeatedly, or misfires under load.
- • You are missing required tools, torque specs, or safe lifting equipment.
- • You are not confident in the next step or safety outcome.