
Safety Warning
DIY auto repair can cause serious injury, fire, or vehicle damage. These guides are for informational purposes only. Always follow OEM torque specs, wear PPE, and consult a certified mechanic if you are unsure. You are solely responsible for your safety.
2002 Freightliner Sprinter 2500 L5-2.7L DSL TurboFACTORY OEM SERVICE PROCEDURE
Brake Bleeding: Service and Repair
STANDARD PROCEDURE - MANUAL BLEEDING
Use Mopar brake fluid, or an equivalent quality fluid meeting SAE and DOT 4 standards only. Use fresh, clean fluid from a sealed container at all times.
1. Remove reservoir filler caps and fill reservoir.
2. If calipers, or wheel cylinders were overhauled, open all caliper and wheel cylinder bleed screws. Then close each bleed screw as fluid starts to drip from it. Top off master cylinder reservoir once more before proceeding.
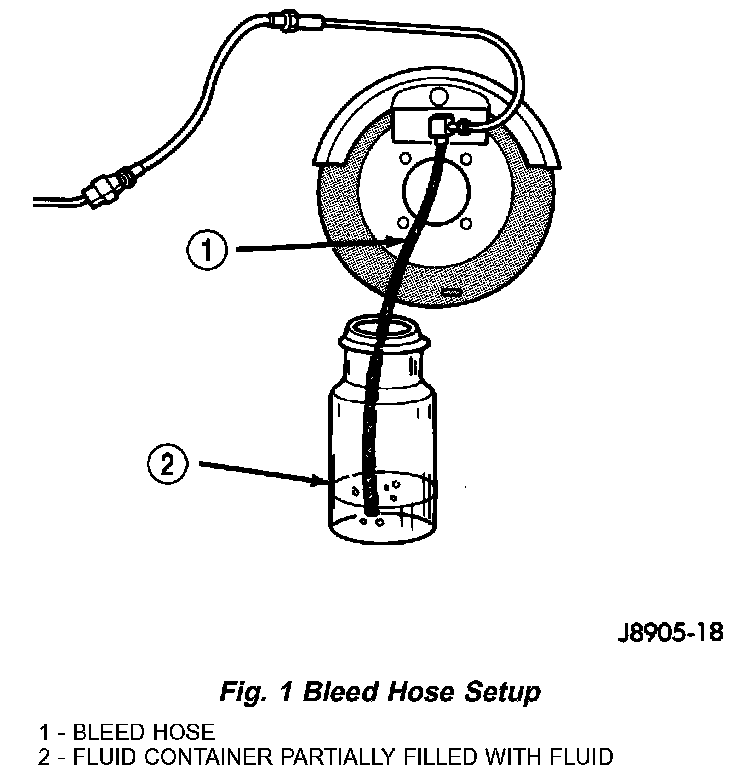
3. Attach one end of bleed hose to bleed screw and insert opposite end in glass container partially filled with brake fluid (Fig. 1). Be sure end of bleed hose is immersed in fluid.
4. Open up bleeder, then have a helper press down the brake pedal. Once the pedal is down close the bleeder. Repeat bleeding until fluid stream is clear and free of bubbles. Then move to the next wheel.
STANDARD PROCEDURE - PRESSURE BLEEDING
Use Mopar brake fluid, or an equivalent quality fluid meeting SAE and DOT 4 standards only. Use fresh, clean fluid from a sealed container at all times.
Follow the manufacturers instructions carefully when using pressure equipment. Do not exceed the tank manufacturers pressure recommendations. Generally, a tank pressure of 15-20 psi is sufficient for bleeding.
Fill the bleeder tank with recommended fluid and purge air from the tank lines before bleeding.
Do not pressure bleed without a proper master cylinder adapter. The wrong adapter can lead to leakage, or drawing air back into the system.
Use Mopar brake fluid, or an equivalent quality fluid meeting SAE and DOT 4 standards only. Use fresh, clean fluid from a sealed container at all times.
1. Remove reservoir filler caps and fill reservoir.
2. If calipers, or wheel cylinders were overhauled, open all caliper and wheel cylinder bleed screws. Then close each bleed screw as fluid starts to drip from it. Top off master cylinder reservoir once more before proceeding.
3. Attach one end of bleed hose to bleed screw and insert opposite end in glass container partially filled with brake fluid (Fig. 1). Be sure end of bleed hose is immersed in fluid.
4. Open up bleeder, then have a helper press down the brake pedal. Once the pedal is down close the bleeder. Repeat bleeding until fluid stream is clear and free of bubbles. Then move to the next wheel.
STANDARD PROCEDURE - PRESSURE BLEEDING
Use Mopar brake fluid, or an equivalent quality fluid meeting SAE and DOT 4 standards only. Use fresh, clean fluid from a sealed container at all times.
Follow the manufacturers instructions carefully when using pressure equipment. Do not exceed the tank manufacturers pressure recommendations. Generally, a tank pressure of 15-20 psi is sufficient for bleeding.
Fill the bleeder tank with recommended fluid and purge air from the tank lines before bleeding.
Do not pressure bleed without a proper master cylinder adapter. The wrong adapter can lead to leakage, or drawing air back into the system.
Factory Service Tools
Use the Manual With the Right Hardware
Pair factory procedures with proven DIY tools so the instructions are easier to execute.
Disclosure: Verified tool recommendations may earn an affiliate commission at no cost to you.
When to See a Mechanic
Stop DIY work and contact a certified mechanic immediately if any of the following apply:
- • You smell fuel, burning insulation, or see smoke.
- • Brakes feel soft, pull hard to one side, or make grinding noises.
- • The engine overheats, stalls repeatedly, or misfires under load.
- • You are missing required tools, torque specs, or safe lifting equipment.
- • You are not confident in the next step or safety outcome.