
Safety Warning
DIY auto repair can cause serious injury, fire, or vehicle damage. These guides are for informational purposes only. Always follow OEM torque specs, wear PPE, and consult a certified mechanic if you are unsure. You are solely responsible for your safety.
2012 Ford Taurus AWD V6-3.5LFACTORY OEM SERVICE PROCEDURE
Refrigerant: Service and Repair
Air Conditioning (A/C) System Recovery, Evacuation and Charging
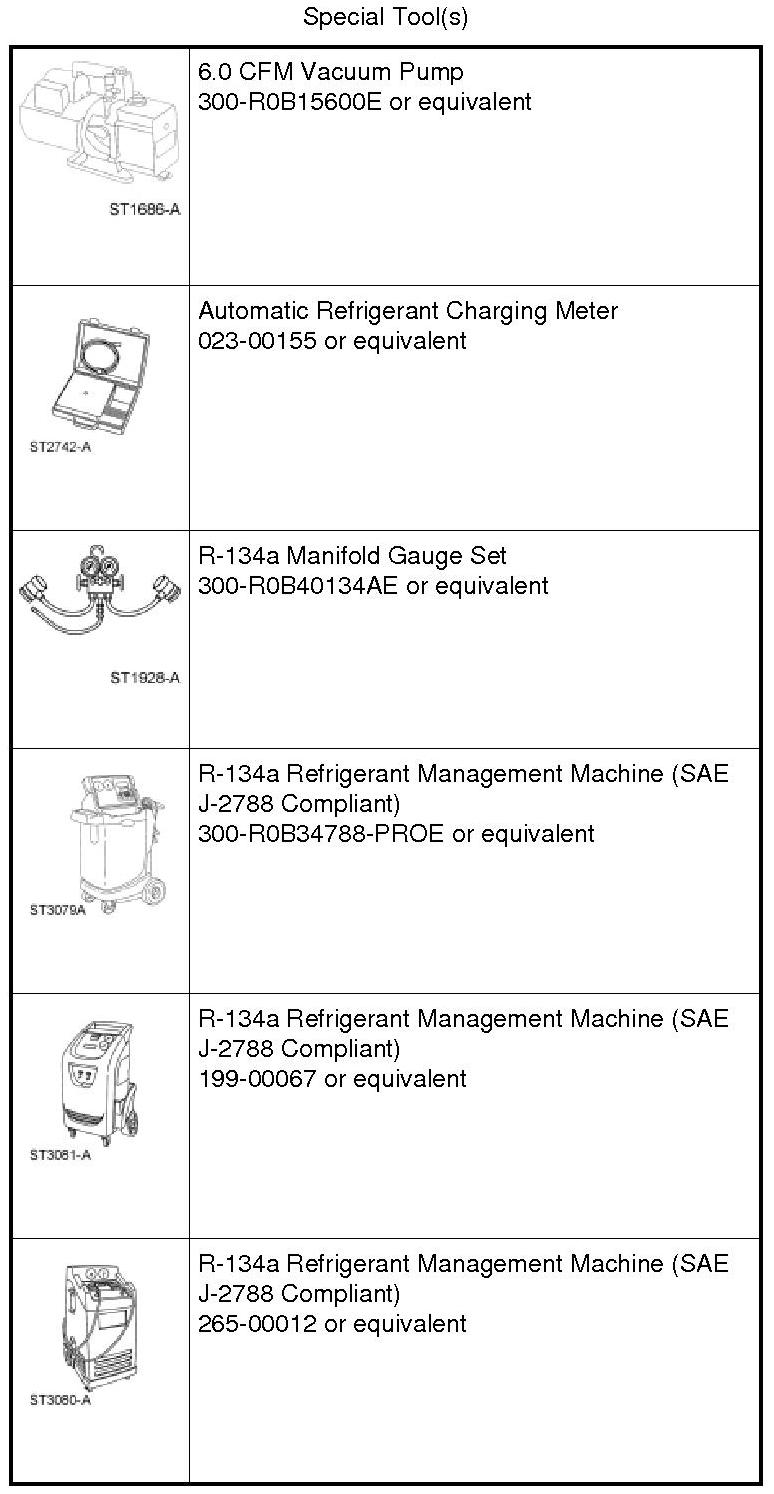
Refrigerant System Recovery
NOTICE: An Air Conditioning (A/C) refrigerant analyzer must be used before the recovery of any vehicle's A/C refrigerant. Failure to do so puts the shop's bulk refrigerant at risk of contamination. If the vehicle's A/C refrigerant is contaminated, refer the customer to the service facility that carried out the last A/C service. If the customer wishes to pay the additional cost, use the A/C recovery equipment that is designated for recovering contaminated A/C refrigerant. All contaminated A/C refrigerant must be disposed of as hazardous waste. For all equipment, follow the equipment manufacturer procedures and instructions.
NOTE: Ford Motor Company recommends the use of R-134a refrigerant management equipment that meets the requirements of the SAE J2788 standard.
1. Prior to recovering, the purity of the refrigerant must be verified. For additional information, refer to Refrigerant Identification Testing Refrigerant Identification Testing.
2. Connect a R-134a Refrigerant Management Machine to the low- and high-pressure service gauge port valves following the operating instructions provided by the equipment manufacturer.
3. Recover the refrigerant from the system following the operating instructions provided by the equipment manufacturer. Note the amount of oil removed during the refrigerant recovery (if any). Add that same amount back into the system once repairs are complete.
4. Once the R-134a Refrigerant Management Machine has recovered the refrigerant, switch OFF the power supply.
5. Allow the system to set for about 2 minutes, and observe the system vacuum reading. If the vacuum is not lost, disconnect the recovery equipment.
6. If the system does lose vacuum, repeat Steps 3 through 5 until the vacuum level remains stable for 2 minutes.
7. Carry out the required repairs.
Refrigerant System Evacuation Using a R-134a Refrigerant Management Machine
1. Connect a R-134a Refrigerant Management Machine to the low- and high-pressure service gauge port valves following the operating instructions provided by the equipment manufacturer.
2. Evacuate the system until the low-pressure gauge reads at least 99.4 kPa (29.5 in-Hg) of vacuum and as close to 101.1 kPa (30 in-Hg) as possible. Continue to operate the Vacuum Pump for a minimum of 45 minutes.
3. Turn OFF the Vacuum Pump. Observe the low-pressure gauge for 5 minutes to make sure that the system vacuum is held.
Refrigerant System Evacuation Using a R-134a Manifold Gauge Set and Vacuum Pump
NOTE: Leaks in refrigerant system service equipment, hoses or gauges can cause a leak in vacuum that may be misinterpreted as a problem with the vehicle's refrigerant system. It is necessary to leak-test all refrigerant system service equipment, hoses and gauges on a weekly basis to verify that no leaks are present.
1. Connect the R-134a Manifold Gauge Set to the low-side and high-side service gauge port valves.
2. Connect the center (yellow) hose from the R-134a Manifold Gauge Set to the suction port on the Vacuum Pump.
3. Open all valves on the R-134a Manifold Gauge Set and both service gauge port valves.
4. Turn on the Vacuum Pump and evacuate the system until the low-pressure gauge reads at least 99.4 kPa (29.5 in-Hg) of vacuum and as close to 101.1 kPa (30 in-Hg) as possible. Continue to operate the Vacuum Pump for a minimum of 45 minutes.
5. Close the high-side and low-side valves on the R-134a Manifold Gauge Set (not the service gauge port valves) and turn OFF the Vacuum Pump.
6. Observe the low-pressure gauge for 5 minutes to make sure that the system vacuum is held. If vacuum is not held for 5 minutes, leak test the system, repair the leak and evacuate the system again.
Refrigerant System Charging Using a R-134a Refrigerant Management Machine
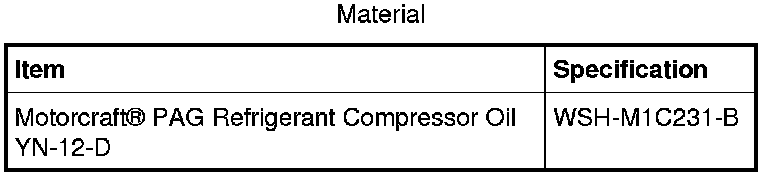
1. Lubricate the refrigerant system with the correct amount of clean PAG oil. For additional information, refer to Refrigerant Oil Adding Refrigerant Oil Adding.
2. Connect a R-134a Refrigerant Management Machine to the low-side and high-side service gauge port valves following the operating instructions provided by the equipment manufacturer.
3. Set the refrigerant charge amount, and charge the refrigerant system following the instructions provided by the equipment manufacturer.
Refrigerant System Charging Using a R-134a Manifold Gauge Set and Automatic Refrigerant Charging Meter
NOTE: Ford Motor Company recommends use of a R-134a Refrigerant Management Machine to carry out charging of the refrigerant system. If a R-134a Refrigerant Management Machine is not available, refrigerant system charging may be accomplished using a separate Automatic Refrigerant Charging Meter and R-134a Manifold Gauge Set.
1. Lubricate the refrigerant system with the correct amount of clean PAG oil. For additional information, refer to Refrigerant Oil Adding Refrigerant Oil Adding.
2. Assemble the R-134a Manifold Gauge Set, Automatic Refrigerant Charging Meter and R-134a supply tank following the Automatic Refrigerant Charging Meter operating instructions.
3. Charge the refrigerant system following the Automatic Refrigerant Charging Meter operating instructions.
4. If the refrigerant flow stops before the refrigerant charge is complete, start the engine, select MAX A/C operation and allow the refrigerant charge to complete.
Factory Service Tools
Use the Manual With the Right Hardware
Pair factory procedures with proven DIY tools so the instructions are easier to execute.
Disclosure: Verified tool recommendations may earn an affiliate commission at no cost to you.
When to See a Mechanic
Stop DIY work and contact a certified mechanic immediately if any of the following apply:
- • You smell fuel, burning insulation, or see smoke.
- • Brakes feel soft, pull hard to one side, or make grinding noises.
- • The engine overheats, stalls repeatedly, or misfires under load.
- • You are missing required tools, torque specs, or safe lifting equipment.
- • You are not confident in the next step or safety outcome.
Rather have a pro handle this?
A certified mobile mechanic comes to your home or office. They bring the tools, you stay comfortable. No tow truck, no waiting room, no surprises.
Comes to youSame-day available12-month warranty
Get a Free QuoteNo obligation. See pricing before you book.