
Safety Warning
DIY auto repair can cause serious injury, fire, or vehicle damage. These guides are for informational purposes only. Always follow OEM torque specs, wear PPE, and consult a certified mechanic if you are unsure. You are solely responsible for your safety.
2012 Ford Escape 2WD L4-2.5LFACTORY OEM SERVICE PROCEDURE
Compressor HVAC: Service and Repair
Air Conditioning (A/C) Compressor - 2.5L
Removal and Installation
NOTICE: If installing a new Air Conditioning (A/C) compressor due to an internal failure of the old unit, carry out the following procedures to remove contamination from the A/C system. Failure to remove contamination from the A/C system, if present, will result in poor A/C performance and/or damage to the new A/C compressor and other components.
- If A/C flushing equipment is available, carry out flushing of the A/C system prior to installing a new A/C compressor.
- If A/C flushing equipment is not available, carry out filtering of the A/C system after a new A/C compressor has been installed.
- Install a new Thermostatic Expansion Valve (TXV) as directed by the A/C flushing or filtering procedure.
- Install a new receiver/drier as directed by the A/C flushing or filtering procedure.
NOTE: Installation of a new receiver/drier is not required when repairing the A/C system except when there is physical evidence of system contamination from a failed A/C compressor or damage to the receiver/drier.
NOTE: A new A/C compressor may come equipped with an A/C clutch disc and hub, A/C compressor pulley and A/C clutch field coil already installed. If these components are not pre-installed, it will be necessary to transfer these parts from the old A/C compressor to the new compressor prior to installation of the A/C compressor if suitable for reuse.
1. With the vehicle in NEUTRAL, position it on a hoist.
2. Recover the refrigerant.
3. Remove the RH lower engine splash shield.
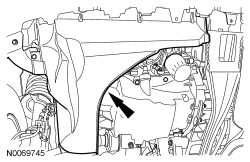
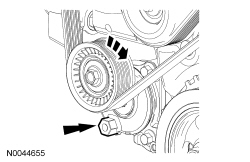
4. Release the accessory drive belt tensioner and remove the drive belt from the A/C compressor pulley.
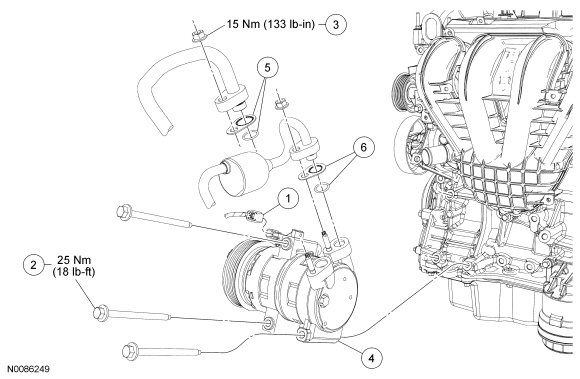
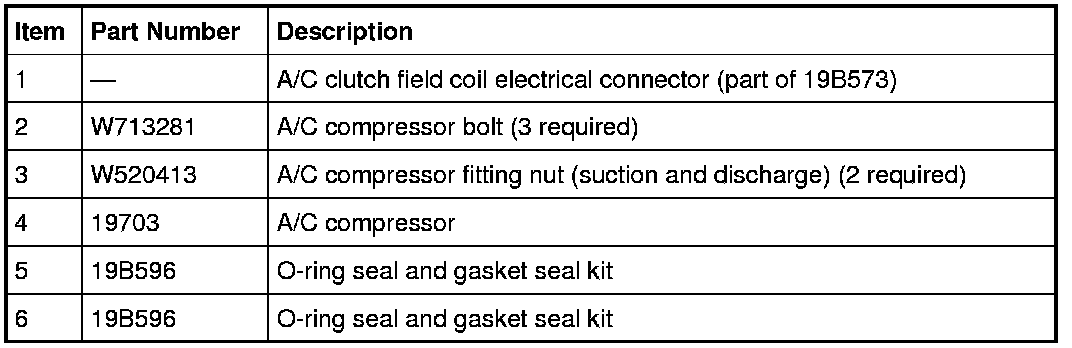
5. Disconnect the A/C clutch field coil electrical connector.
6. NOTICE: Do not allow the Air Conditioning (A/C) compressor to hang from the A/C lines or damage to the A/C lines can occur.
Remove the 3 A/C compressor bolts and lower the A/C compressor to allow access to the suction and discharge fitting nuts.
- To install, tighten the A/C compressor bolts to 25 Nm (18 lb-ft).
7. Remove the A/C compressor suction and discharge fitting nuts and disconnect the fittings.
- Discard the O-ring seals and gasket seals.
- To install, tighten to 15 Nm (133 lb-in).
8. Remove the A/C compressor.
9. NOTE: If installing a new A/C compressor, transfer the shipping caps from the new A/C compressor to the old A/C compressor after the refrigerant oil has been measured.
To install, reverse the removal procedure.
- Install new gasket seals and O-ring seals.
- If a new A/C compressor is to be installed, the clutch assembly may need to be transferred from the old unit to the new unit. For additional information, refer to Clutch and Clutch Field Coil- 2.5L, 3.0L (4V) .
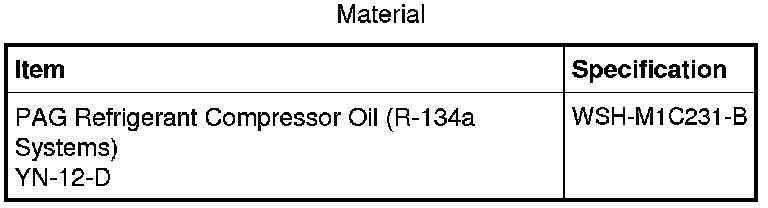
- If not filtering the A/C system, lubricate the refrigerant system with the correct amount of clean PAG oil.
10. Evacuate, leak test and charge the refrigerant system.
Factory Service Tools
Use the Manual With the Right Hardware
Pair factory procedures with proven DIY tools so the instructions are easier to execute.
Disclosure: Verified tool recommendations may earn an affiliate commission at no cost to you.
When to See a Mechanic
Stop DIY work and contact a certified mechanic immediately if any of the following apply:
- • You smell fuel, burning insulation, or see smoke.
- • Brakes feel soft, pull hard to one side, or make grinding noises.
- • The engine overheats, stalls repeatedly, or misfires under load.
- • You are missing required tools, torque specs, or safe lifting equipment.
- • You are not confident in the next step or safety outcome.