
Safety Warning
DIY auto repair can cause serious injury, fire, or vehicle damage. These guides are for informational purposes only. Always follow OEM torque specs, wear PPE, and consult a certified mechanic if you are unsure. You are solely responsible for your safety.
2011 Ford Transit Connect L4-2.0LFACTORY OEM SERVICE PROCEDURE
Timing Chain: Service and Repair
Timing Chain Installation
Engine
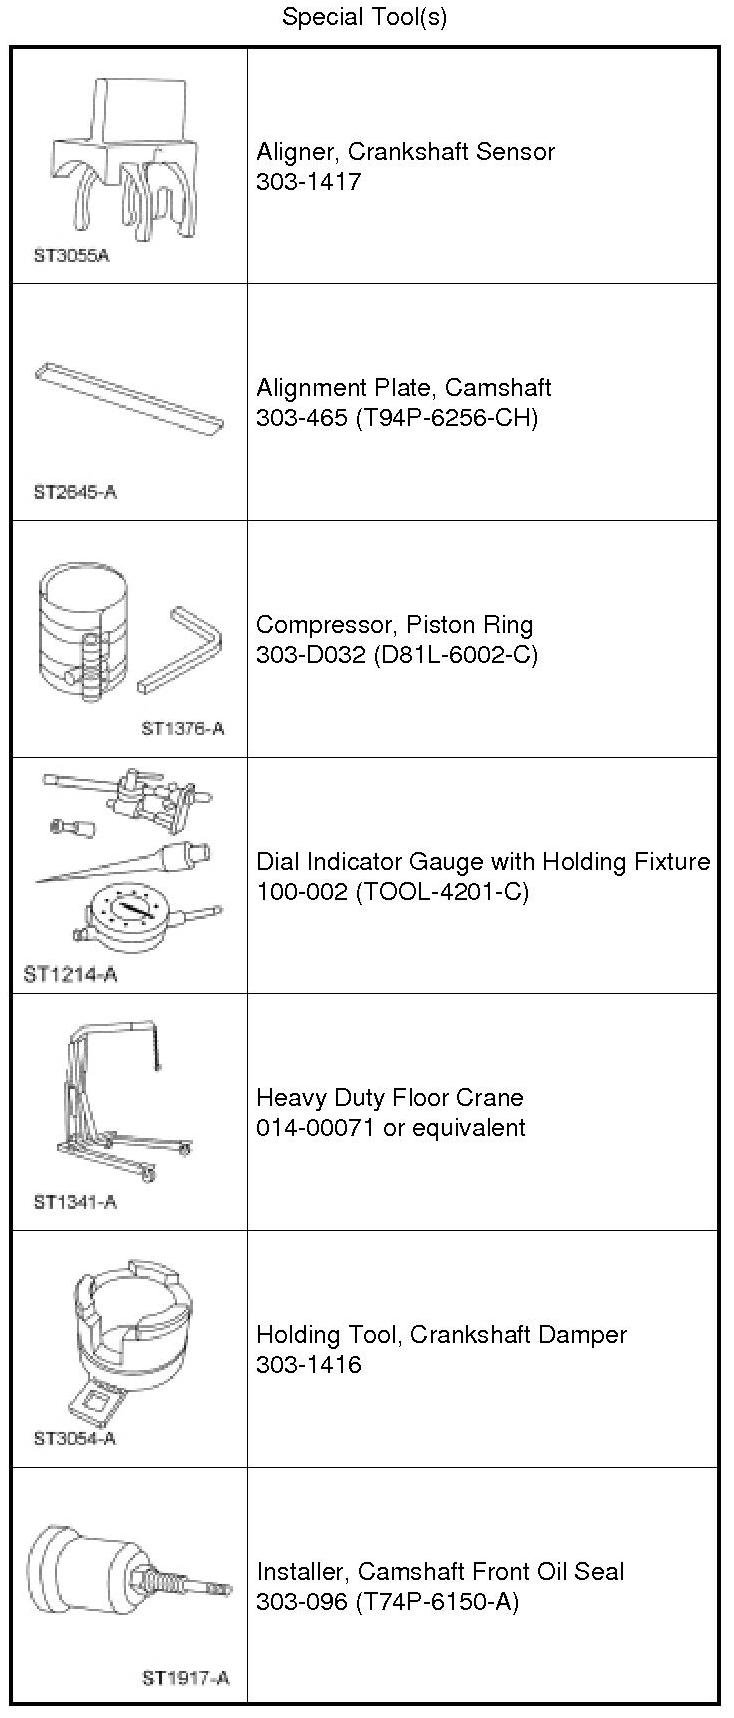
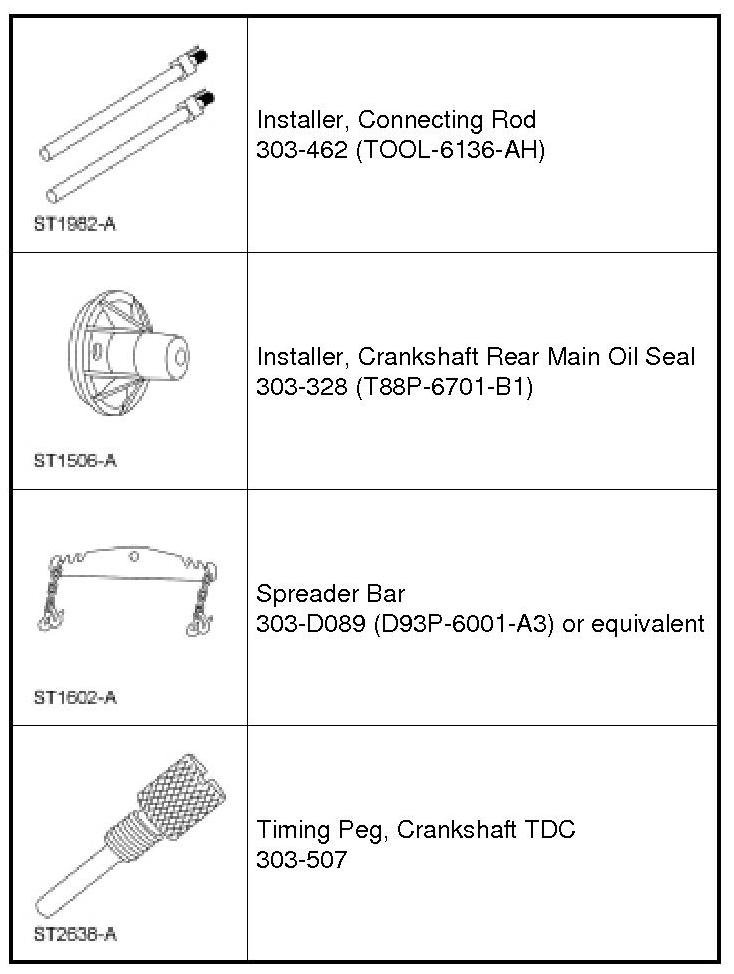
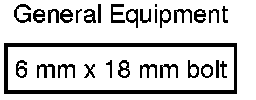
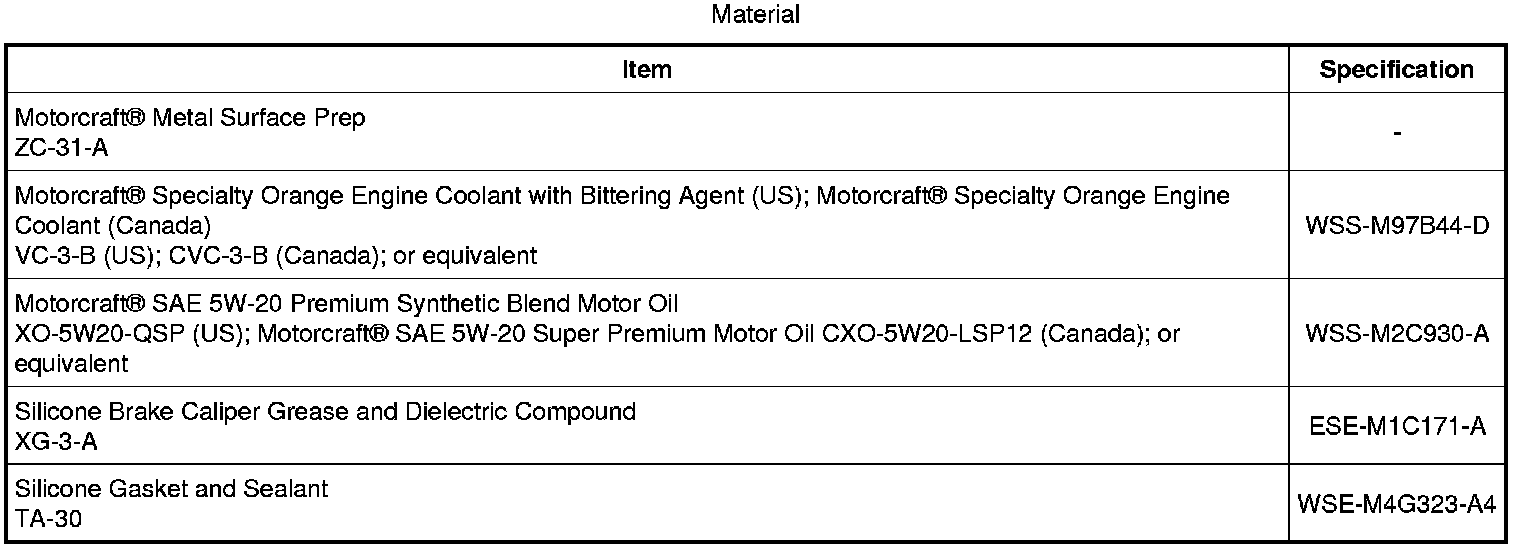
Front Engine Block
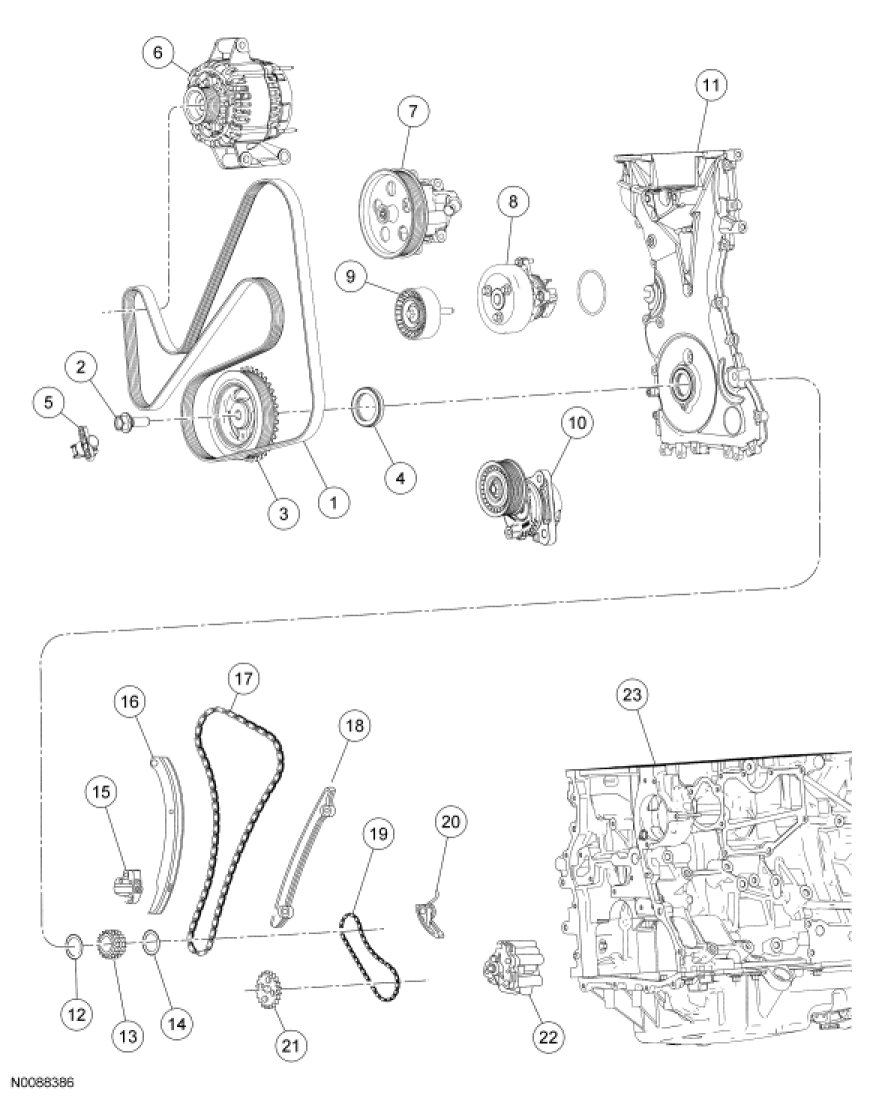
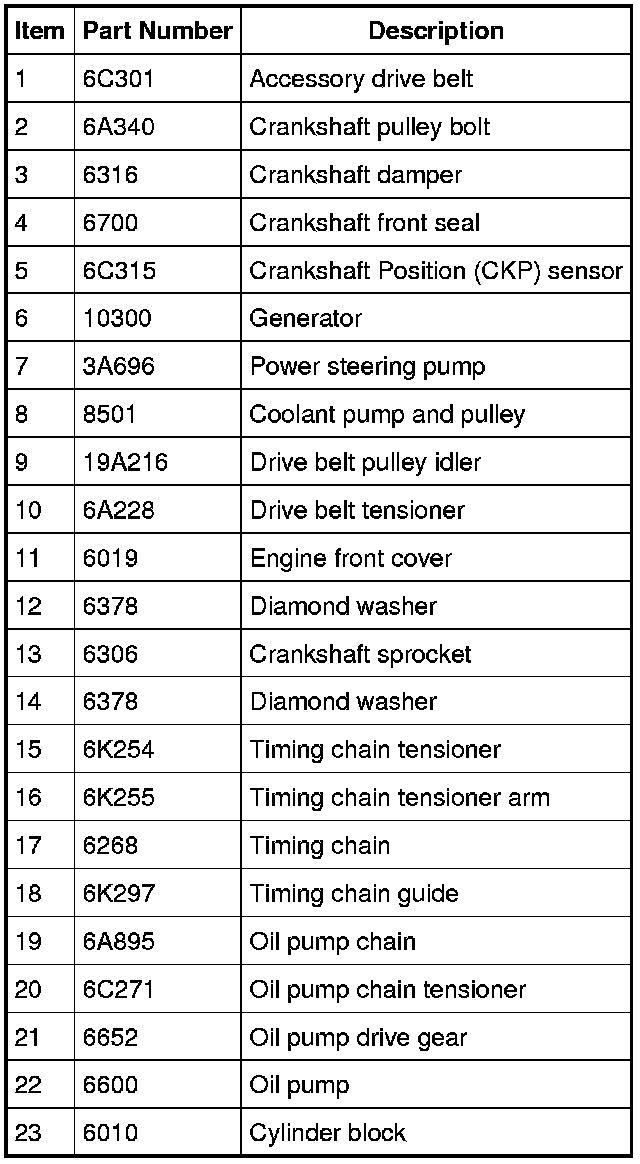
Cylinder Head
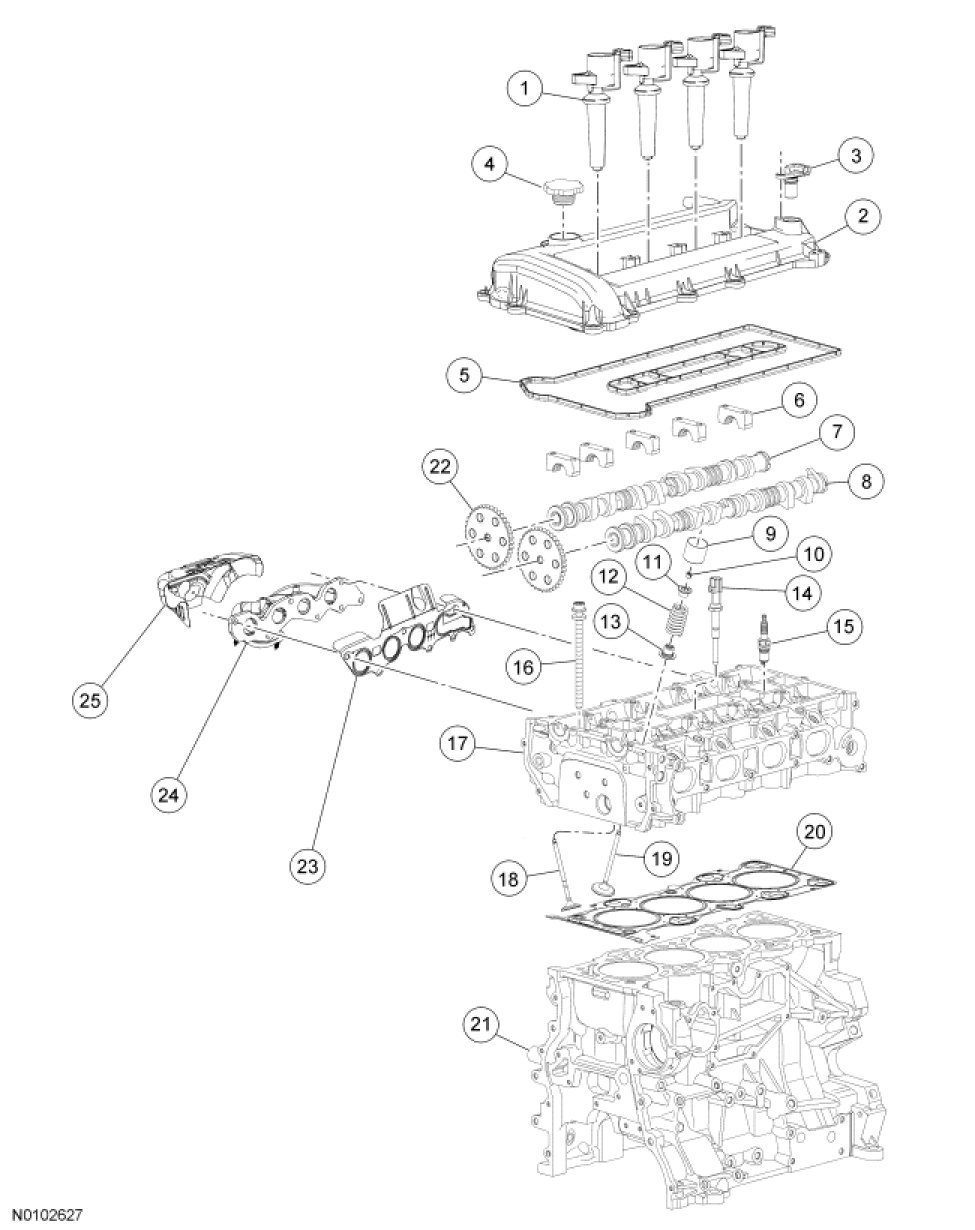
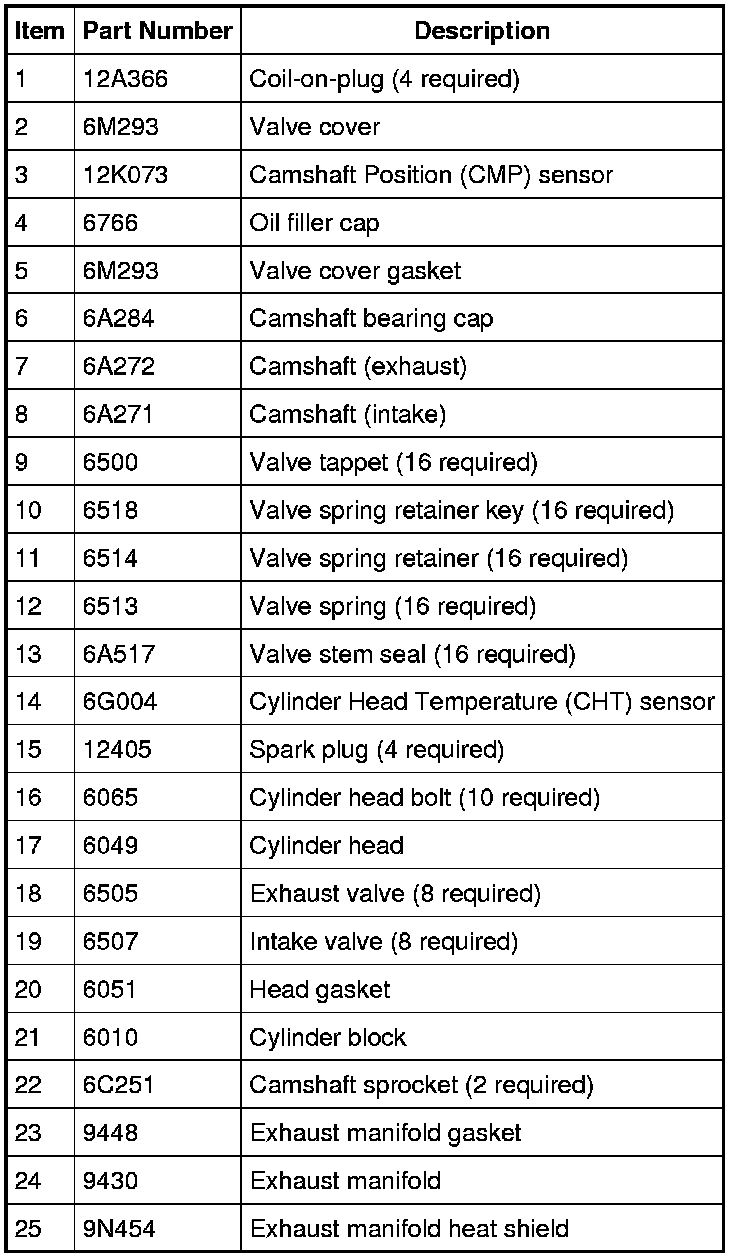
NOTICE: Do not loosen or remove the crankshaft pulley bolt without first installing the special tools as instructed in this procedure. The crankshaft pulley and the crankshaft timing sprocket are not keyed to the crankshaft. The crankshaft, the crankshaft sprocket and the pulley are fitted together by friction, using diamond washers between the flange faces on each part. For that reason, the crankshaft sprocket is also unfastened if the pulley bolt is loosened. Before any repair requiring loosening or removal of the crankshaft pulley bolt, the crankshaft and camshafts must be locked in place by the special service tools, otherwise severe engine damage can occur.
NOTICE: During engine repair procedures, cleanliness is extremely important. All parts must be thoroughly cleaned and any foreign material, including any material created while cleaning gasket surfaces, that enters the oil passages, coolant passages or the oil pan, can cause engine failure.
NOTE: Assembly of the engine requires various inspections/measurements of the engine components (engine block, crankshaft, connecting rods, pistons and piston rings). These inspections/measurements will aid in determining if the engine components will require replacement. For additional information, refer to Engine System - General Information Service and Repair.
NOTICE: Install the camshafts with the alignment slots in the camshafts lined up so the Camshaft Alignment Plate can be installed without rotating the camshafts. Make sure the lobes on the No. 1 cylinder are in the same position as noted in the disassembly procedure. Rotating the camshafts when the timing chain is removed, or installing the camshafts 180 degrees out of position, can cause severe damage to the valves and pistons.
NOTE: Lubricate the camshaft journals and bearing caps with clean engine oil.
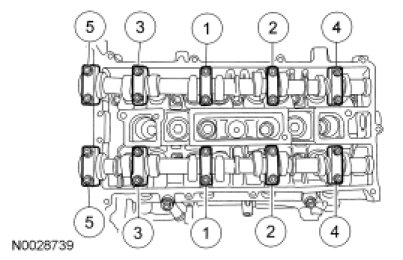
Install the camshafts and bearing caps in their original location and orientation. Tighten the bearing caps in the sequence shown in 3 stages:
- Stage 1: Tighten one turn at a time until tight.
- Stage 2: Tighten to 7 Nm (62 lb-in).
- Stage 3: Tighten to 16 Nm (142 lb-in).
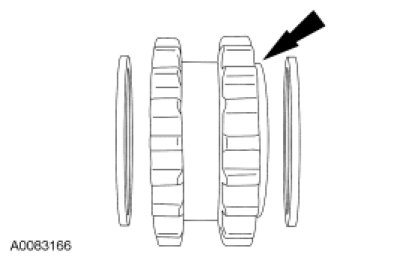
NOTE: Install a new crankshaft sprocket diamond washer on both sides of the crankshaft sprocket.
Install the crankshaft sprocket, new crankshaft sprocket diamond washers, oil pump chain and oil pump sprocket.
- The crankshaft sprocket flange must be facing away from the engine block.
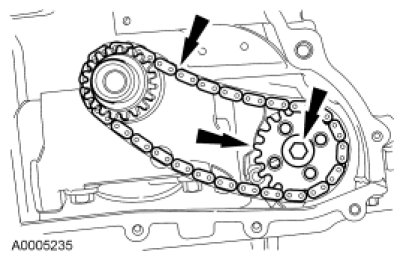
Install the oil pump chain, sprocket and bolt.
- Tighten to 25 Nm (18 lb-ft).
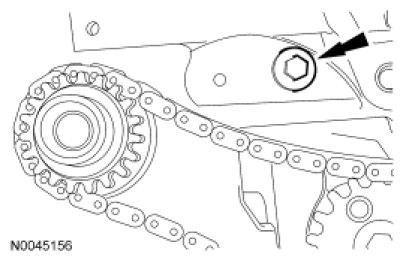
Install the oil pump chain tensioner shoulder bolt.
- Tighten to 10 Nm (89 lb-in).
Install the oil pump chain tensioner. Hook the tensioner spring around the shoulder bolt.
- Tighten to 10 Nm (89 lb-in).
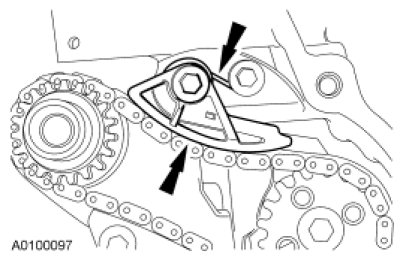
NOTICE: The Camshaft Alignment Plate is for camshaft alignment only. Using this tool to prevent engine rotation can result in engine damage.
Install the Camshaft Alignment Plate in the slots on the rear of both camshafts.
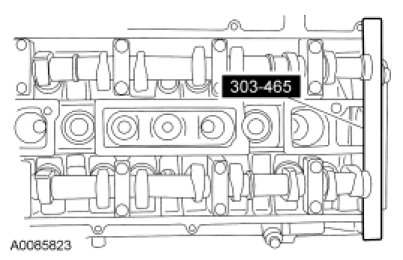
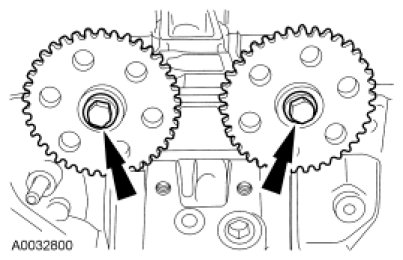
Install the camshaft sprockets and the bolts. Do not tighten the bolts at this time.
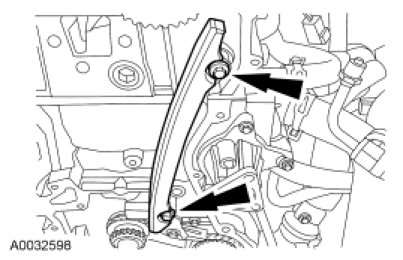
Install the LH timing chain guide and the 2 bolts.
- Tighten to 10 Nm (89 lb-in).
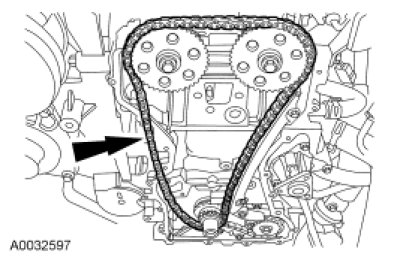
Install the timing chain.
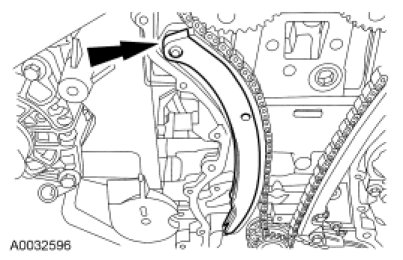
Install the RH timing chain guide.
NOTE: If the timing chain tensioner plunger and ratchet assembly are not pinned in the compressed position, follow the next 4 steps.
NOTICE: Do not compress the ratchet assembly. This will damage the ratchet assembly.
Using the edge of a vise, compress the timing chain tensioner plunger.
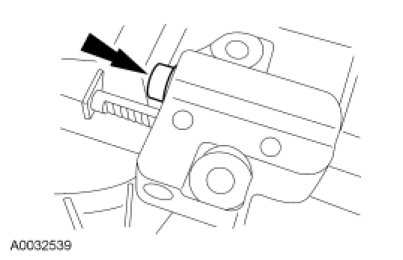
Using a small pick, push back and hold the ratchet mechanism.
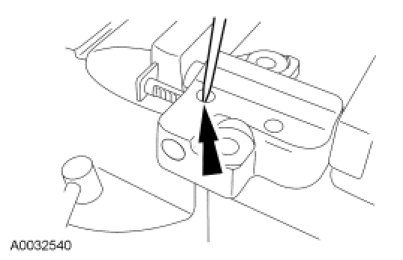
While holding the ratchet mechanism, push the ratchet arm back into the tensioner housing.
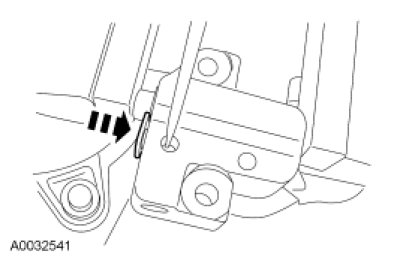
Install a paper clip into the hole in the tensioner housing to hold the ratchet assembly and the plunger in during installation.
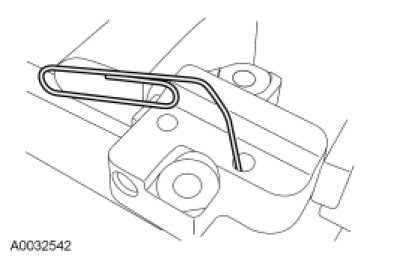
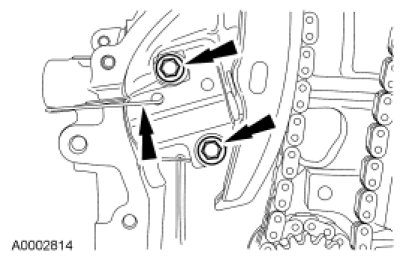
Install the timing chain tensioner and the 2 bolts.
- Tighten to 10 Nm (89 lb-in).
- Remove the paper clip to release the piston.
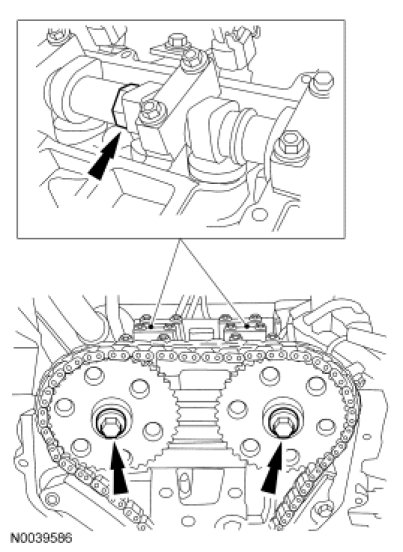
NOTICE: The Camshaft Alignment Plate is for camshaft alignment only. Using this tool to prevent engine rotation can result in engine damage.
Using the flats on the camshafts to prevent camshaft rotation, tighten the camshaft drive gear bolts to 72 Nm (53 lb-ft).
Factory Service Tools
Use the Manual With the Right Hardware
Pair factory procedures with proven DIY tools so the instructions are easier to execute.
Disclosure: Verified tool recommendations may earn an affiliate commission at no cost to you.
When to See a Mechanic
Stop DIY work and contact a certified mechanic immediately if any of the following apply:
- • You smell fuel, burning insulation, or see smoke.
- • Brakes feel soft, pull hard to one side, or make grinding noises.
- • The engine overheats, stalls repeatedly, or misfires under load.
- • You are missing required tools, torque specs, or safe lifting equipment.
- • You are not confident in the next step or safety outcome.