
Safety Warning
DIY auto repair can cause serious injury, fire, or vehicle damage. These guides are for informational purposes only. Always follow OEM torque specs, wear PPE, and consult a certified mechanic if you are unsure. You are solely responsible for your safety.
2009 Chrysler Sebring Convertible L4-2.4LFACTORY OEM SERVICE PROCEDURE
Engine Torque Specifications
TORQUE
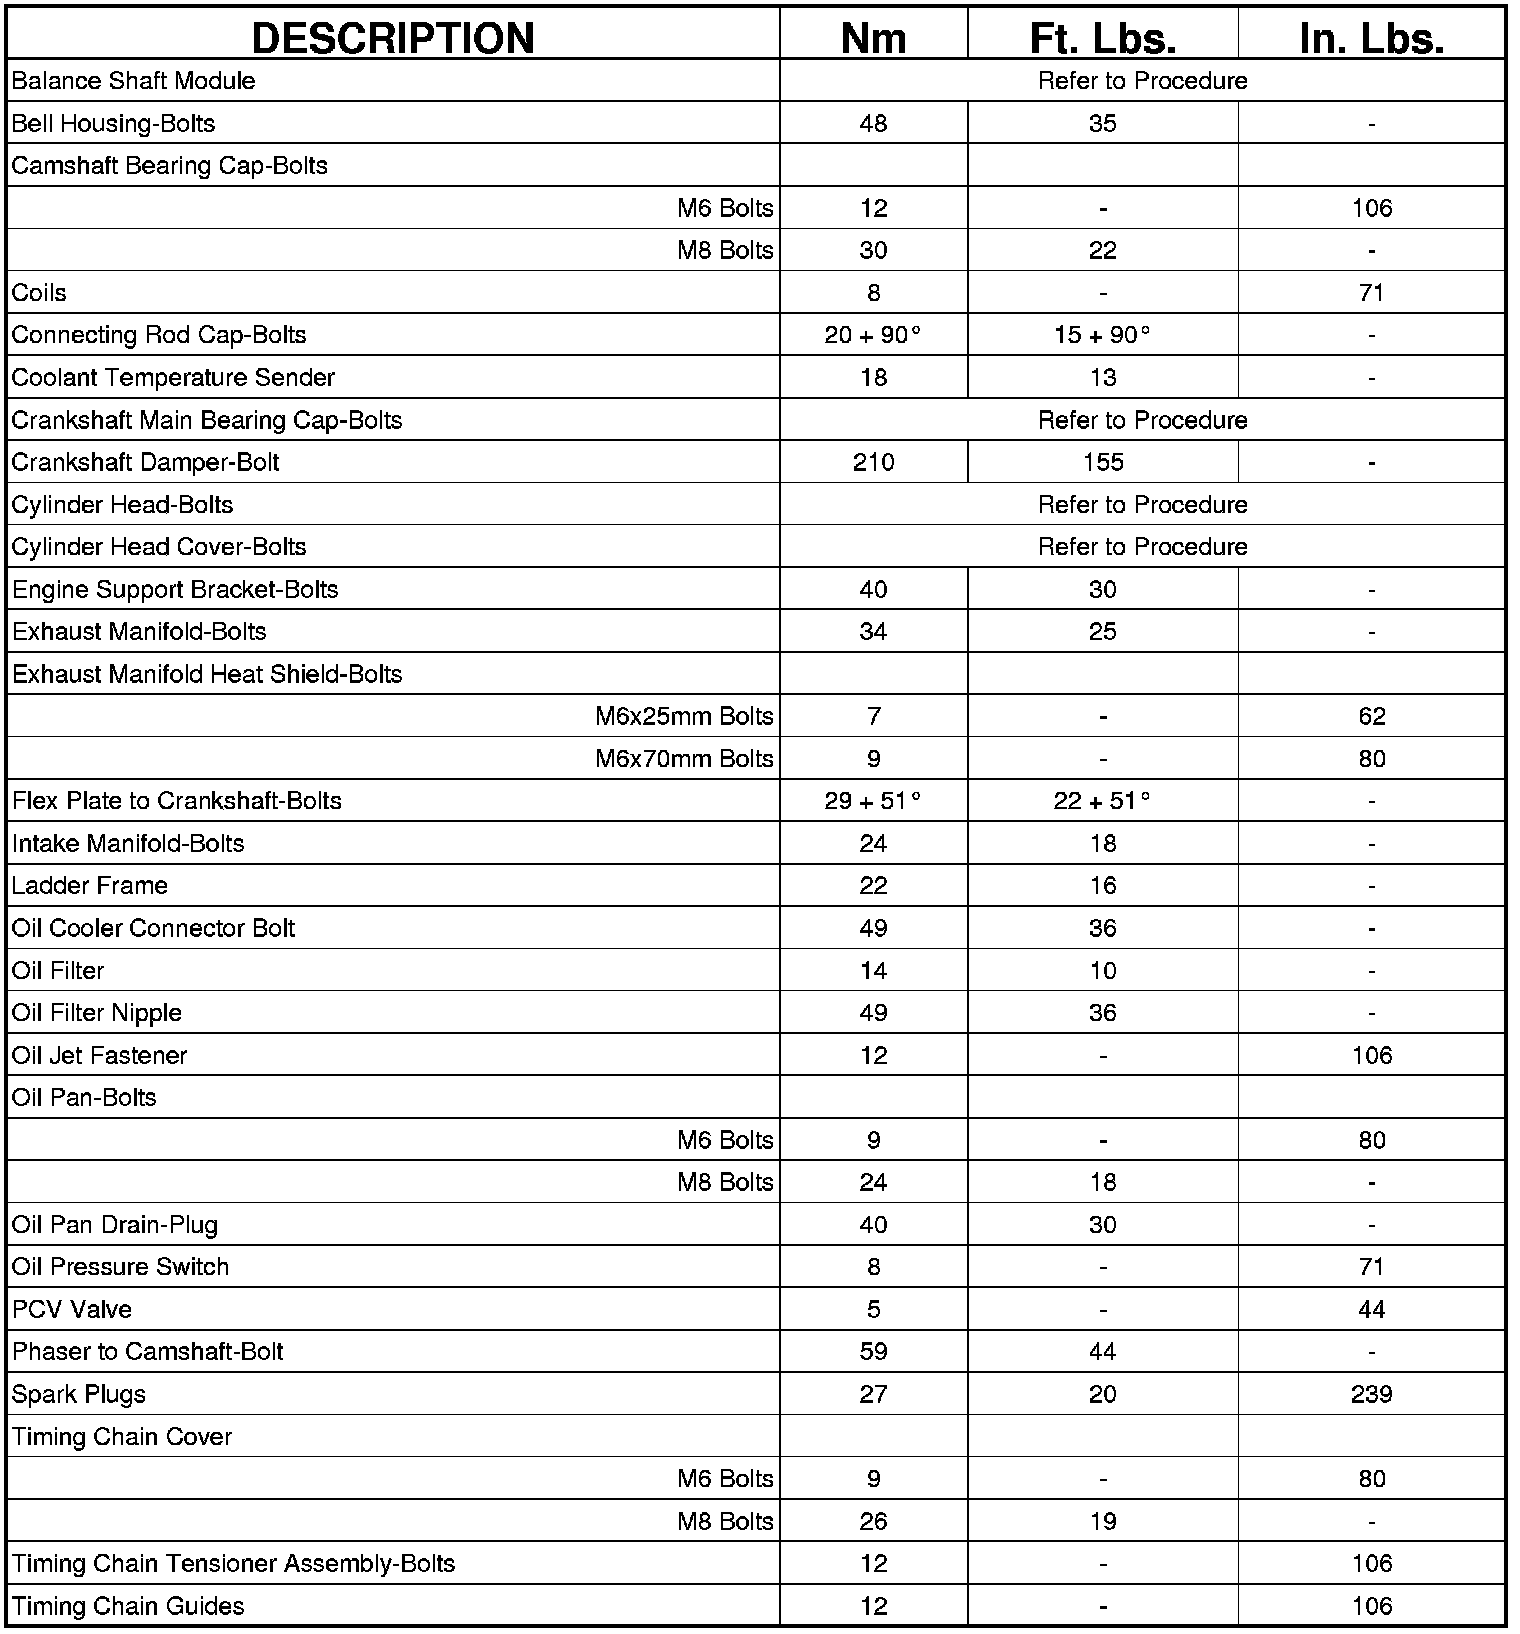
2.4L, EDG, ED3
CYLINDER HEAD
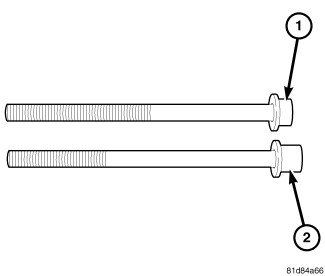
CAUTION: This engine was built with 2 different style cylinder head bolts. Each style bolt requires a different torque value. The bolts can be identified by the short bolt head (1) and the long bolt head (2).
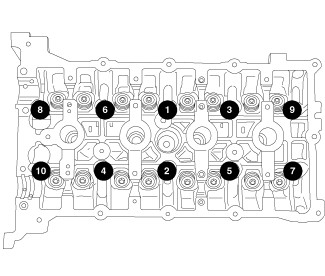
If your bolt has the short head (1), use the following torque specifications:
First: All 30 Nm (25 ft. lbs.)
Second: All 61 Nm (45 ft. lbs.)
Third: All 61 Nm (45 ft. lbs.)
Fourth: All an additional 90°
CAUTION: Do not use a torque wrench for the Fourth step.
If your bolt has the long head (2), use the following torque specifications:
First: All 30 Nm (25 ft. lbs.)
Second: All 73 Nm (54 ft. lbs.)
Third: All 73 Nm (54 ft. lbs.)
Fourth: All an additional 90°
CAUTION: Do not use a torque wrench for the Fourth step.
HEAD BOLT REUSE/REPLACE
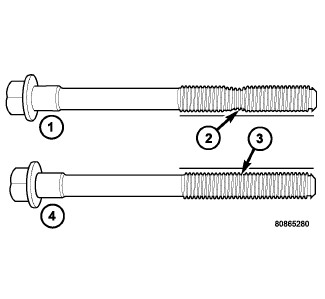
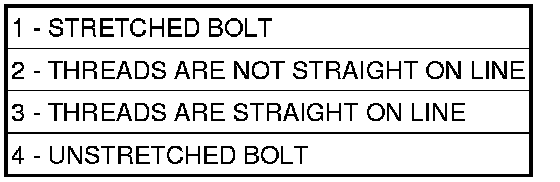
The cylinder head bolts must be examined BEFORE reuse. If the threads are necked down the bolts must be replaced.
INTAKE MANIFOLD
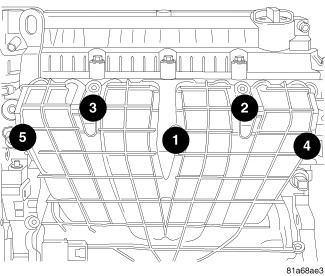
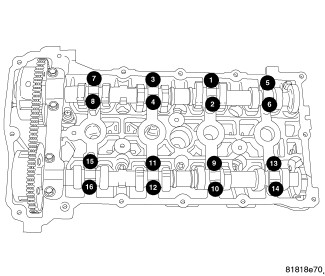
Camshaft Bearing Cap
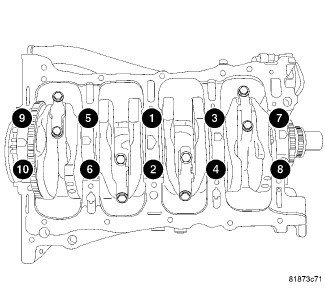
Main Bearing Cap
CAUTION: There are different sets main bolts supplied with this engine. Each bolt set has a different torque value and engine damage could result if bolts are not torqued correctly. The bolts are not interchangeable.
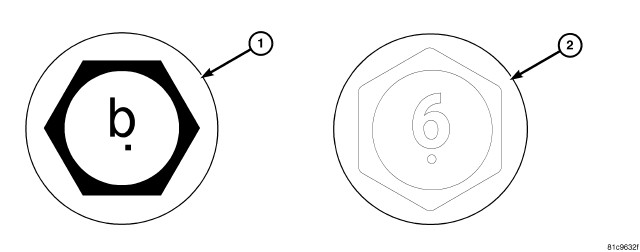
If your bolt heads look like this (1,2), go to step A. If your bolt heads do not look like this (1,2), go to step B.
A. Tighten bolts using a three step method, in the sequence shown.
- Tighten bolts to 15 Nm (11 ft. lbs.)
- Tighten bolts to 27 Nm (20 ft. lbs.)
- Rotate an additional 45°.
B. Tighten bolts using a three step method, in the sequence shown.
- Tighten bolts to 15 Nm (11 ft. lbs.)
- Tighten bolts to 45 Nm (33 ft. lbs.)
- Rotate an additional 45°.
OIL PUMP [Balance Shaft Module (BSM)]
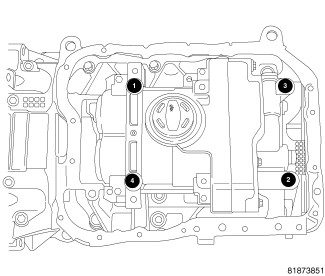
CAUTION: There are two different Balance Shaft Module (BSM) to engine block bolts used. 180 mm bolts with a lock-patch on the threads or 185 mm bolts without lock-patch. Do not reuse the 180 mm bolts. Always discard 180 mm bolts after removing. Failure to replace these bolts can result in engine damage. The 185 mm bolts are reusable. Install the same length bolts that were removed and use either four new 180 mm bolts or four 185 mm bolts.
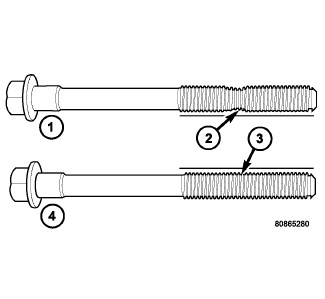
The 185 mm (7.283 in.) length bolts must be checked for stretching. Check the bolts with a straight edge for necking (2). If the bolts are necked down, they must be replaced.
For new 180 mm bolts
Tighten new 180 mm BSM mounting bolts as follows:
a 15 Nm (11 ft. lbs.).
b 33 Nm (24 ft. lbs.) .
c Rotate bolts an additional 90° .
For 185 mm bolts
Tighten 185 mm BSM mounting bolts as follows:
a 15 Nm (11 ft. lbs.).
b 29 Nm (22 ft. lbs.).
c Rotate bolts an additional 90°
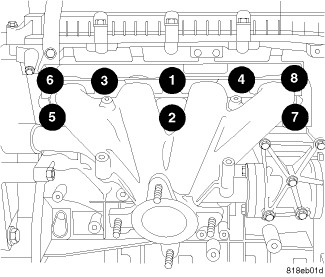
EXHAUST MANIFOLD
WATER PUMP
Bolts-Water Pump Mounting 24 Nm (18 ft. lbs)
Bolts-Water Pump Inlet Tube to Block 12 Nm (9 ft. lbs)
Bolts, Water Pump Inlet Tube to water pump housing - Gas engine 24 Nm (18 ft. lbs)
Bolts, Water Pump to Water Pump Adapter - gas Engine 22 Nm (10 ft. lbs)
Bolts, Water Pump Pulley to Water Pump - Gas Engine 9 Nm (80 in. lbs)
Factory Service Tools
Use the Manual With the Right Hardware
Pair factory procedures with proven DIY tools so the instructions are easier to execute.
Disclosure: Verified tool recommendations may earn an affiliate commission at no cost to you.
When to See a Mechanic
Stop DIY work and contact a certified mechanic immediately if any of the following apply:
- • You smell fuel, burning insulation, or see smoke.
- • Brakes feel soft, pull hard to one side, or make grinding noises.
- • The engine overheats, stalls repeatedly, or misfires under load.
- • You are missing required tools, torque specs, or safe lifting equipment.
- • You are not confident in the next step or safety outcome.