
Safety Warning
DIY auto repair can cause serious injury, fire, or vehicle damage. These guides are for informational purposes only. Always follow OEM torque specs, wear PPE, and consult a certified mechanic if you are unsure. You are solely responsible for your safety.
2009 Chrysler 300 V6-2.7LFACTORY OEM SERVICE PROCEDURE
Police Package Speed Control Switch
POLICE PACKAGE SPEED CONTROL SWITCH
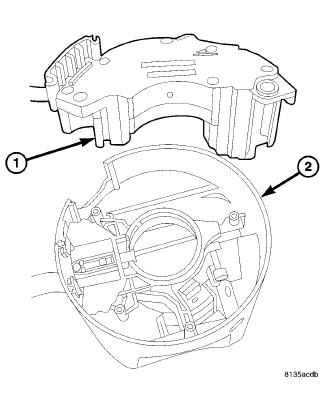
1. Install the speed control switch (1) to steering column control module (2) (SCCM).
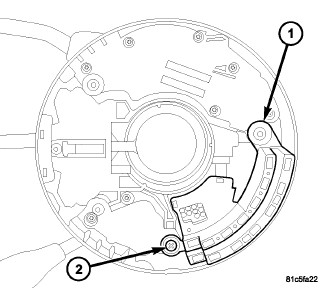
2. If equipped with ESP, install the steering angle sensor (1) and phillips head screw (2) to SCCM. Tighten phillips head screw to.7 Nm (6 in. lbs.). If not equipped with ESP, install the plastic insert and phillips head screw to steering column. Tighten phillips head screw to.7 Nm (6 in. lbs.).
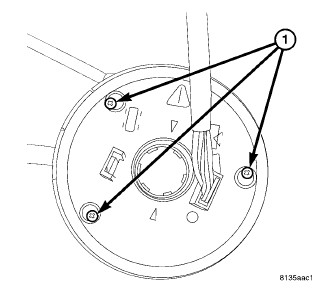
CAUTION: DO NOT fully install one of the clockspring T10 Torx screws. Leave one clockspring T10 Torx screw out far enough to stop the clockspring from rotating. This is necessary to keep the clockspring centered when installing to the steering shaft. Torque is critical on the clockspring T10 torx screws, make sure the clockspring T10 Torx screws are torqued to specification.
3. Install the clockspring and two T10 Torx screws (1), leave the remaining screw out far enough to stop the clockspring from rotating. Tighten T10 Torx screws to.7 Nm (6 in. lbs.).
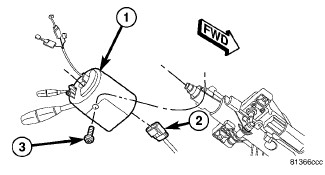
WARNING: To service the speed control switch, the entire assembly that houses the speed control switch must be removed from the column. This must be done due to the clockspring passing through the assembly and into the self docking connector. Failure to remove the this assembly could damage the pins of the clockspring during installation and prevent the airbag system from operating properly.
4. Connect the electrical connector (2).
5. Install the SCCM assembly (1) onto the steering column.
6. Tighten the set screw (3) securing the SCCM assembly (1) to the steering column. Tighten screw to 4 Nm (35 in. lbs.).
7. Tighten the remaining clockspring T10 Torx screw to.7 Nm (6 in. lbs.).
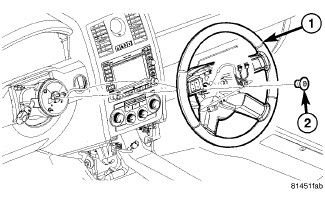
8. Align the spline on the steering wheel hub to shaft and install the steering wheel (1).
9. Install a NEW retaining bolt (2). Tighten the bolt to 75 Nm (55 ft. lbs.).
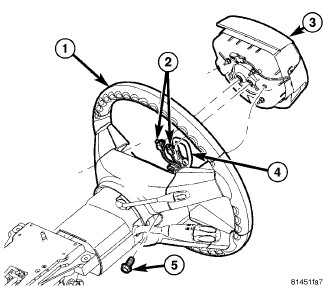
10. Install the driver airbag (3), Driver Air Bag - Installation.
11. Connect the negative battery cable, tighten the nut to 5 Nm (45 in. lbs.).
12. If equipped with Electronic Stability Program (ESP), the steering angle sensor must be calibrated Battery Reconnection.
Factory Service Tools
Use the Manual With the Right Hardware
Pair factory procedures with proven DIY tools so the instructions are easier to execute.
Disclosure: Verified tool recommendations may earn an affiliate commission at no cost to you.
When to See a Mechanic
Stop DIY work and contact a certified mechanic immediately if any of the following apply:
- • You smell fuel, burning insulation, or see smoke.
- • Brakes feel soft, pull hard to one side, or make grinding noises.
- • The engine overheats, stalls repeatedly, or misfires under load.
- • You are missing required tools, torque specs, or safe lifting equipment.
- • You are not confident in the next step or safety outcome.