
Safety Warning
DIY auto repair can cause serious injury, fire, or vehicle damage. These guides are for informational purposes only. Always follow OEM torque specs, wear PPE, and consult a certified mechanic if you are unsure. You are solely responsible for your safety.
2007 Chevrolet Suburban 2WD V8-5.3LFACTORY OEM SERVICE PROCEDURE
Rear Disc Brake Hardware Replacement (1500 Series)
Rear Disc Brake Hardware Replacement (1500 Series)
Caution: Refer to Brake Dust Caution.
Removal Procedure
1. Inspect the fluid level in the brake master cylinder reservoir.
2. If the fluid level is midway between the maximum-full point and the minimum allowable level, no fluid needs to be removed from the reservoir before proceeding.
3. If the fluid level is higher than midway between the maximum-full point and the minimum allowable level, remove fluid to the midway point before proceeding.
4. Raise and support the vehicle. Refer to Lifting and Jacking the Vehicle.
5. Remove the tire and wheel assembly.
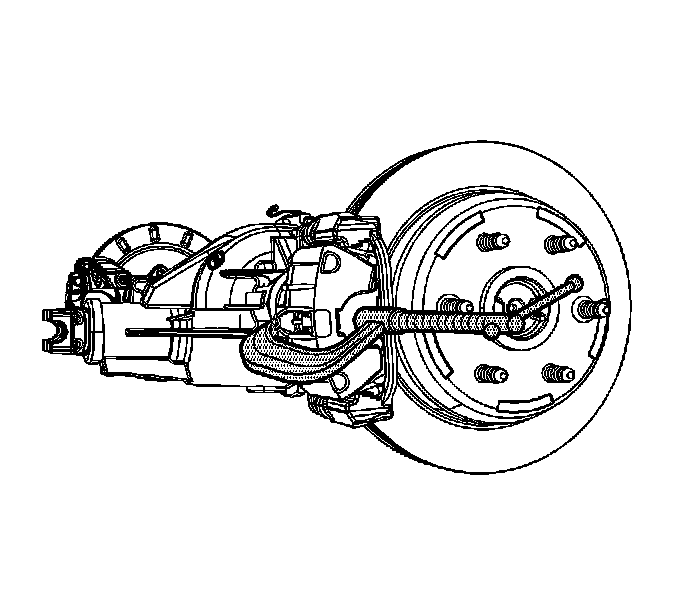
6. Compress the brake caliper pistons.
1. Install a large C-clamp over the top of the caliper housing and against the back of the outboard pad.
2. Slowly tighten the C-clamp until the piston is pushed completely into the caliper bore.
3. Remove the C-clamp from the caliper.
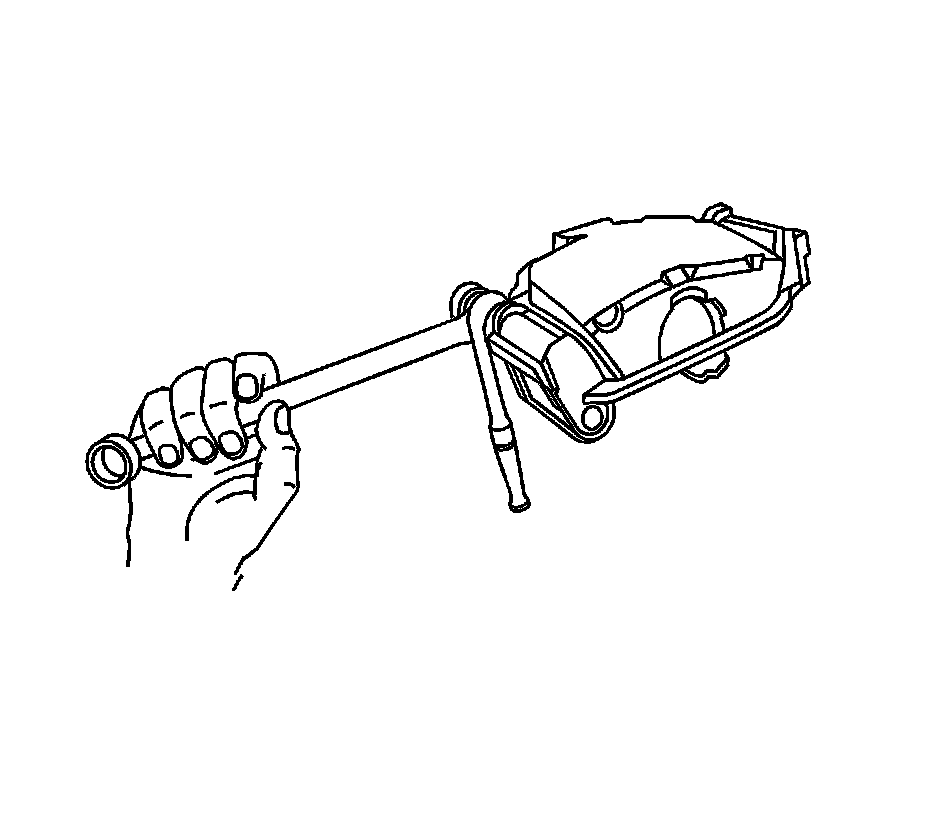
Important:
^ DO NOT use any air tools to remove or tighten the guide pin bolts. Use hand tools only.
^ Install an open end wrench to hold the caliper guide pin in line with the brake caliper while removing or installing the caliper guide pin bolts. DO NOT allow the open end wrench to come in contact with the brake caliper. Allowing the open end wrench to come in contact with the brake caliper will cause a pulsation when the brake is applied.
Using an open end wrench to hold the guide pins, loosen the guide pin bolts.
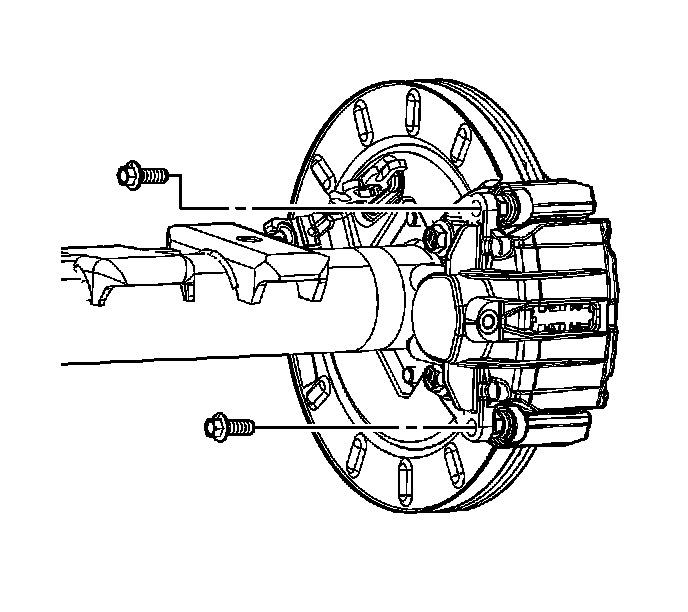
7. Remove the brake caliper guide pin bolts.
Notice: Support the brake caliper with heavy mechanic wire, or equivalent, whenever it is separated from its mount and the hydraulic flexible brake hose is still connected. Failure to support the caliper in this manner will cause the flexible brake hose to bear the weight of the caliper, which may cause damage to the brake hose and in turn may cause a brake fluid leak.
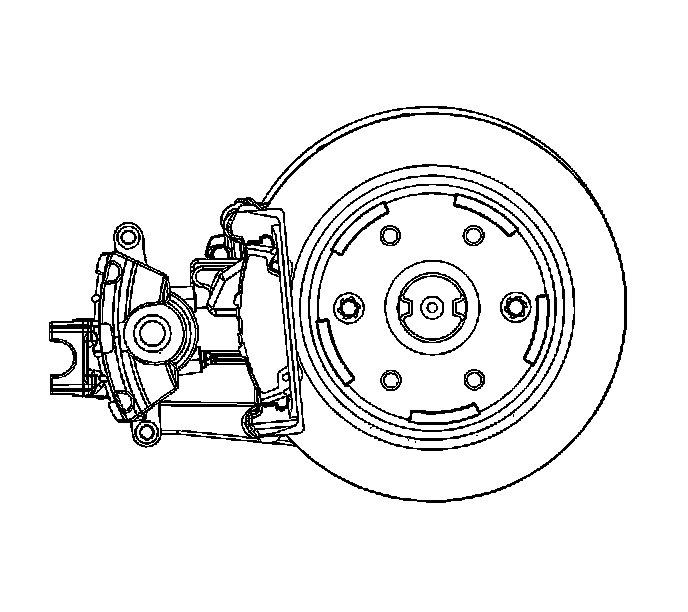
8. Remove the caliper from the caliper bracket and support with heavy mechanics wire or equivalent. DO NOT disconnect the hydraulic brake hose from the caliper.
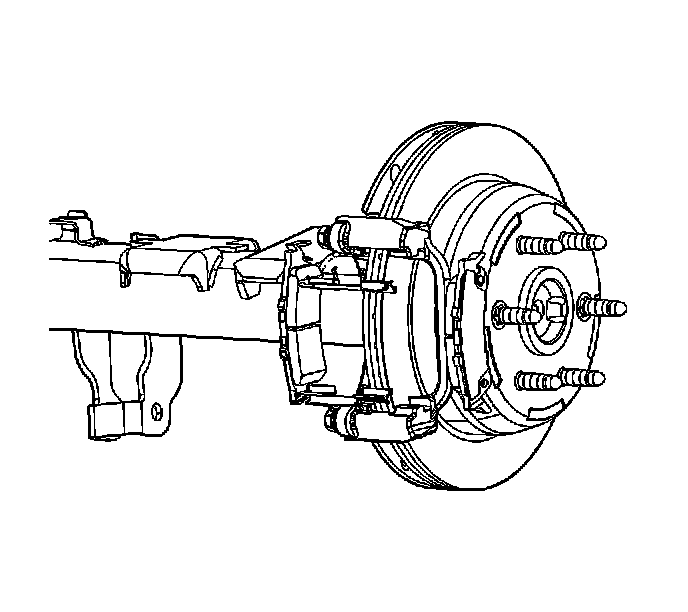
Important: Mark the position of the brake pads for proper installation.
9. Remove the brake pads from the brake caliper bracket.
10. Remove the brake pad retaining springs.

11. Remove the guide pins (5) from brake caliper bracket (3).
12. Remove the guide pin boots (4) from the caliper bracket.
Installation Procedure
1. Lubricate the caliper bracket bushings and guide pins with high temperature silicone brake lubricant.
2. Install the guide pin boots (4) to the brake caliper bracket.
3. Install the guide pins (5) to the brake caliper bracket (3).
4. Install the brake pad retaining springs to the brake caliper bracket.
Important: If installing the original brake pads, position the brake pads in the location marked during removal.
5. Install the brake pads.
6. Install the brake caliper to the brake caliper bracket.
7. Install the brake caliper guide pin bolts.
Notice: Refer to Fastener Notice.
Important:
^ DO NOT use any air tools to remove or tighten the guide pin bolts. Use hand tools only.
^ Install an open end wrench to hold the caliper guide pin in line with the brake caliper while removing or installing the caliper guide pin bolts. DO NOT allow the open end wrench to come in contact with the brake caliper. Allowing the open end wrench to come in contact with the brake caliper will cause a pulsation when the brake is applied.
Use an open end wrench to hold the caliper guide pin while tightening the guide pin bolt.
Tighten the bolts to 38 N.m (28 lb ft).
8. Install the tire and wheel assembly.
9. Lower the vehicle. Refer to Lifting and Jacking the Vehicle.
10. With the engine OFF, gradually apply the brake pedal to approximately 2/3 of its travel distance.
11. Slowly release the brake pedal.
12. Wait 15 seconds, then repeat 11-12 until a firm pedal is obtained to properly seat the brake caliper pistons and pads.
13. Fill the master cylinder reservoir to the proper level with clean brake fluid, if necessary. Refer to Master Cylinder Reservoir Filling.
Factory Service Tools
Use the Manual With the Right Hardware
Pair factory procedures with proven DIY tools so the instructions are easier to execute.
Disclosure: Verified tool recommendations may earn an affiliate commission at no cost to you.
When to See a Mechanic
Stop DIY work and contact a certified mechanic immediately if any of the following apply:
- • You smell fuel, burning insulation, or see smoke.
- • Brakes feel soft, pull hard to one side, or make grinding noises.
- • The engine overheats, stalls repeatedly, or misfires under load.
- • You are missing required tools, torque specs, or safe lifting equipment.
- • You are not confident in the next step or safety outcome.
Rather have a pro handle this?
A certified mobile mechanic comes to your home or office. They bring the tools, you stay comfortable. No tow truck, no waiting room, no surprises.
Comes to youSame-day available12-month warranty
Get a Free QuoteNo obligation. See pricing before you book.