
Safety Warning
DIY auto repair can cause serious injury, fire, or vehicle damage. These guides are for informational purposes only. Always follow OEM torque specs, wear PPE, and consult a certified mechanic if you are unsure. You are solely responsible for your safety.
2007 Chevrolet Optra (CANADA) L4-2.0LFACTORY OEM SERVICE PROCEDURE
Fuel Level Sensor: Service and Repair
Fuel Sender Assembly Replacement
Tools Required
CH-47717 Fuel Lock Ring Remover Tool
Removal Procedure
Caution: Gasoline or gasoline vapors are highly flammable. A fire could occur if an ignition source is present. Never drain or store gasoline or diesel fuel in an open container, due to the possibility of fire or explosion. Have a dry chemical (Class B) fire extinguisher nearby.
Caution: Provide proper ventilation when working with fuel in enclosed areas where fuel vapors can collect. The lack of adequate ventilation may result in personal injury.
Caution: Always wear safety goggles when working with fuel in order to protect the eyes from fuel splash.
Caution: Remove the rear compartment floor trim to provide technician contact with the vehicle's metal surfaces. Failure to remove the rear compartment floor trim may cause a static electricity discharge to ignite any fuel vapor resulting in personal injury and vehicle damage.
Caution: Fuel Vapors can collect while servicing fuel system parts in enclosed areas such as a trunk. To reduce the risk of fire and increased exposure to vapors:
* Use forced air ventilation such as a fan set outside of the trunk.
* Plug or cap any fuel system openings in order to reduce fuel vapor formation.
* Clean up any spilled fuel immediately.
* Avoid sparks and any source of ignition.
* Use signs to alert others in the work area that fuel system work is in process.
Notice: Cap the fittings and plug the holes when servicing the fuel system in order to prevent dirt and other contaminants from entering the open pipes and passages.
Notice: Clean all of the following areas before performing any disconnections in order to avoid possible contamination in the system:
* The fuel pipe connections
* The hose connections
* The areas surrounding the connections
Important:
* Always replace the fuel sender assembly O-rings when reinstalling the fuel sender assembly.
* Always maintain cleanliness when servicing fuel system components.
* Do not bend the arm of the fuel gage float while removing the fuel sender assembly.
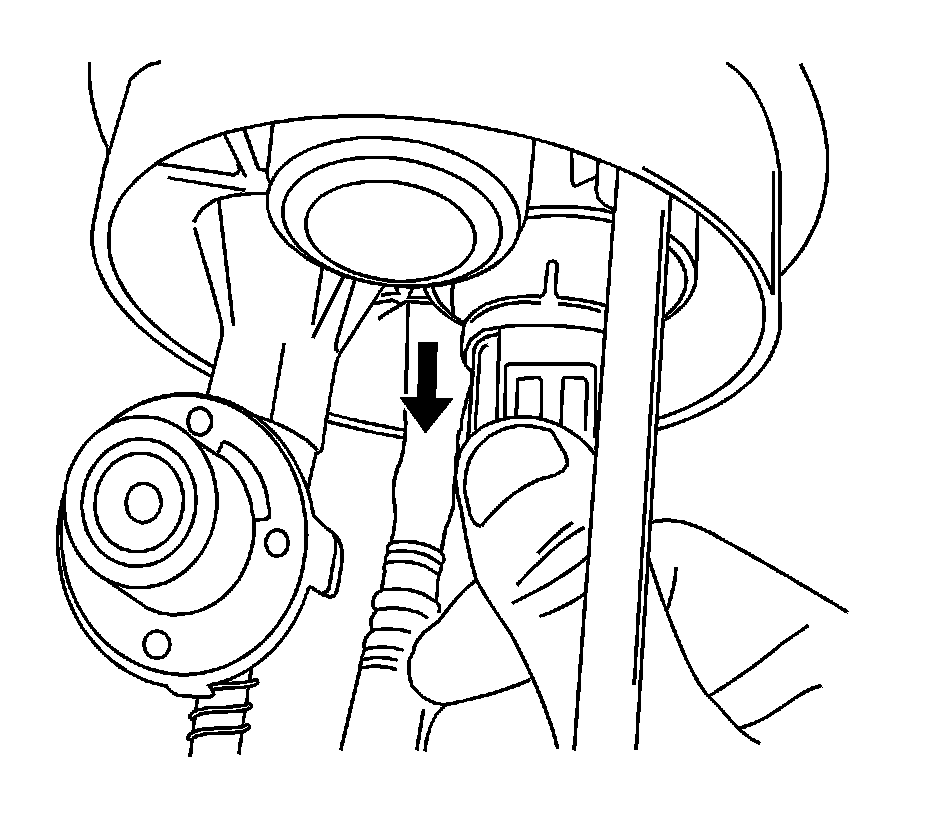
1. Remove the fuel pump. Refer to Fuel Pump Replacement Fuel Pump Replacement.
2. Disconnect the fuel sender insulator connector.
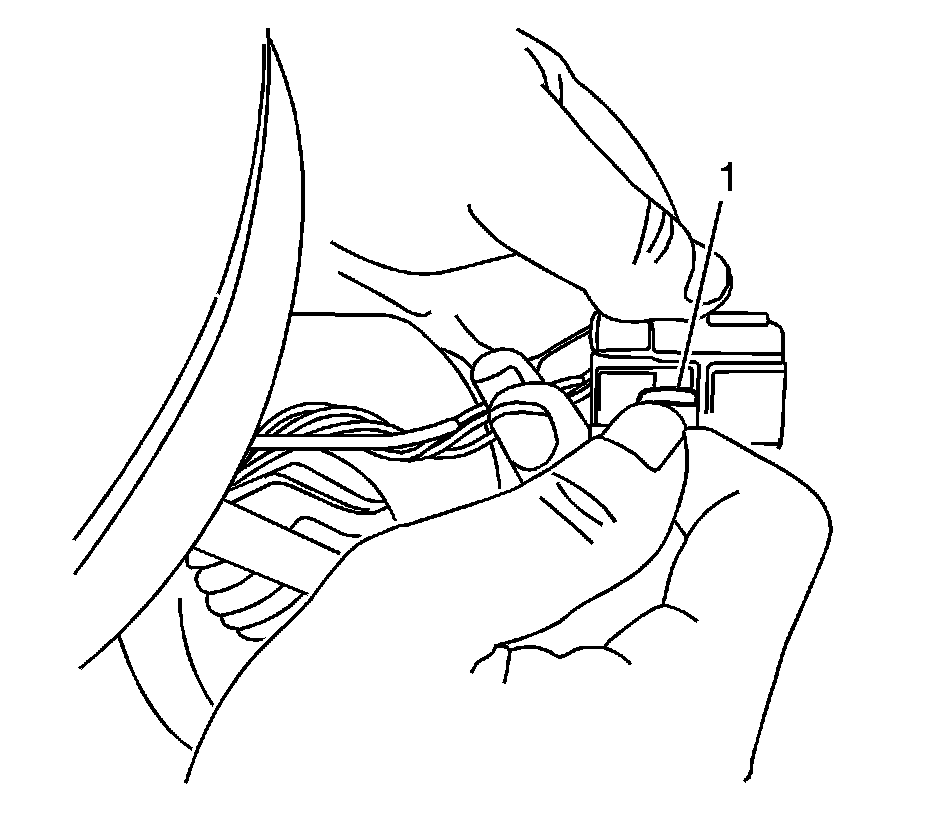
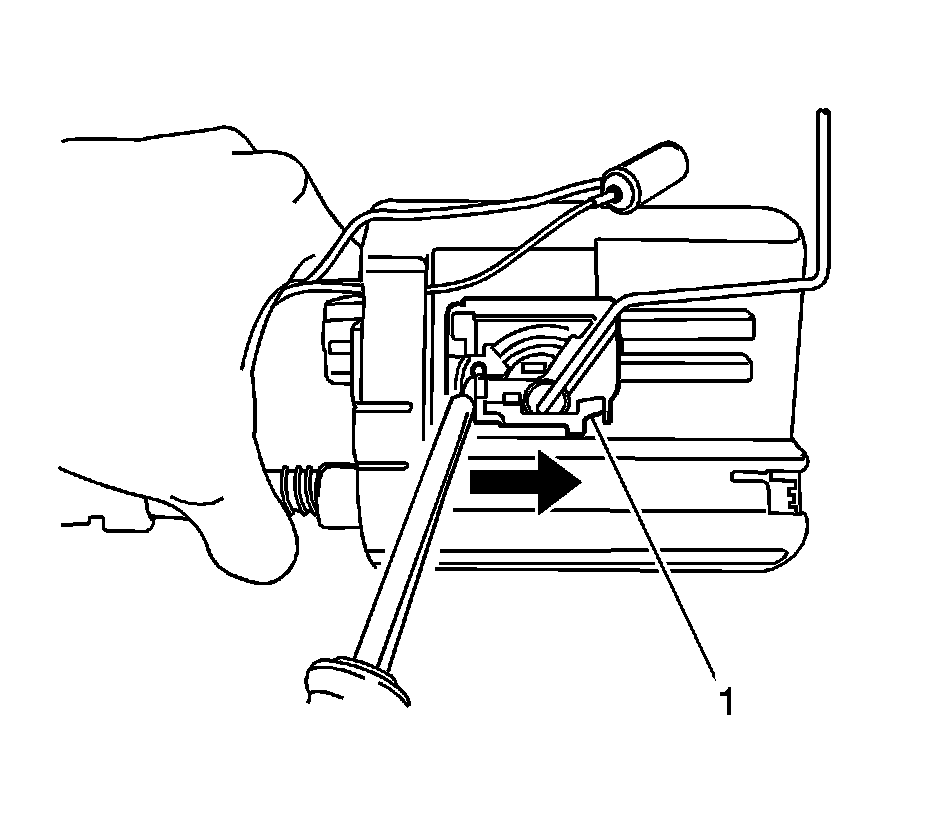
3. To disconnect the fuel pump terminal, push the terminal wedge (1) in the insulator.
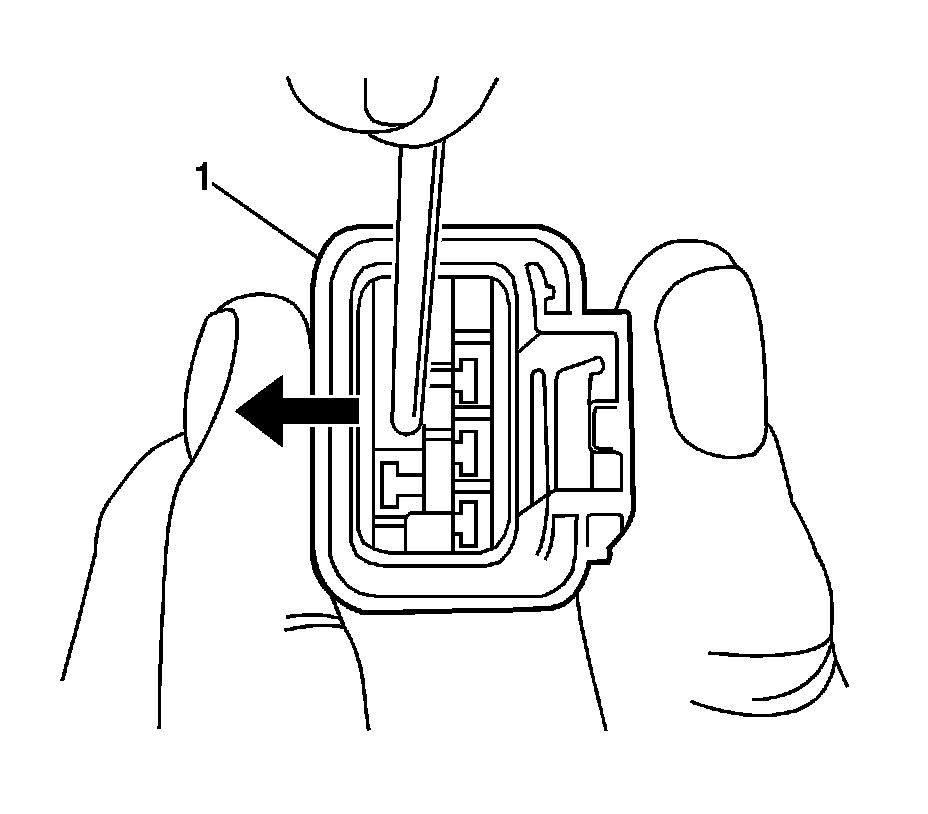
4. Push the wedge (1) outside, then pull the wires to disconnect from the connector.
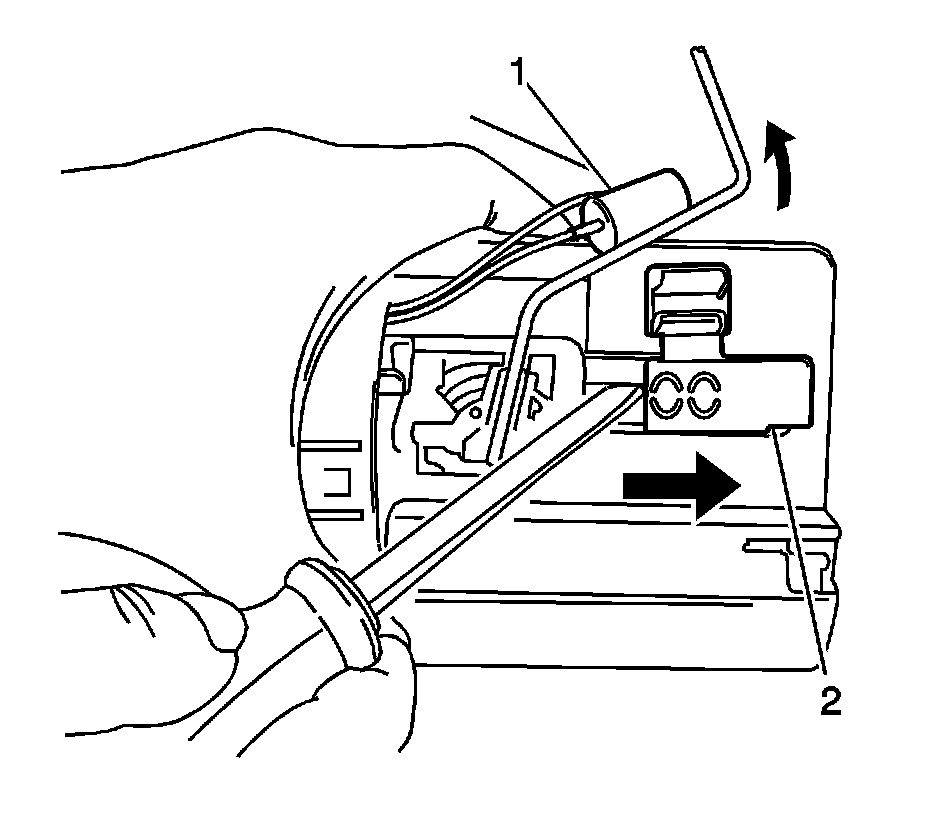
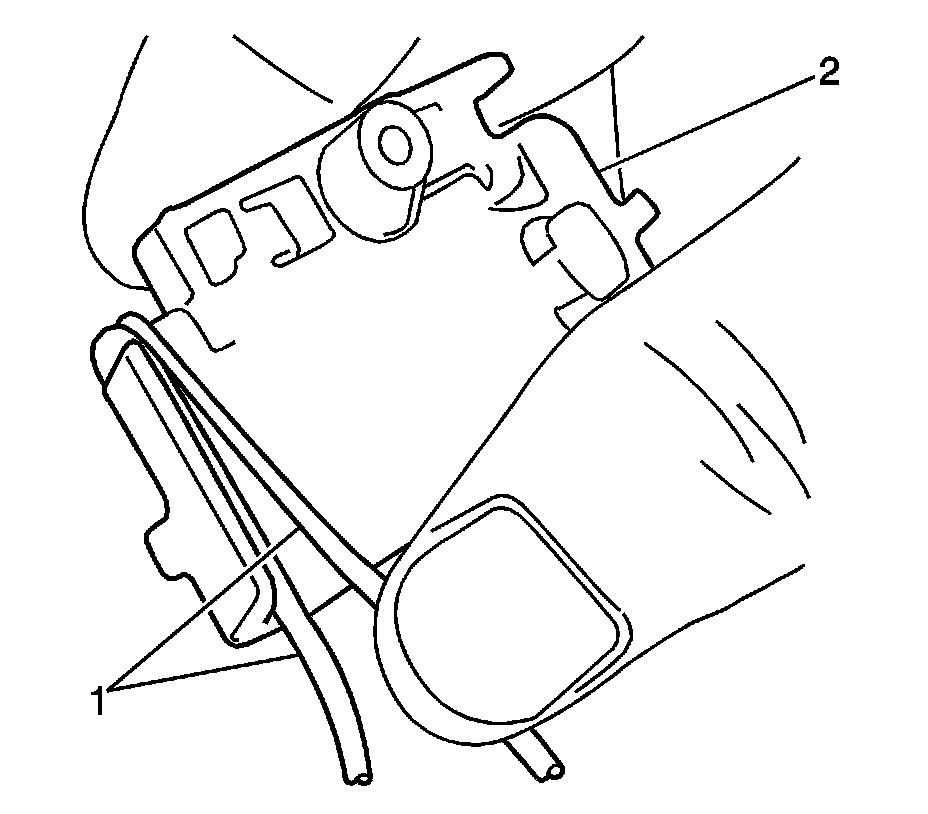
5. Remove the fuel level sensor (1) from the sender housing, then remove the sender housing (2).
6. Remove the fuel sender assembly (1).
Important: Do not spill residual fuel or damage the fuel level sensor float while rotating and tilting the sender assembly during removal.
7. Remove the fuel sender assembly (2) from the fuel tank.
Installation Procedure
Notice: Always re-attach the fuel lines and fuel filter with all original type fasteners and hardware.
Do not repair sections of fuel pipes.
1. Wind the wires (1) around the sender assembly (2).
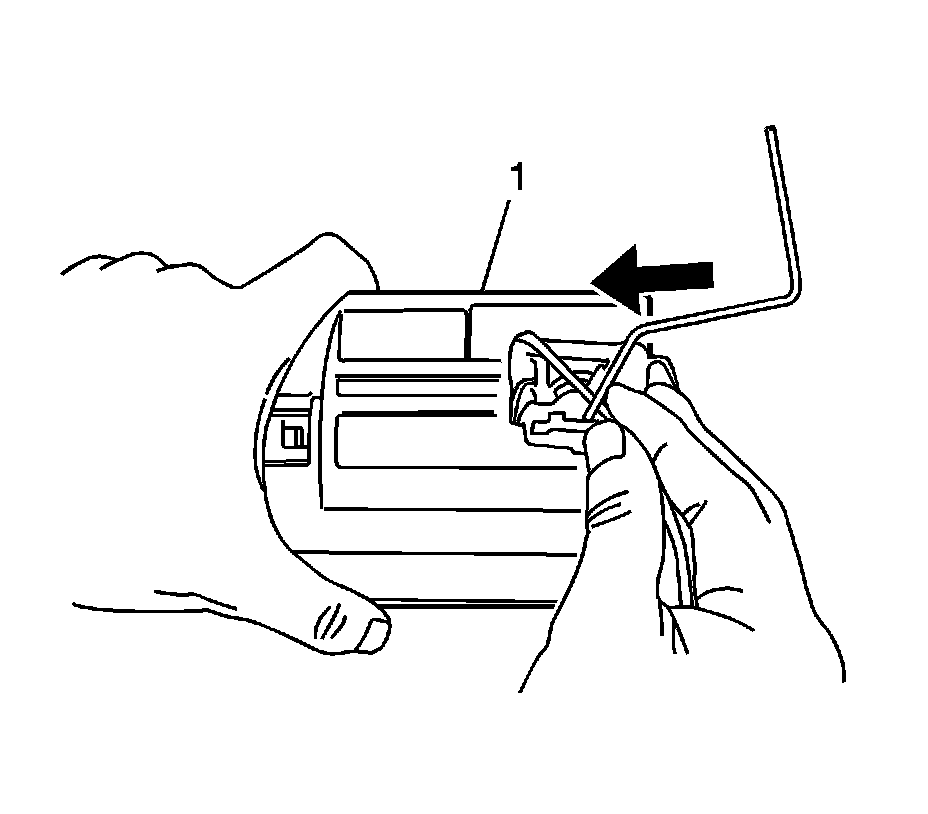
Important: Failure to install the fuel sender assembly correctly will result in fuel gauge inaccurate reading.
2. Install the sender assembly onto the fuel pump assembly (1).
Important: Failure to install the fuel level sensor correctly will result in fuel level warning lamp inaccurate reading.
3. Install the fuel level sensor onto the fuel sender housing.
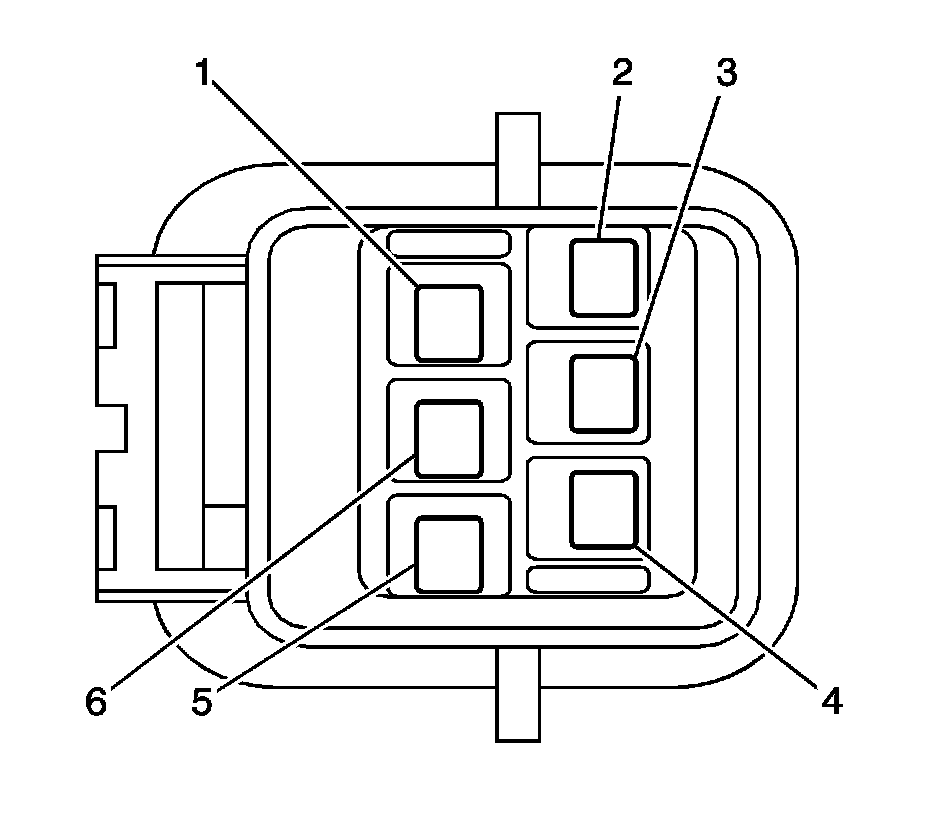
4. Connect the wires into the insulator as follows:
* Red (1)
* Blue (2)
* Gray (3)
* Yellow (4)
* Blue (5)
* Black (6)
5. Connect the fuel sender insulator connector.
6. Install the fuel pump. Refer to Fuel Pump Replacement Fuel Pump Replacement.
Factory Service Tools
Use the Manual With the Right Hardware
Pair factory procedures with proven DIY tools so the instructions are easier to execute.
Disclosure: Verified tool recommendations may earn an affiliate commission at no cost to you.
When to See a Mechanic
Stop DIY work and contact a certified mechanic immediately if any of the following apply:
- • You smell fuel, burning insulation, or see smoke.
- • Brakes feel soft, pull hard to one side, or make grinding noises.
- • The engine overheats, stalls repeatedly, or misfires under load.
- • You are missing required tools, torque specs, or safe lifting equipment.
- • You are not confident in the next step or safety outcome.
Rather have a pro handle this?
A certified mobile mechanic comes to your home or office. They bring the tools, you stay comfortable. No tow truck, no waiting room, no surprises.
Comes to youSame-day available12-month warranty
Get a Free QuoteNo obligation. See pricing before you book.