
Safety Warning
DIY auto repair can cause serious injury, fire, or vehicle damage. These guides are for informational purposes only. Always follow OEM torque specs, wear PPE, and consult a certified mechanic if you are unsure. You are solely responsible for your safety.
1992 Chevrolet G 30 Van V8-350 5.7LFACTORY OEM SERVICE PROCEDURE
After Repairs Test Drive
Pedal Reserve Checks:
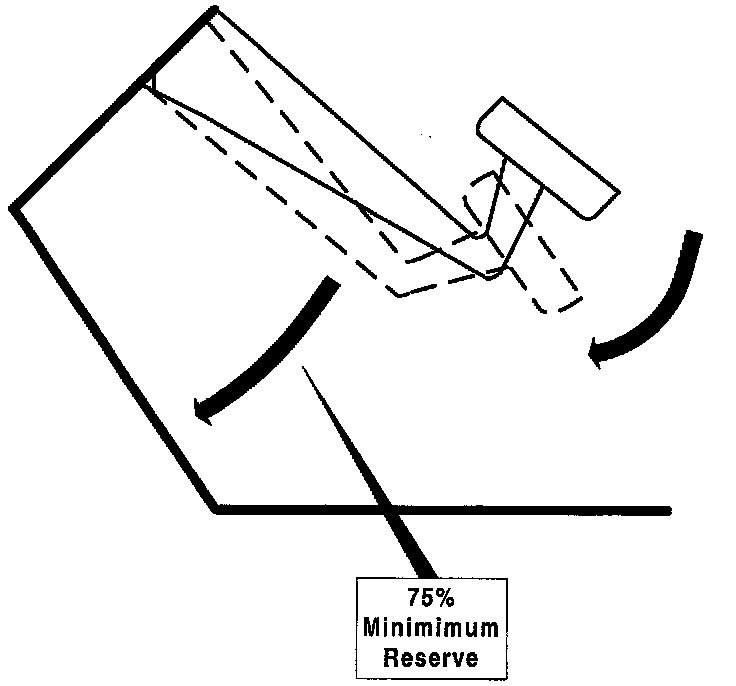
PRIOR TO TEST DRIVING AFTER SERVICING
- Pump the brake pedal to seat the new pads. It normally takes 3-4 full pumps to establish a firm pedal. Ensure you have a firm brake pedal with at least a 75% reserve.
WARNING: Do not attempt to move or test drive the vehicle until a firm pedal is established. The vehicle will have NO BRAKING ABILITY (front or rear) until the brakes are pumped and a firm pedal is established.
- Check for proper brake booster operation.
1. With the engine "OFF", depress and release the brake pedal 4-5 times (this bleeds off the vacuum reserve in the booster).
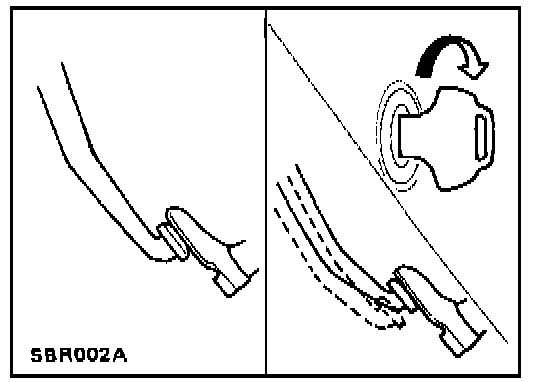
2. Depress the brake pedal firmly and start the engine.
- If the pedal goes down slightly the brake booster is assisting in brake operation.
- If the pedal does not go down slightly the brake booster is not assisting in brake operation and should be diagnosed for problems.
- Check the tire pressures. Uneven tire pressures may result in a noticeable pull when the brakes are applied.
- Inspect the calipers and all brake hydraulic connections and verify that there are no brake fluid leaks.
- Verify the operation of the rear brakes and emergency brake, adjust if necessary.
- Verify that all lug nuts have been tightened and torqued to specifications.
- Verify wheel bearing adjustment.
- Verify that the master-cylinder is properly filled.
- Perform a series of low speed stops and verify the brakes have sufficient stopping power for a safe test drive.
INITIAL BREAK-IN / SEATING THE PADS
New brake linings must be properly broken in and seated.
- Initially make 8-10 slow and gradual brake applications, slowing from 25 to 10 miles per hour.
- Severe braking or locking up the brakes should be avoided (unless dictated by an emergency situation) for the first 50 miles.
WARNING: Until the new brake linings are properly broken in, overall braking performance will be less than 100%. Braking performance will gradually increase as the new linings are seated.
WHAT TO CHECK FOR WHILE DRIVING
- Verify there are no abnormal noises (metallic scraping, grinding, or clicking). Light brake squeal is common on new pads/linings. The squeal should disappear after the first 20 miles.
- Verify there is no pedal pulsation or steering pull when the brakes are applied.
- Verify that the brake pedal remains solid and does not become soft or spongy after the first few applications.
- Verify the braking performance is adequate to safely stop the vehicle.
POST TEST DRIVE INSPECTION
After the test drive, several components will usually need to be readjusted or fine tuned.
- Check the master-cylinder reservoir and refill as necessary.
- Check the rear brake and emergency brake adjustment. Readjust if necessary.
- Check the wheel bearing adjustment. Readjust if necessary.
- Closely inspect all brake components, and hydraulic connection to verify there are no brake fluid leaks.
Factory Service Tools
Use the Manual With the Right Hardware
Pair factory procedures with proven DIY tools so the instructions are easier to execute.
Disclosure: Verified tool recommendations may earn an affiliate commission at no cost to you.
When to See a Mechanic
Stop DIY work and contact a certified mechanic immediately if any of the following apply:
- • You smell fuel, burning insulation, or see smoke.
- • Brakes feel soft, pull hard to one side, or make grinding noises.
- • The engine overheats, stalls repeatedly, or misfires under load.
- • You are missing required tools, torque specs, or safe lifting equipment.
- • You are not confident in the next step or safety outcome.
Rather have a pro handle this?
A certified mobile mechanic comes to your home or office. They bring the tools, you stay comfortable. No tow truck, no waiting room, no surprises.
Comes to youSame-day available12-month warranty
Get a Free QuoteNo obligation. See pricing before you book.