
Safety Warning
DIY auto repair can cause serious injury, fire, or vehicle damage. These guides are for informational purposes only. Always follow OEM torque specs, wear PPE, and consult a certified mechanic if you are unsure. You are solely responsible for your safety.
2006 Cadillac SRX RWD V6-3.6L VIN 7FACTORY OEM SERVICE PROCEDURE
Transmission Position Sensor/Switch: Service and Repair
Manual Shaft Shift Position Switch Replacement
Tools Required
J 44767 Seal Installer
Removal Procedure
1. Raise and support the vehicle.
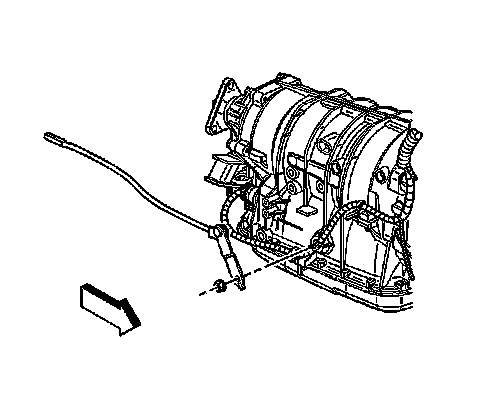
2. Remove the transmission manual shift shaft nut.
3. Disconnect the shift linkage from the transmission manual shift shaft.
4. Remove the exhaust system.
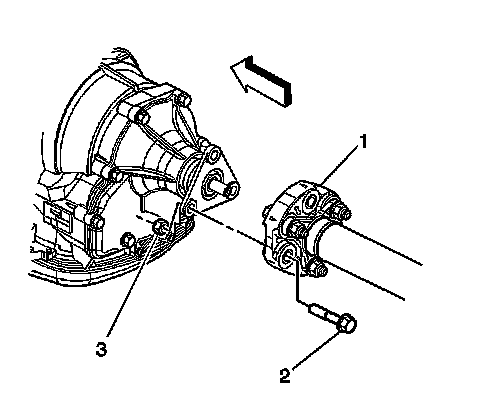
5. Disconnect the propeller shaft coupler (1) from the transmission flange.
6. Push the front propeller shaft toward the rear of the vehicle in order to release the propeller shaft coupler (1) from the transmission flange.
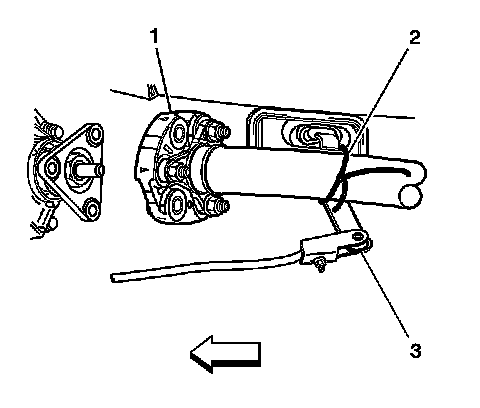
7. Secure the front propeller shaft (1) to the shift control lever (3) with a piece of mechanics wire (2).
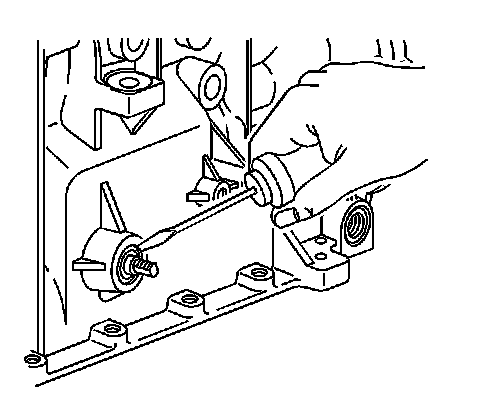
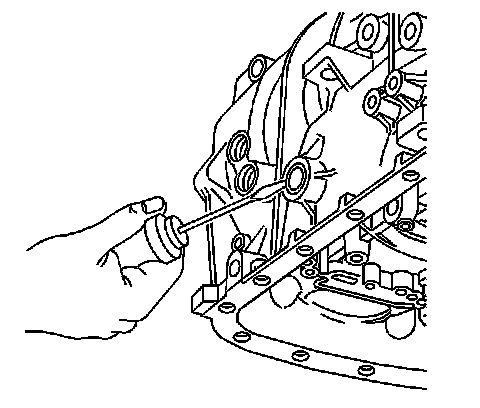
8. Important: Replace the shaft seal only if leaking.
Using a small screwdriver, remove and discard the shaft seal.
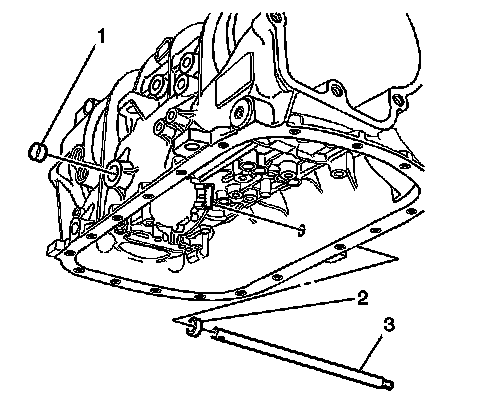
9. Important: Replace the cup plug only if leaking.
Using a small screwdriver, remove and discard the cup plug.
10. Important: Removal of the transmission from the vehicle is NOT required for removal or replacement of the shift shaft position switch. Remove the transmission from the vehicle and refer to replacement of the manual shift shaft ONLY if replacement of the manual shift shaft (3) is necessary.
Remove the transmission fluid pan and filter.
11. Disconnect the electrical connector from the manual shift shaft position switch.
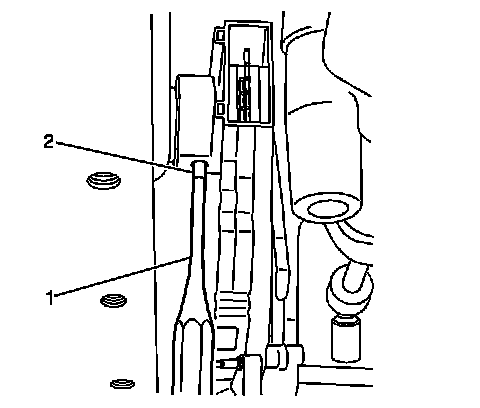
12. Using a suitable pin punch (1), remove the manual shift shaft position switch retaining pin (2).
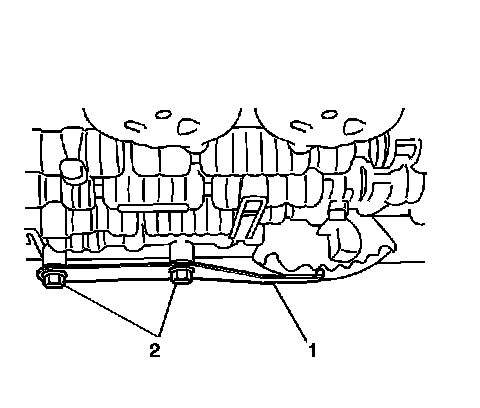
13. Remove the manual shift shaft detent spring (1) and bolts (2).
14. Position a suitable transmission jack under the transmission support.
15. Remove the transmission support from the body ONLY.
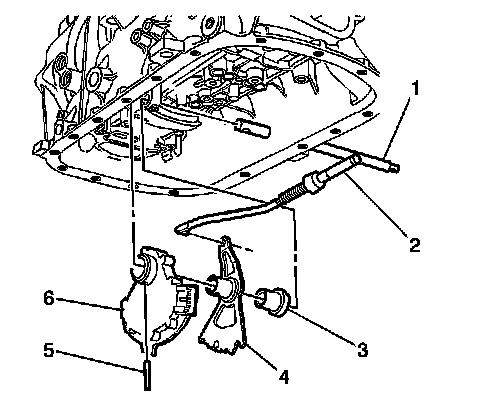
16. Using the transmission jack, lower the rear of the transmission only enough to allow the manual shift shaft (1) to clear the vehicle floor pan.
17. Extract the manual shift shaft (1) from the transmission case only far enough to allow removal of the manual shift shaft position switch (6).
18. Remove the manual shift shaft position switch (6), the manual shift shaft detent lever (4), the manual shift shaft assembly spacer (3), and the park pawl actuator (2) as an assembly.
Installation Procedure
1. Install the manual shift shaft position switch (6), the manual shift shaft detent lever (4), the manual shift shaft assembly spacer (3), and the park pawl actuator (2) as an assembly. It may be necessary to push up on the park pawl in order to fully insert the park pawl actuator (2).
2. Fully insert the manual shift shaft (1) into the transmission case.
3. Raise the transmission to its original position.
4. Install the transmission support.
5. Remove the transmission jack.
6. Install the manual shift shaft detent spring (1).
7. Install the control valve body bolts (2) retaining the manual shift shaft detent spring. Do not tighten at this time.
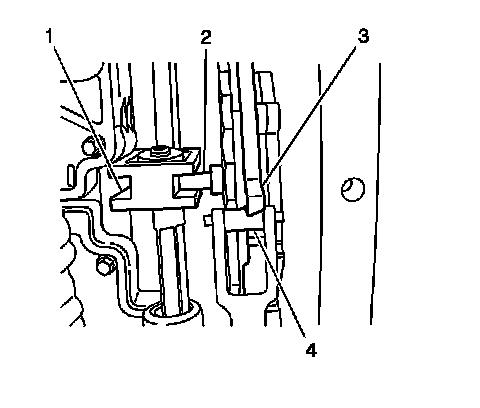
8. Confirm that the manual shift shaft detent lever locating pin (2) is properly engaged with the manual valve link (1).
9. Confirm that the detent spring roller (4) is properly engaged with the manual shift shaft switch (3).
10. Using a suitable pin punch (1). Install the manual shift shaft position switch retaining pin (2).
11. Connect the electrical connector to the manual shift shaft position switch.
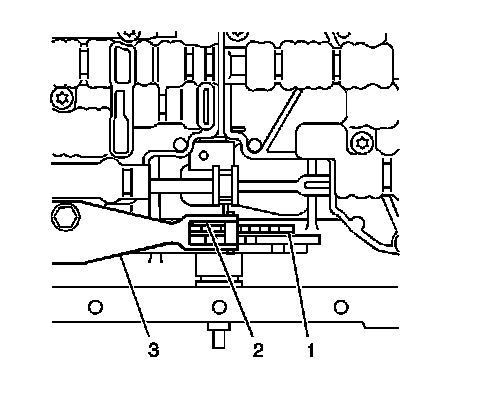
12. Install a 0.8 mm spacer (2) between the manual shaft detent lever (1) and the manual shaft detent spring (3).
13. Notice: Tighten the detent spring bolts.
Tighten the bolts to 11 Nm (97 inch lbs.).
14. Remove the spacer (2).
15. Install the transmission fluid pan and filter.
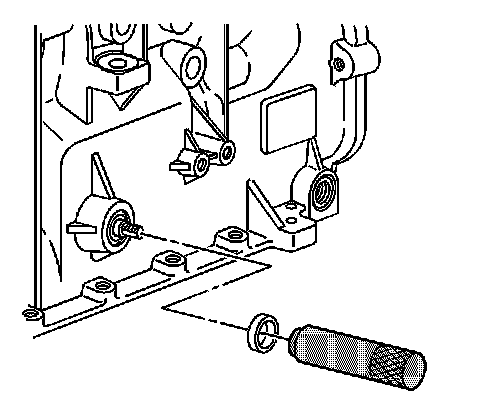
16. If previously removed, install a new shaft seal using J 44767.
17. Position the seal onto the J 44767 before installing the seal into the transmission case.
18. Carefully slide the seal and tool over the manual shift shaft and insert the seal into the transmission until fully seated
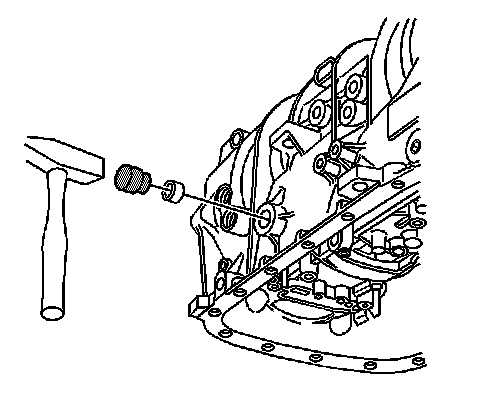
19. If previously removed, install a new cup plug. Lubricate the cup plug with transmission fluid before installation.
20. Insert the cup plug into the transmission until flush with the transmission case.
21. Remove the mechanics wire (2) securing front propeller shaft (1) to the shift control lever (3).
22. Install the propeller shaft coupler (1) to the transmission flange.
23. Install the exhaust system.
24. Connect the shift linkage to the transmission manual shift shaft.
25. Install the transmission manual shift shaft nut.
Tighten the nut to 9 Nm (80 inch lbs.).
26. Adjust the shift control linkage. Refer to Shift Control Linkage Adjustment.
27. Lower the vehicle.
Factory Service Tools
Use the Manual With the Right Hardware
Pair factory procedures with proven DIY tools so the instructions are easier to execute.
Disclosure: Verified tool recommendations may earn an affiliate commission at no cost to you.
When to See a Mechanic
Stop DIY work and contact a certified mechanic immediately if any of the following apply:
- • You smell fuel, burning insulation, or see smoke.
- • Brakes feel soft, pull hard to one side, or make grinding noises.
- • The engine overheats, stalls repeatedly, or misfires under load.
- • You are missing required tools, torque specs, or safe lifting equipment.
- • You are not confident in the next step or safety outcome.
Rather have a pro handle this?
A certified mobile mechanic comes to your home or office. They bring the tools, you stay comfortable. No tow truck, no waiting room, no surprises.
Comes to youSame-day available12-month warranty
Get a Free QuoteNo obligation. See pricing before you book.