
Safety Warning
DIY auto repair can cause serious injury, fire, or vehicle damage. These guides are for informational purposes only. Always follow OEM torque specs, wear PPE, and consult a certified mechanic if you are unsure. You are solely responsible for your safety.
1985 Cadillac Seville V8-350 5.7L DSLFACTORY OEM SERVICE PROCEDURE
Disassembly
Fig. 1 Final drive assembly exploded view:
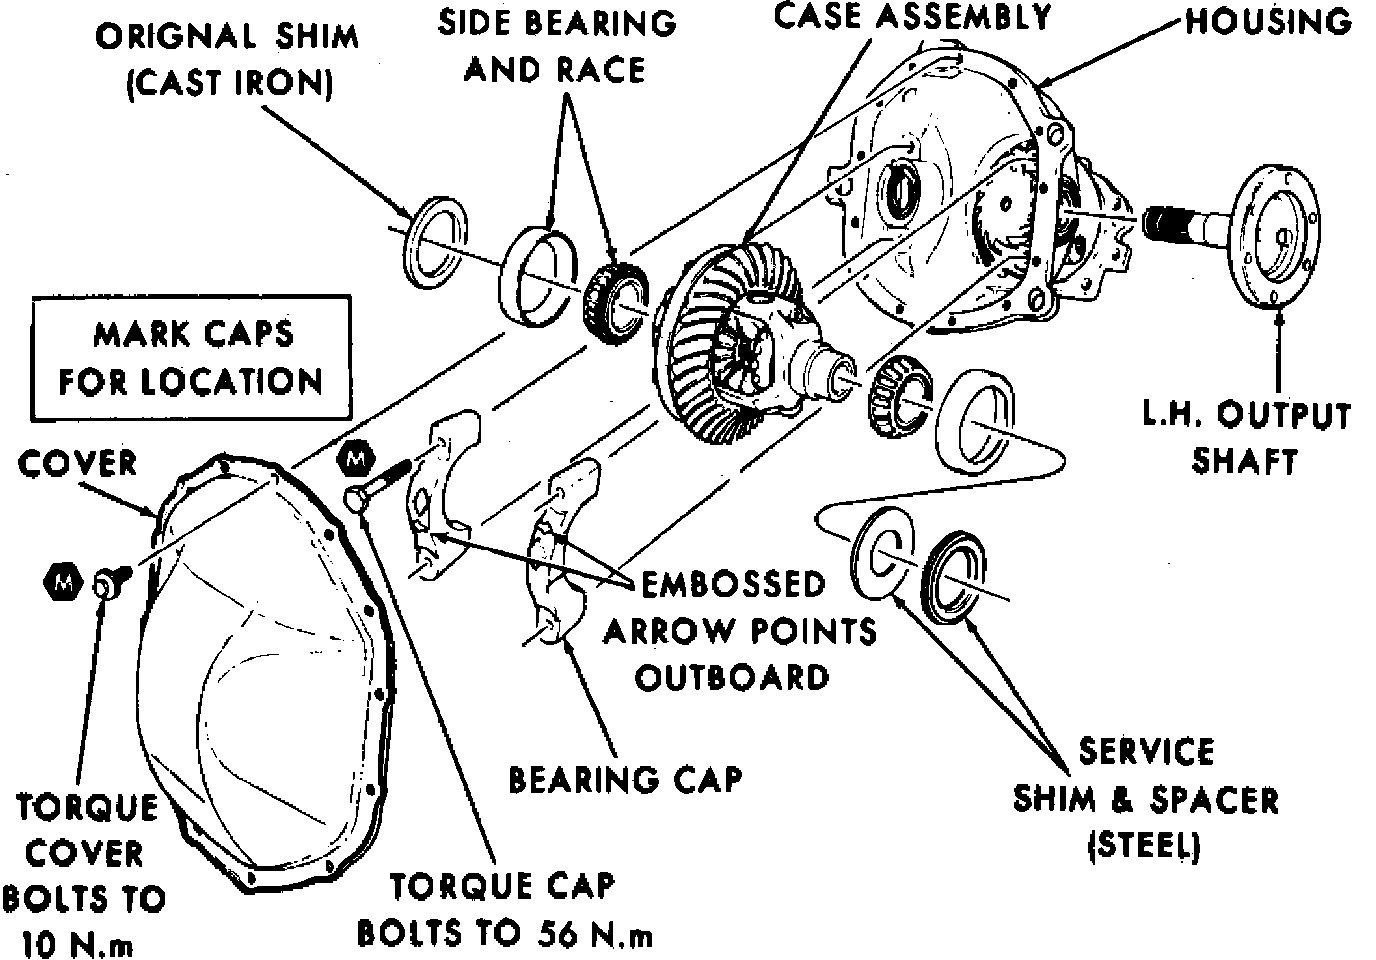
1. Remove final drive unit, drain lubricant into a suitable container and mount final drive assembly in suitable holding fixture.
2. Remove cover retaining screws, cover and gasket, Fig. 1. Prior to completing disassembly, measure and record existing ring gear and pinion backlash, total assembly preload and ring gear runout. This will indicate gear or bearing wear or errors in assembly adjustment, and aid in diagnosing final drive unit failures. In addition, if the ring gear and pinion set is re-used, they should be reinstalled with the same backlash and preload to avoid altering the existing gear tooth contact pattern.
3. Mark installation position of side gear bearing caps, then remove cap bolts and the caps.
4. Remove differential assembly, prying against ring gear bolt with suitable lever.
5. Mark side bearing shims and races in sets and place with respective bearing caps.
6. Remove differential side bearings using a suitable puller and pilot, and place bearings with respective race, cap and shim assemblies.
7. Loosen all ring gear retaining bolts and remove all except two bolts, 180° apart. Ring gear bolts have righthand threads.
8. Free ring gear from case by alternately tapping loosened ring gear bolts. Do not attempt to pry gear from case, as machined surfaces will be damaged.
9. Remove ring gear bolts and the ring gear.
Fig. 2 Differential case & drive pinion assembly exploded view:
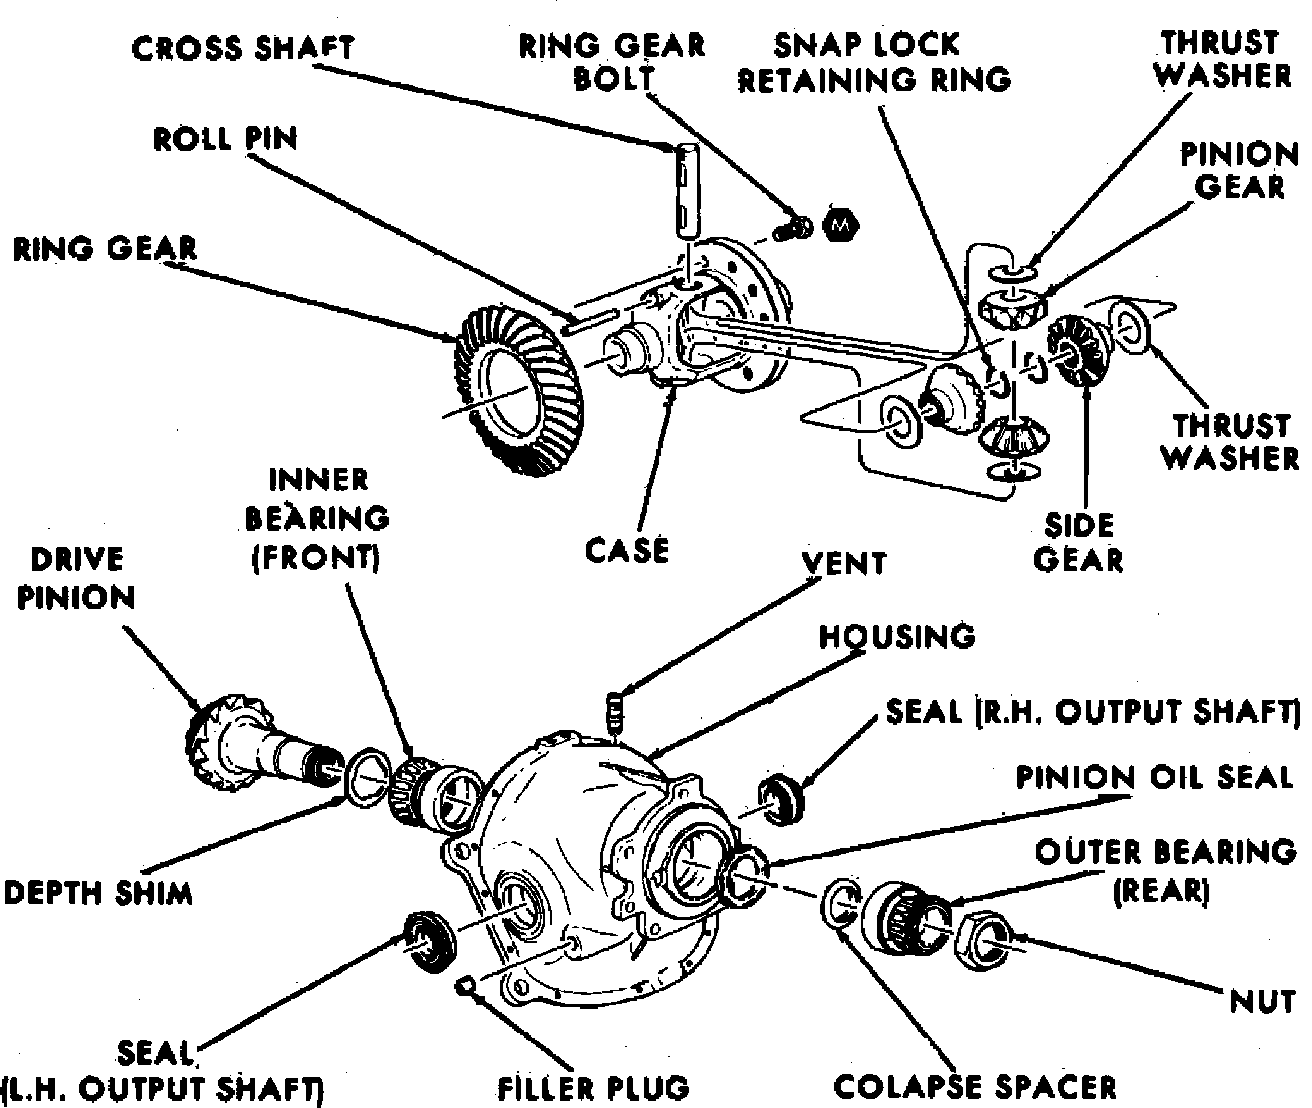
Fig. 3 Pinion bearing preload check:
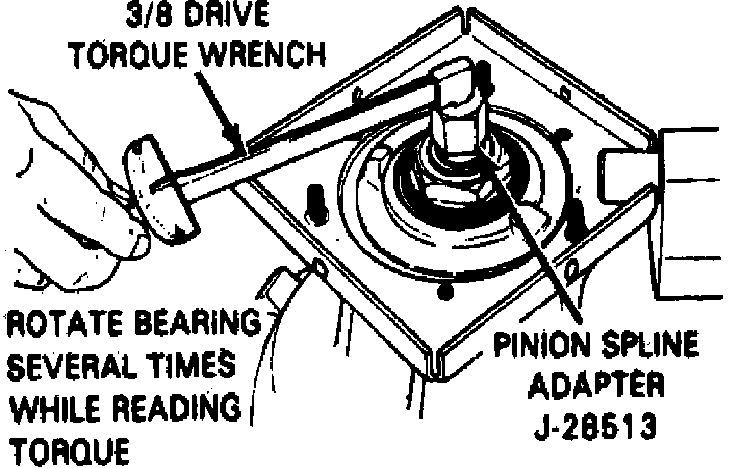
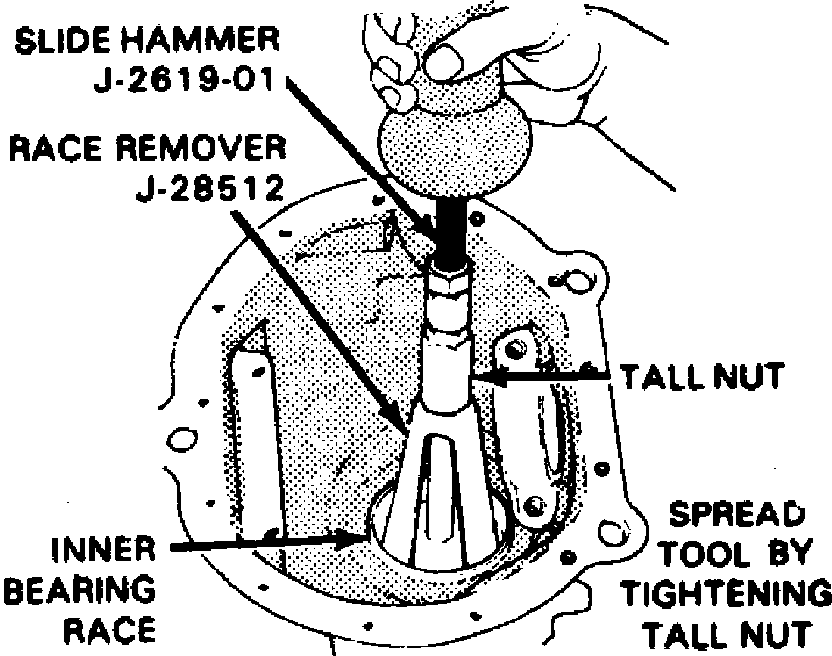
Fig. 4 Inner pinion bearing race removal:
10. Drive out roll pin securing pinion shaft, Fig. 2, then remove shaft.
11. Remove differential pinions, side gears and thrust washers, noting installation position for assembly. Keep thrust washers with respective gears.
12. Measure and record drive pinion preload using spline adapter J-28513 or equivalent and a suitable torque wrench, Fig. 3.
13. Remove drive pinion nut, holding nut with suitable wrench and turning pinion with spline adapter J-28513 or equivalent. Turn pinion shaft clockwise to loosen nut.
14. Partially reinstall nut to protect pinion shaft threads, then free pinion from bearings by rapping nut sharply with suitable hammer.
15. Remove pinion nut, outer bearing, collapsible spacer and the drive pinion.
16. Remove pinion seal, driving seal toward inside of housing with a suitable punch.
17. Remove outer pinion bearing race, driving race toward outside of housing with a suitable brass drift, and place race with bearing.
18. Remove inner pinion bearing race using suitable puller and slide hammer, Fig. 4.
19. Press inner bearing from pinion and place bearing with race, remove depth adjusting shim, then measure and record shim thickness.
20. Pry output shaft seals from housing using a suitable lever. Pry seals at several positions, taking care not to damage housing.
Factory Service Tools
Use the Manual With the Right Hardware
Pair factory procedures with proven DIY tools so the instructions are easier to execute.
Disclosure: Verified tool recommendations may earn an affiliate commission at no cost to you.
When to See a Mechanic
Stop DIY work and contact a certified mechanic immediately if any of the following apply:
- • You smell fuel, burning insulation, or see smoke.
- • Brakes feel soft, pull hard to one side, or make grinding noises.
- • The engine overheats, stalls repeatedly, or misfires under load.
- • You are missing required tools, torque specs, or safe lifting equipment.
- • You are not confident in the next step or safety outcome.
Rather have a pro handle this?
A certified mobile mechanic comes to your home or office. They bring the tools, you stay comfortable. No tow truck, no waiting room, no surprises.
Comes to youSame-day available12-month warranty
Get a Free QuoteNo obligation. See pricing before you book.