
Safety Warning
DIY auto repair can cause serious injury, fire, or vehicle damage. These guides are for informational purposes only. Always follow OEM torque specs, wear PPE, and consult a certified mechanic if you are unsure. You are solely responsible for your safety.
1982 Cadillac Seville V8-252 4.1LFACTORY OEM SERVICE PROCEDURE
Compressor Replacement
COMPRESSOR - D.F.I. ENGINE (ALL)
REMOVAL
1. Purge refrigerant from system.
2. Partially remove air cleaner.
3. Remove top through bolt and nut.
4. Loosen bottom nut and swing bracket out of way.
5. Remove generator bracket bolt behind compressor and one bolt through tubular strut behind compressor.
6. Disconnect electrical connections at compressor.
7. Remove high and low pressure lines at compressor and remove compressor. Cap openings in both lines and compressor.
INSTALLATION
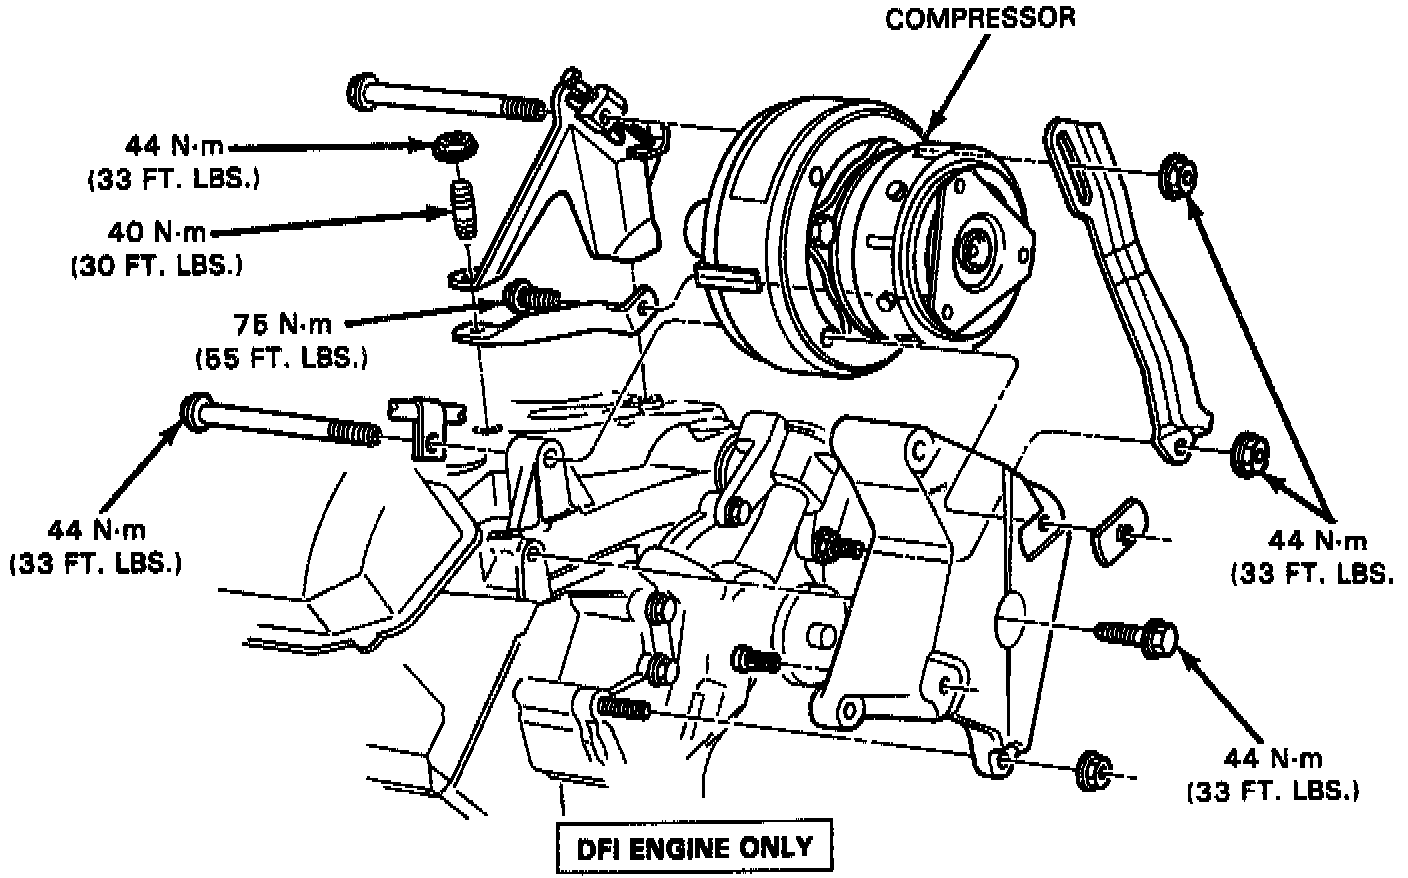
^ Reverse removal procedure noting the following:
1. Torque pressure lines at compressor to 26-40 Nm (20-30 ft. lbs.).
NOTICE: The 0-rings in the compressor head should be oiled prior to placement in the cavity. Care should be taken not to damage these 0-rings during installation.
2. Torque the compressor top through bolt and nut, bottom nut and generator bracket bolt to 38-50 Nm (28-37 ft. lbs.). Torque the one bolt through tubular strut into compressor to 65-85 Nm (48-63 ft. lbs.).
3. Install belt on compressor pulley and tension to 700-900 Nm (157-202 lbs.) for a new belt and 400-750 Nm (90-169 lbs.) for a used belt.
4. Evacuate and charge refrigeration system.
5. Leak test all compressor connections.
NOTICE: All leaks must be repaired. Under no circumstances should a compressor be operated when a leak exists. Loss of refrigerant prevents oil return to the compressor and operating the compressor may damage it.
REMOVAL
1. Purge refrigerant from system.
2. Partially remove air cleaner.
3. Remove top through bolt and nut.
4. Loosen bottom nut and swing bracket out of way.
5. Remove generator bracket bolt behind compressor and one bolt through tubular strut behind compressor.
6. Disconnect electrical connections at compressor.
7. Remove high and low pressure lines at compressor and remove compressor. Cap openings in both lines and compressor.
INSTALLATION
Compressor Mounting:
^ Reverse removal procedure noting the following:
1. Torque pressure lines at compressor to 26-40 Nm (20-30 ft. lbs.).
NOTICE: The 0-rings in the compressor head should be oiled prior to placement in the cavity. Care should be taken not to damage these 0-rings during installation.
2. Torque the compressor top through bolt and nut, bottom nut and generator bracket bolt to 38-50 Nm (28-37 ft. lbs.). Torque the one bolt through tubular strut into compressor to 65-85 Nm (48-63 ft. lbs.).
3. Install belt on compressor pulley and tension to 700-900 Nm (157-202 lbs.) for a new belt and 400-750 Nm (90-169 lbs.) for a used belt.
4. Evacuate and charge refrigeration system.
5. Leak test all compressor connections.
NOTICE: All leaks must be repaired. Under no circumstances should a compressor be operated when a leak exists. Loss of refrigerant prevents oil return to the compressor and operating the compressor may damage it.
Factory Service Tools
Use the Manual With the Right Hardware
Pair factory procedures with proven DIY tools so the instructions are easier to execute.
Disclosure: Verified tool recommendations may earn an affiliate commission at no cost to you.
When to See a Mechanic
Stop DIY work and contact a certified mechanic immediately if any of the following apply:
- • You smell fuel, burning insulation, or see smoke.
- • Brakes feel soft, pull hard to one side, or make grinding noises.
- • The engine overheats, stalls repeatedly, or misfires under load.
- • You are missing required tools, torque specs, or safe lifting equipment.
- • You are not confident in the next step or safety outcome.