
Safety Warning
DIY auto repair can cause serious injury, fire, or vehicle damage. These guides are for informational purposes only. Always follow OEM torque specs, wear PPE, and consult a certified mechanic if you are unsure. You are solely responsible for your safety.
2012 Acura MDX V6-3.7LFACTORY OEM SERVICE PROCEDURE
Transmission Position Sensor/Switch: Service and Repair
Transmission Range Switch Replacement
1. Do the battery removal procedure Removal and Replacement.
2. Remove the main under-hood fuse box from the battery base.
3. Remove the intake air duct and the air cleaner housing.
4. Remove the battery base and the battery base bracket.
5. Disconnect the transmission range switch connector.
6. Remove the spring clip (A) and the control pin (B), then separate the shift cable end (C) from the control lever (D).

7. Check the bushing (E) in the shift cable end for a proper fit and wear. If the bushing is loose or worn, replace the shift cable Service and Repair.
8. Remove the transmission range switch.
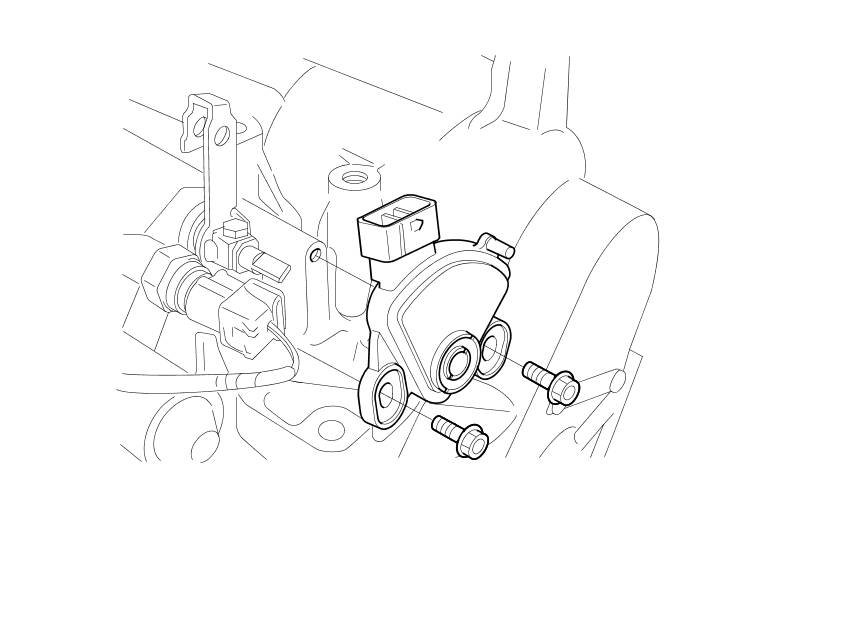
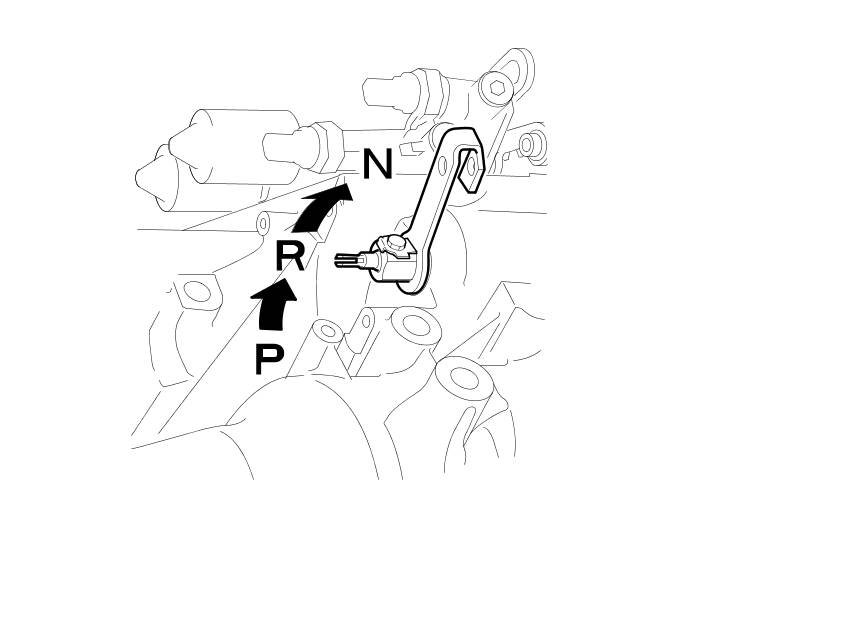
9. Turn the control lever fully counterclockwise to the P position. Then turn the control lever clockwise two clicks to the N position.
10. Set a new transmission range switch (A) to the N position. Align the cutouts (B) on the rotary-frame with the neutral positioning cutouts (C) on the transmission range switch, then put a 2.0 mm (0.08 in) feeler gauge blade (D) in the cutouts to hold the transmission range switch in the N position.
NOTE: Be sure to use a 2.0 mm (0.08 in) feeler gauge blade or equivalent to hold the transmission range switch in the N position.

11. Install the transmission range switch (A) gently on the selector control shaft (B) while holding it in the N position with the 2.0 mm (0.08 in) blade (C).

12. Tighten the bolts on the transmission range switch while you continue to hold the N position. Do not move the transmission range switch when tightening the bolts. Then remove the feeler gauge.

13. Apply molybdenum grease to the center of the bushing (A) on the shift cable end (B). Attach the shift cable end to the control lever (C), then insert the control pin (D) into the control lever hole through the shift cable end, and secure the control pin with the spring clip (E).

14. Check the transmission range switch connectors for rust, corrosion, or oil, and clean or repair if necessary, then connect the transmission range switch connector securely.
15. Install the battery base bracket and the battery base.
16. Install the air cleaner housing and the intake air duct.
17. Install the main under-hood fuse box on the battery base.
18. Do the battery installation procedure Removal and Replacement.
19. Turn the ignition switch to ON (II). Move the shift lever through all positions, and verify the transmission range switch matches the A/T gear position indicator.
20. Check that the engine only starts in P and N.
21. Check that the back-up lights come on when the shift lever is in R.
22. Raise the vehicle on a lift, make sure it is securely supported, and allow all four wheels to rotate freely. Then start the engine, and check the shift lever operation.
Factory Service Tools
Use the Manual With the Right Hardware
Pair factory procedures with proven DIY tools so the instructions are easier to execute.
Disclosure: Verified tool recommendations may earn an affiliate commission at no cost to you.
When to See a Mechanic
Stop DIY work and contact a certified mechanic immediately if any of the following apply:
- • You smell fuel, burning insulation, or see smoke.
- • Brakes feel soft, pull hard to one side, or make grinding noises.
- • The engine overheats, stalls repeatedly, or misfires under load.
- • You are missing required tools, torque specs, or safe lifting equipment.
- • You are not confident in the next step or safety outcome.